Create a Swimm Doc
This doc will walk you through the process of creating a Swimm doc on your own repo.
Not ready to start with your own repo? Try out our demo repo.
Need help connecting Swimm's repo? Check our Git provider guides to connect your repositories to Swimm.
IDE
Create a new doc
To create a new Swimm doc, click on the Document button in the IDE plugin. This will open a new markdown file in your IDE within the .swm directory.
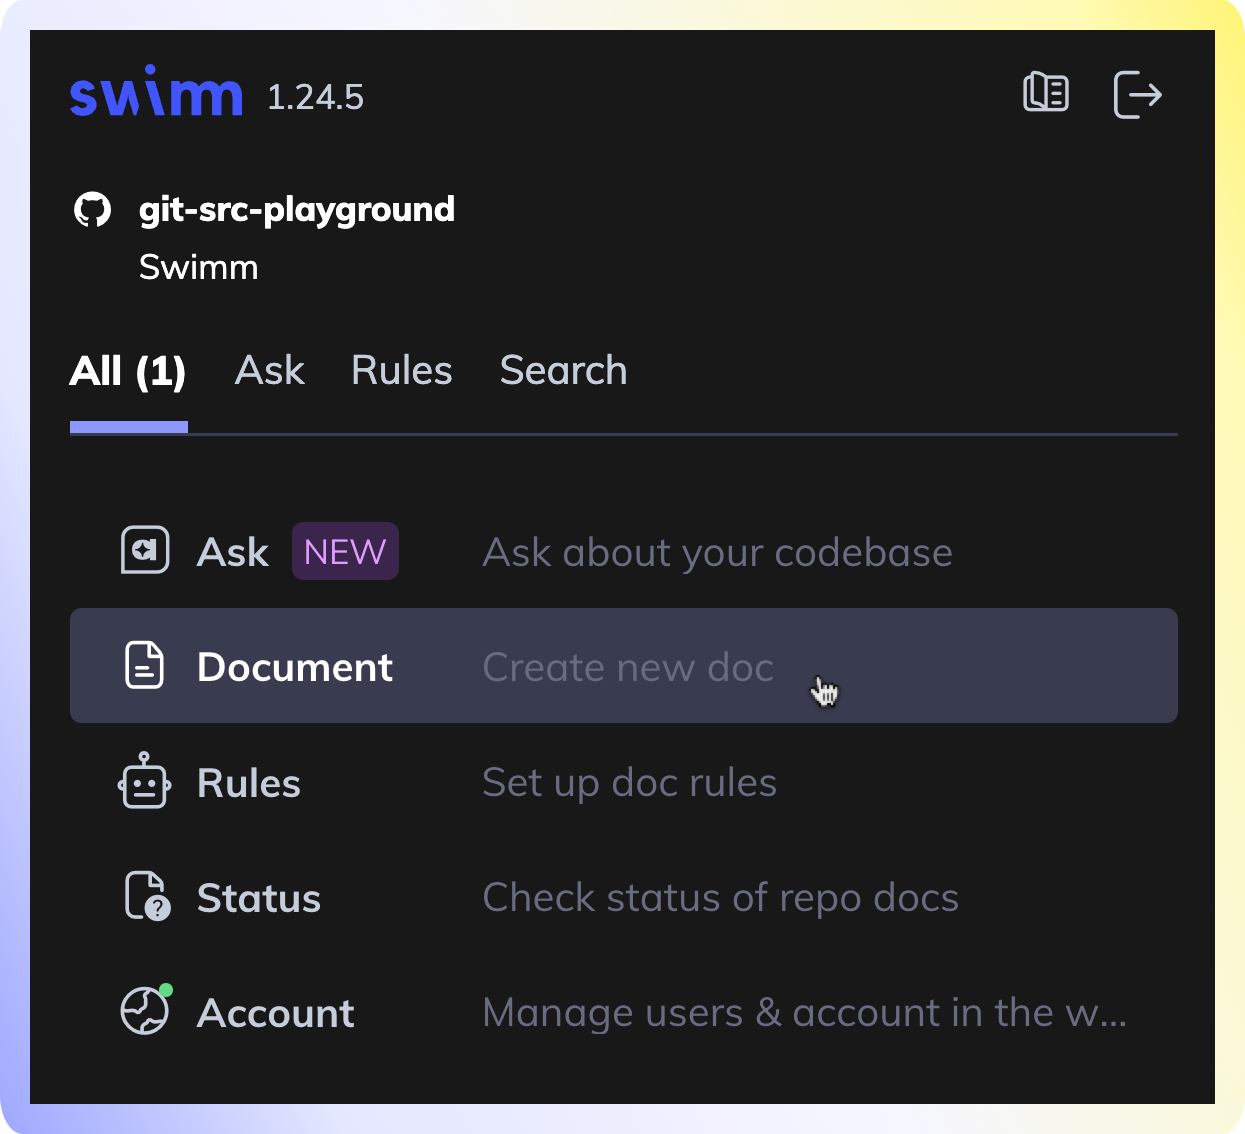
- If you do not have any Swimm documents in your repository, the plugin will create the
.swmdirectory for you. - If you
git pulla repository with Swimm docs, the plugin will recognize the existing.swmdirectory and display the docs in the plugin.
Add a title
Start by giving your document a title. Our recommendation is to be as descriptive as possible - How to post analytics is a better title than Analytics, as the former tells the reader what they will learn from reading the doc.
Use Swimm’s code-coupled editor to edit and add content
Write with Markdown to add content to your Swimm doc. We encourage writers to take advantage of our Editor commands to make writing easier and code-couple your documentation to your codebase.
Any time you link code to your documentation, Swimm will automatically update the code snippets in your docs when the code changes. This ensures that your documentation is always up-to-date.
Important Swimm commands
| Command | Description |
|---|---|
/Code snippet | Add live code to your document with code snippets. |
/Smart Token | Link to a specific token from your code, like a function name, variable or specific value. |
/Path | Add a path of a directory or a file in your document. Swimm will track it in case it is renamed, moved, or deleted. |
/Image | Add an image to your document, stored in your repository (default) or Swimm's cloud servers. |
/Doc | Add a link to an existing Swimm doc. Swimm will track it in case it gets out of date and notify. |
/Playlist | Add a link to an existing Playlist. Swimm will track it and notify you if it’s out of date. |
/Diagram | Add a code-coupled diagram. |
/AI or /Generate description | Generate a description for the snippet with Generative AI. |
Add Code Snippets
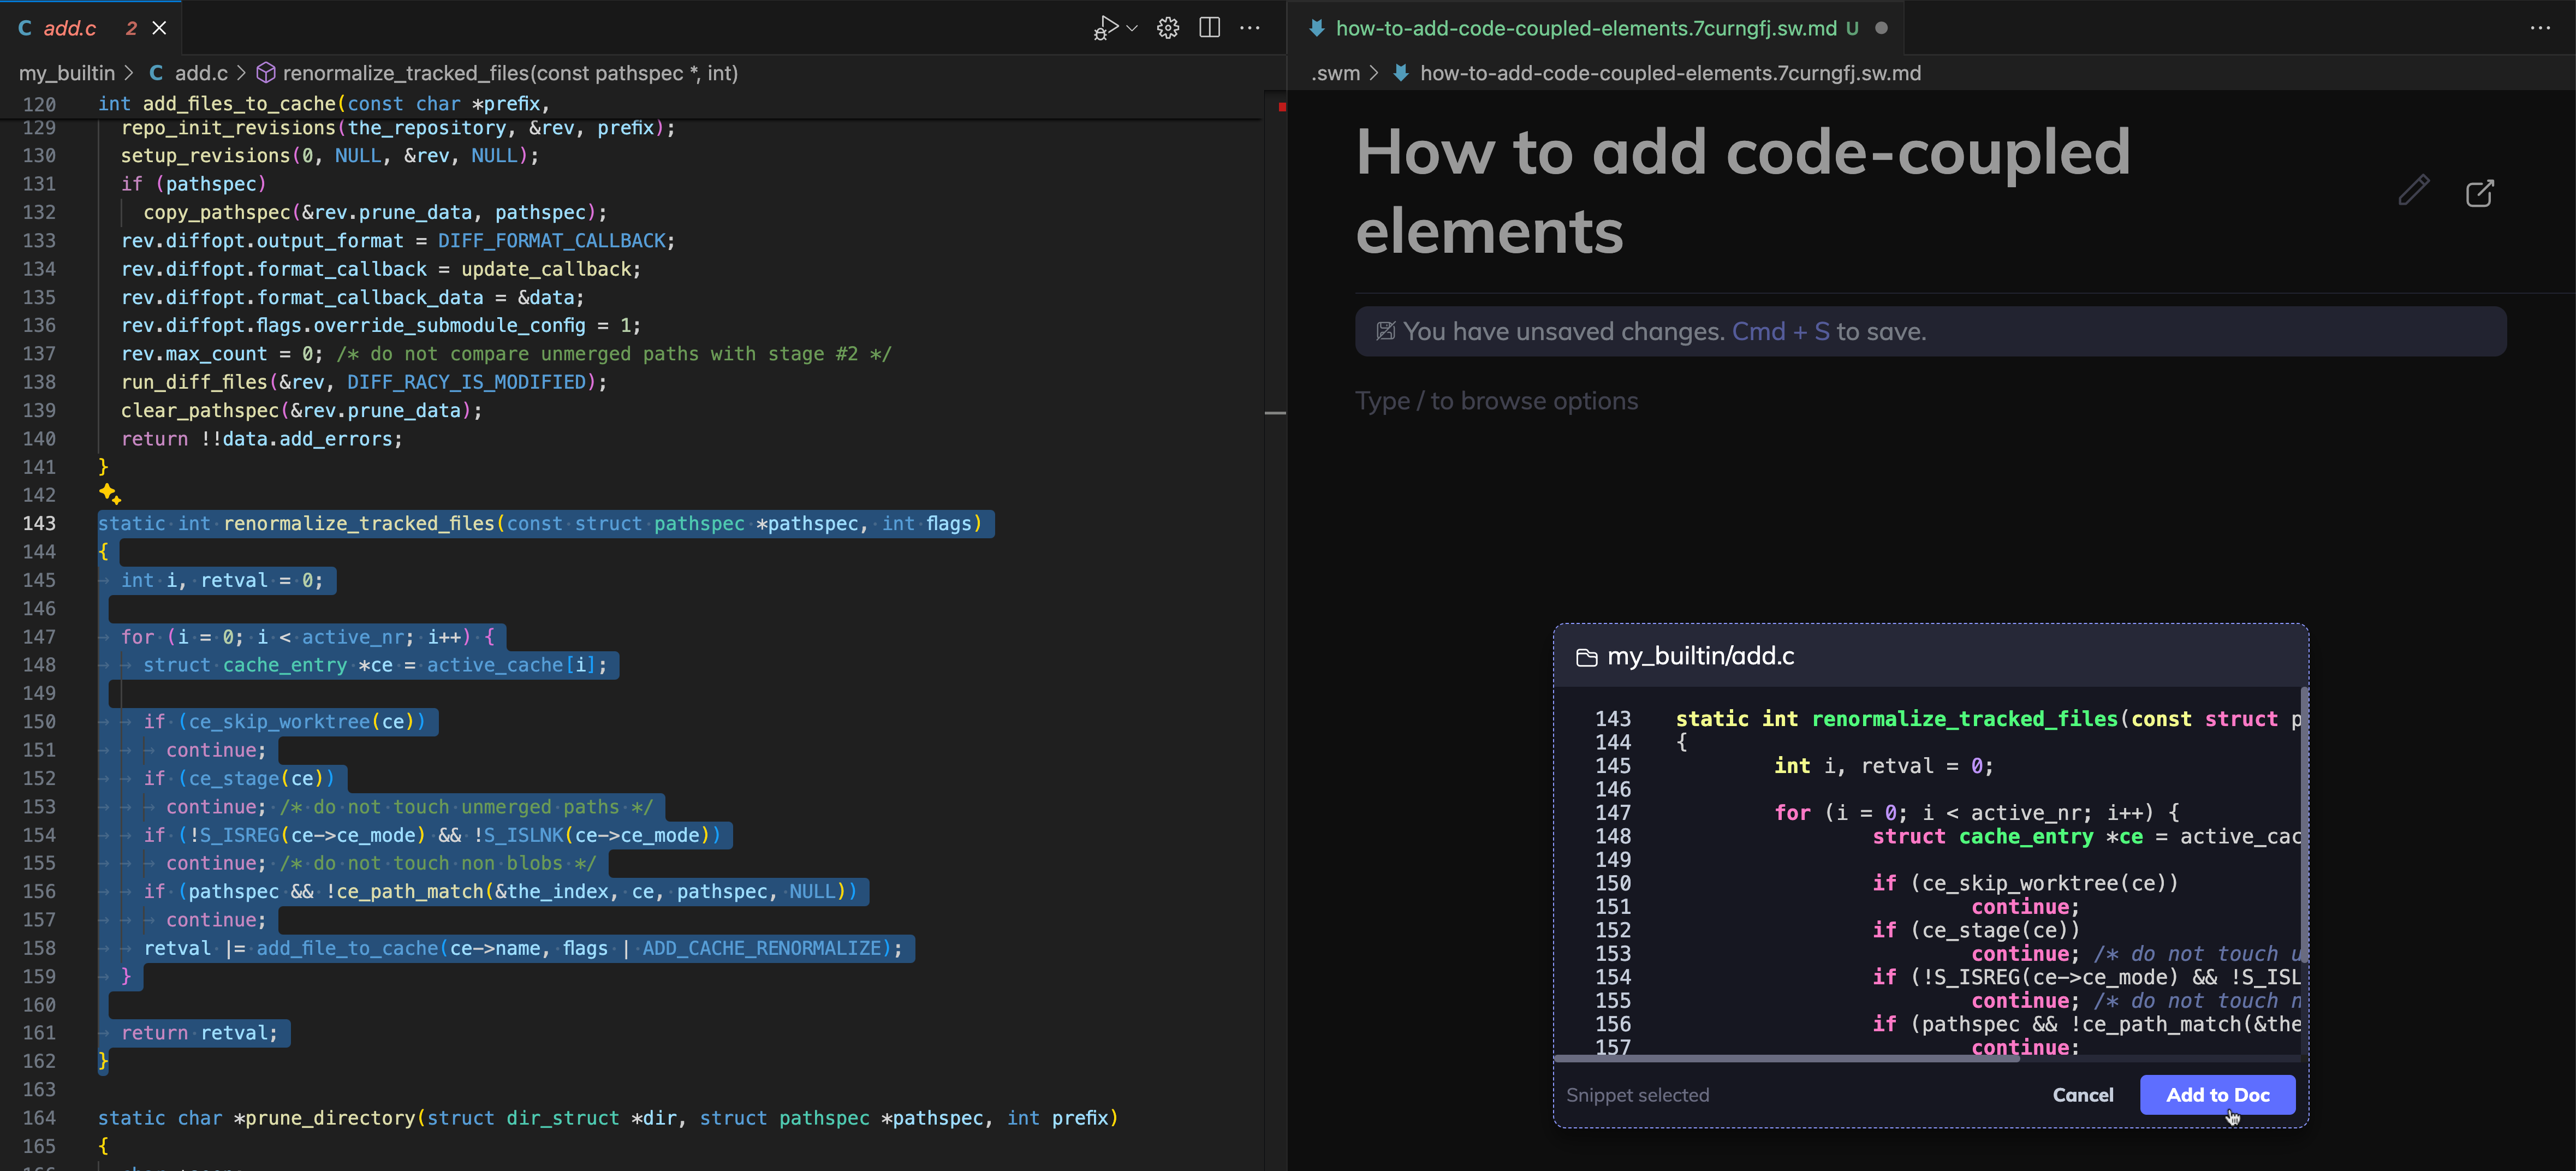
1. Type /Code snippet and press enter
2. Select snippet from codebase and click Add to Doc
3: Save Swimm doc
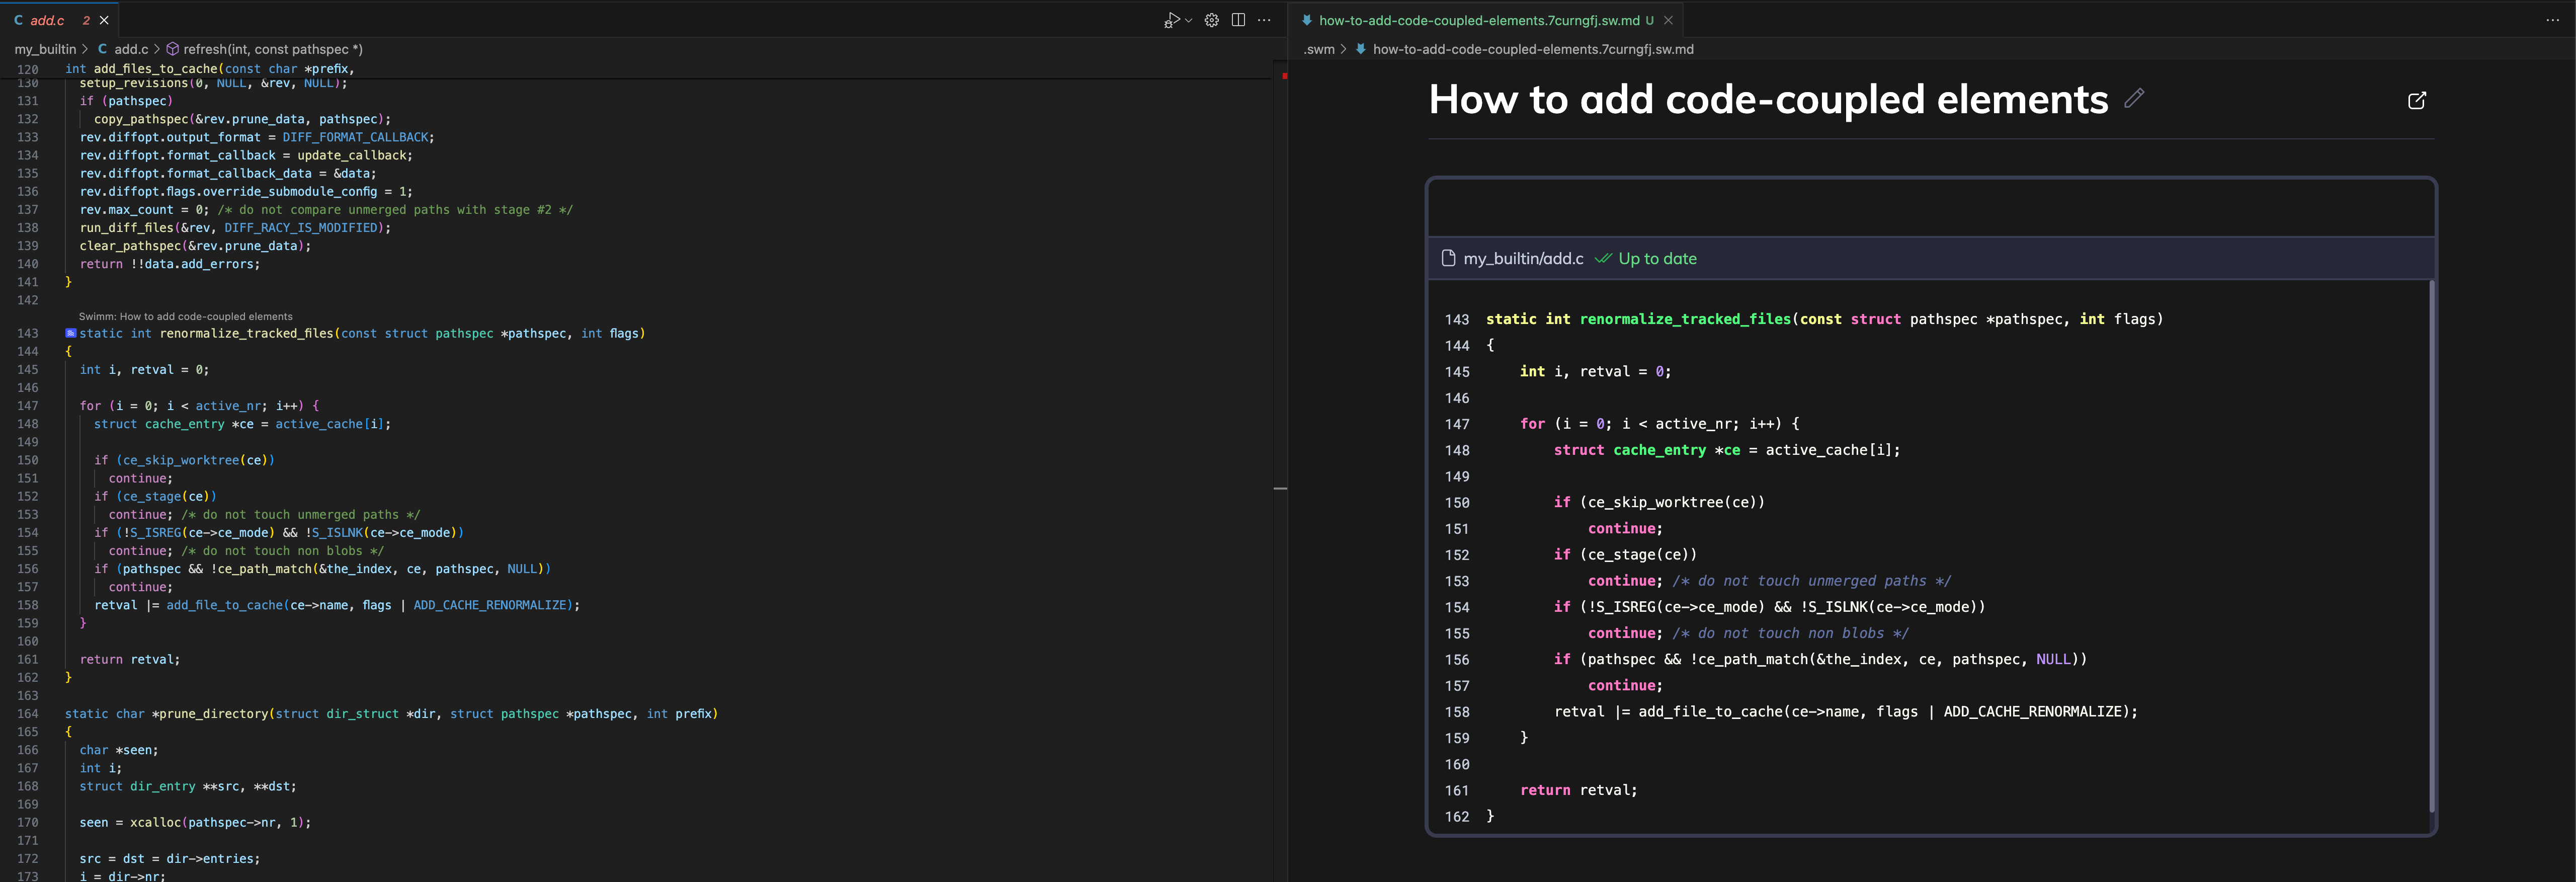 Note the blue icon in the gutter that indicates a code snippet is linked to this doc.
Add Smart Tokens
Smart Tokens help you seamlessly integrate parts of your code into the documentation. They update automatically when there are changes in the code, keeping the document current.
Single-word tokens
These tokens are great for referencing specific elements like variables, methods or functions.
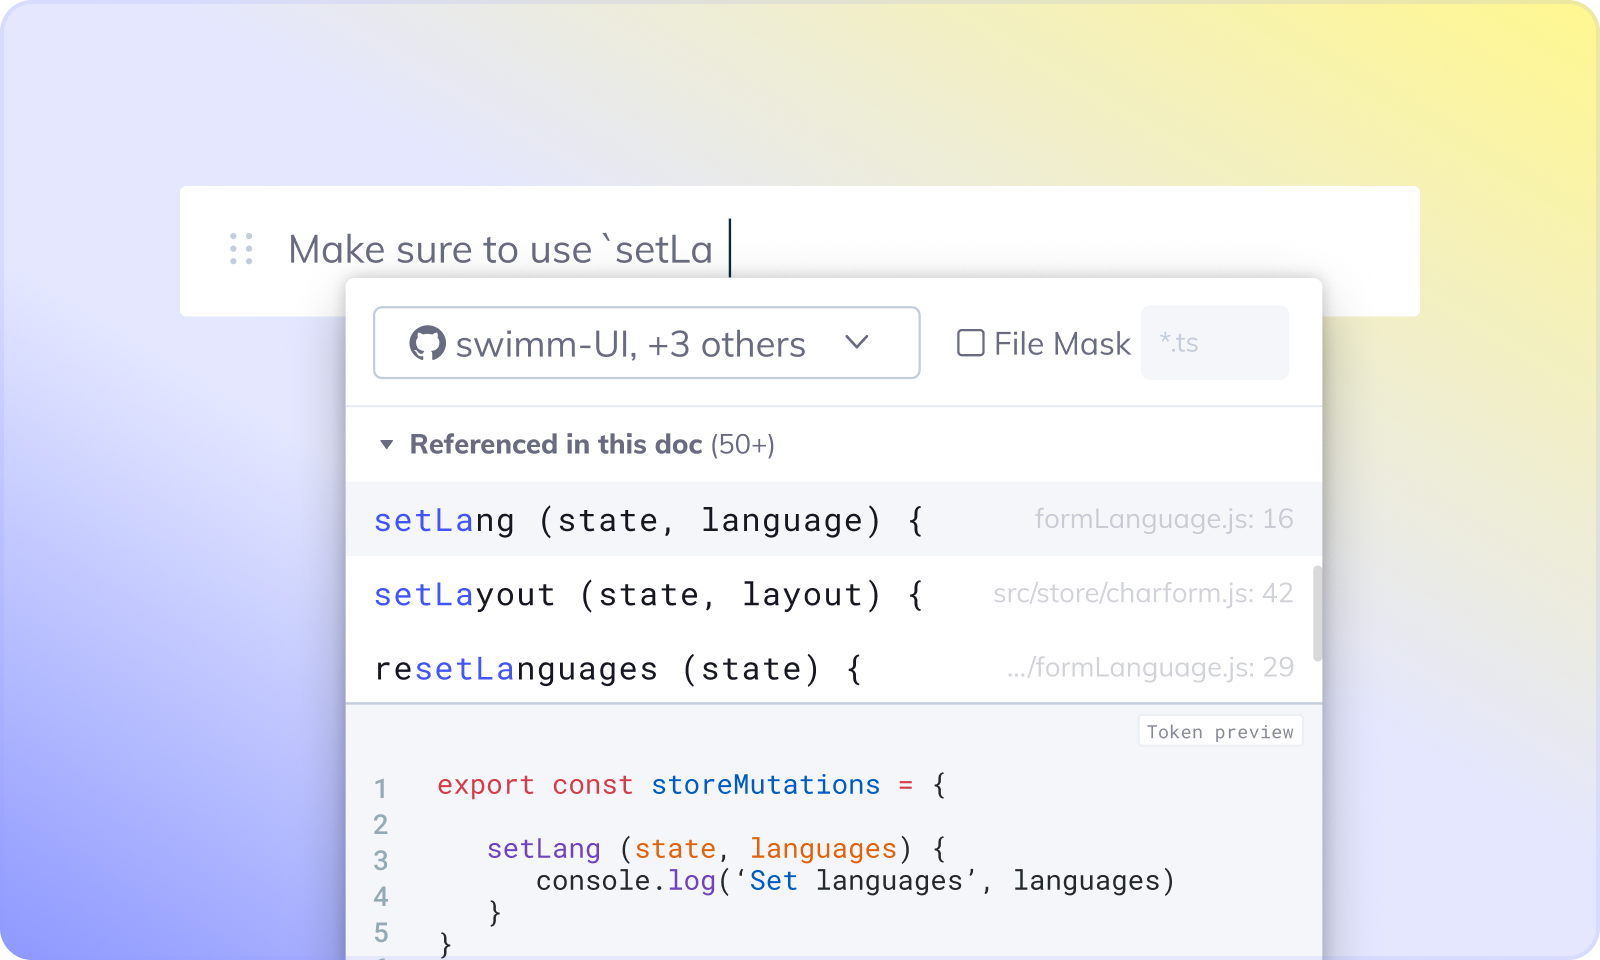
Multi-word tokens
Group multiple values in a Smart Token by typing them together within a single line, enhancing its linking capability.
Can't find the token you are looking for? Check out Editor tips and tricks.
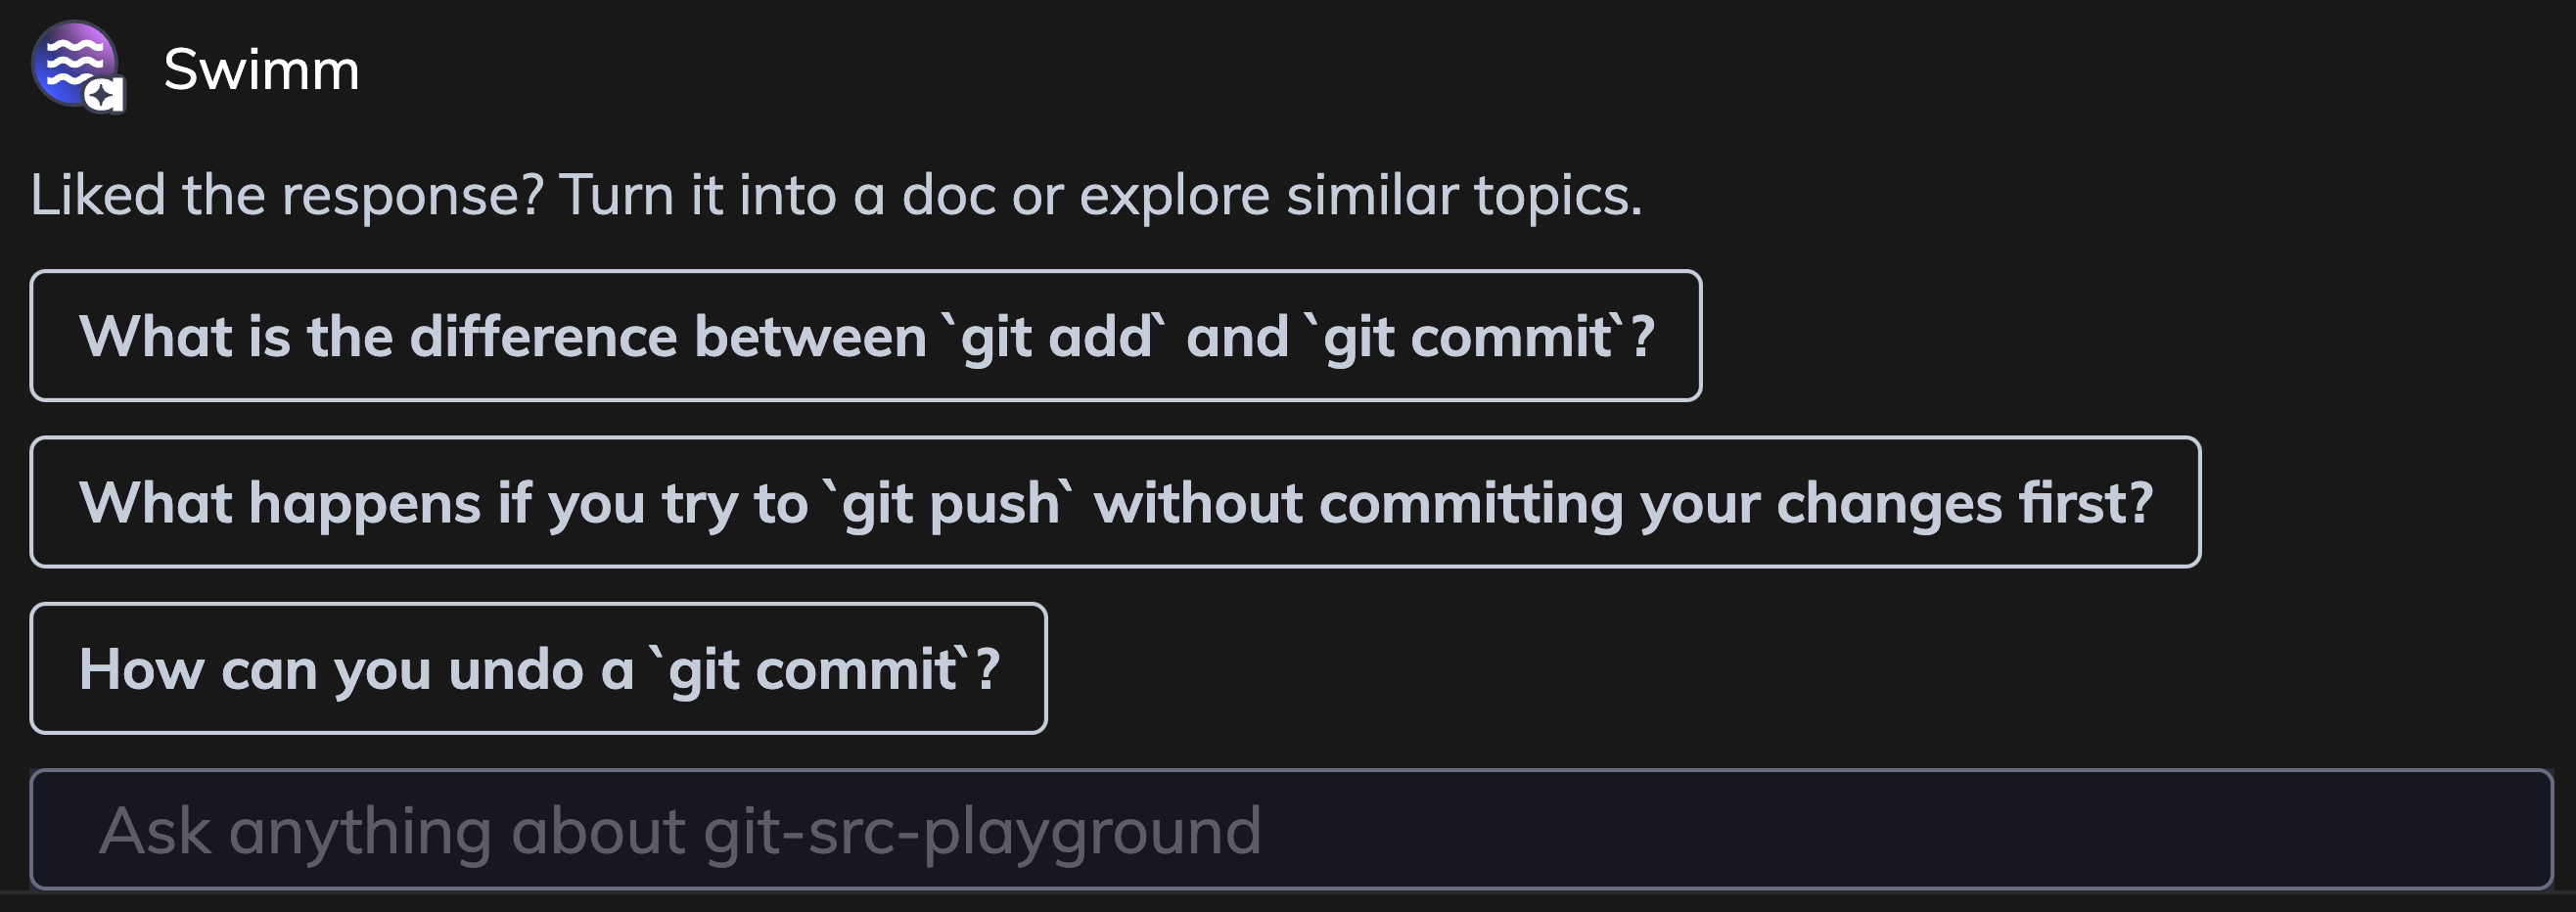
/ask Swimm
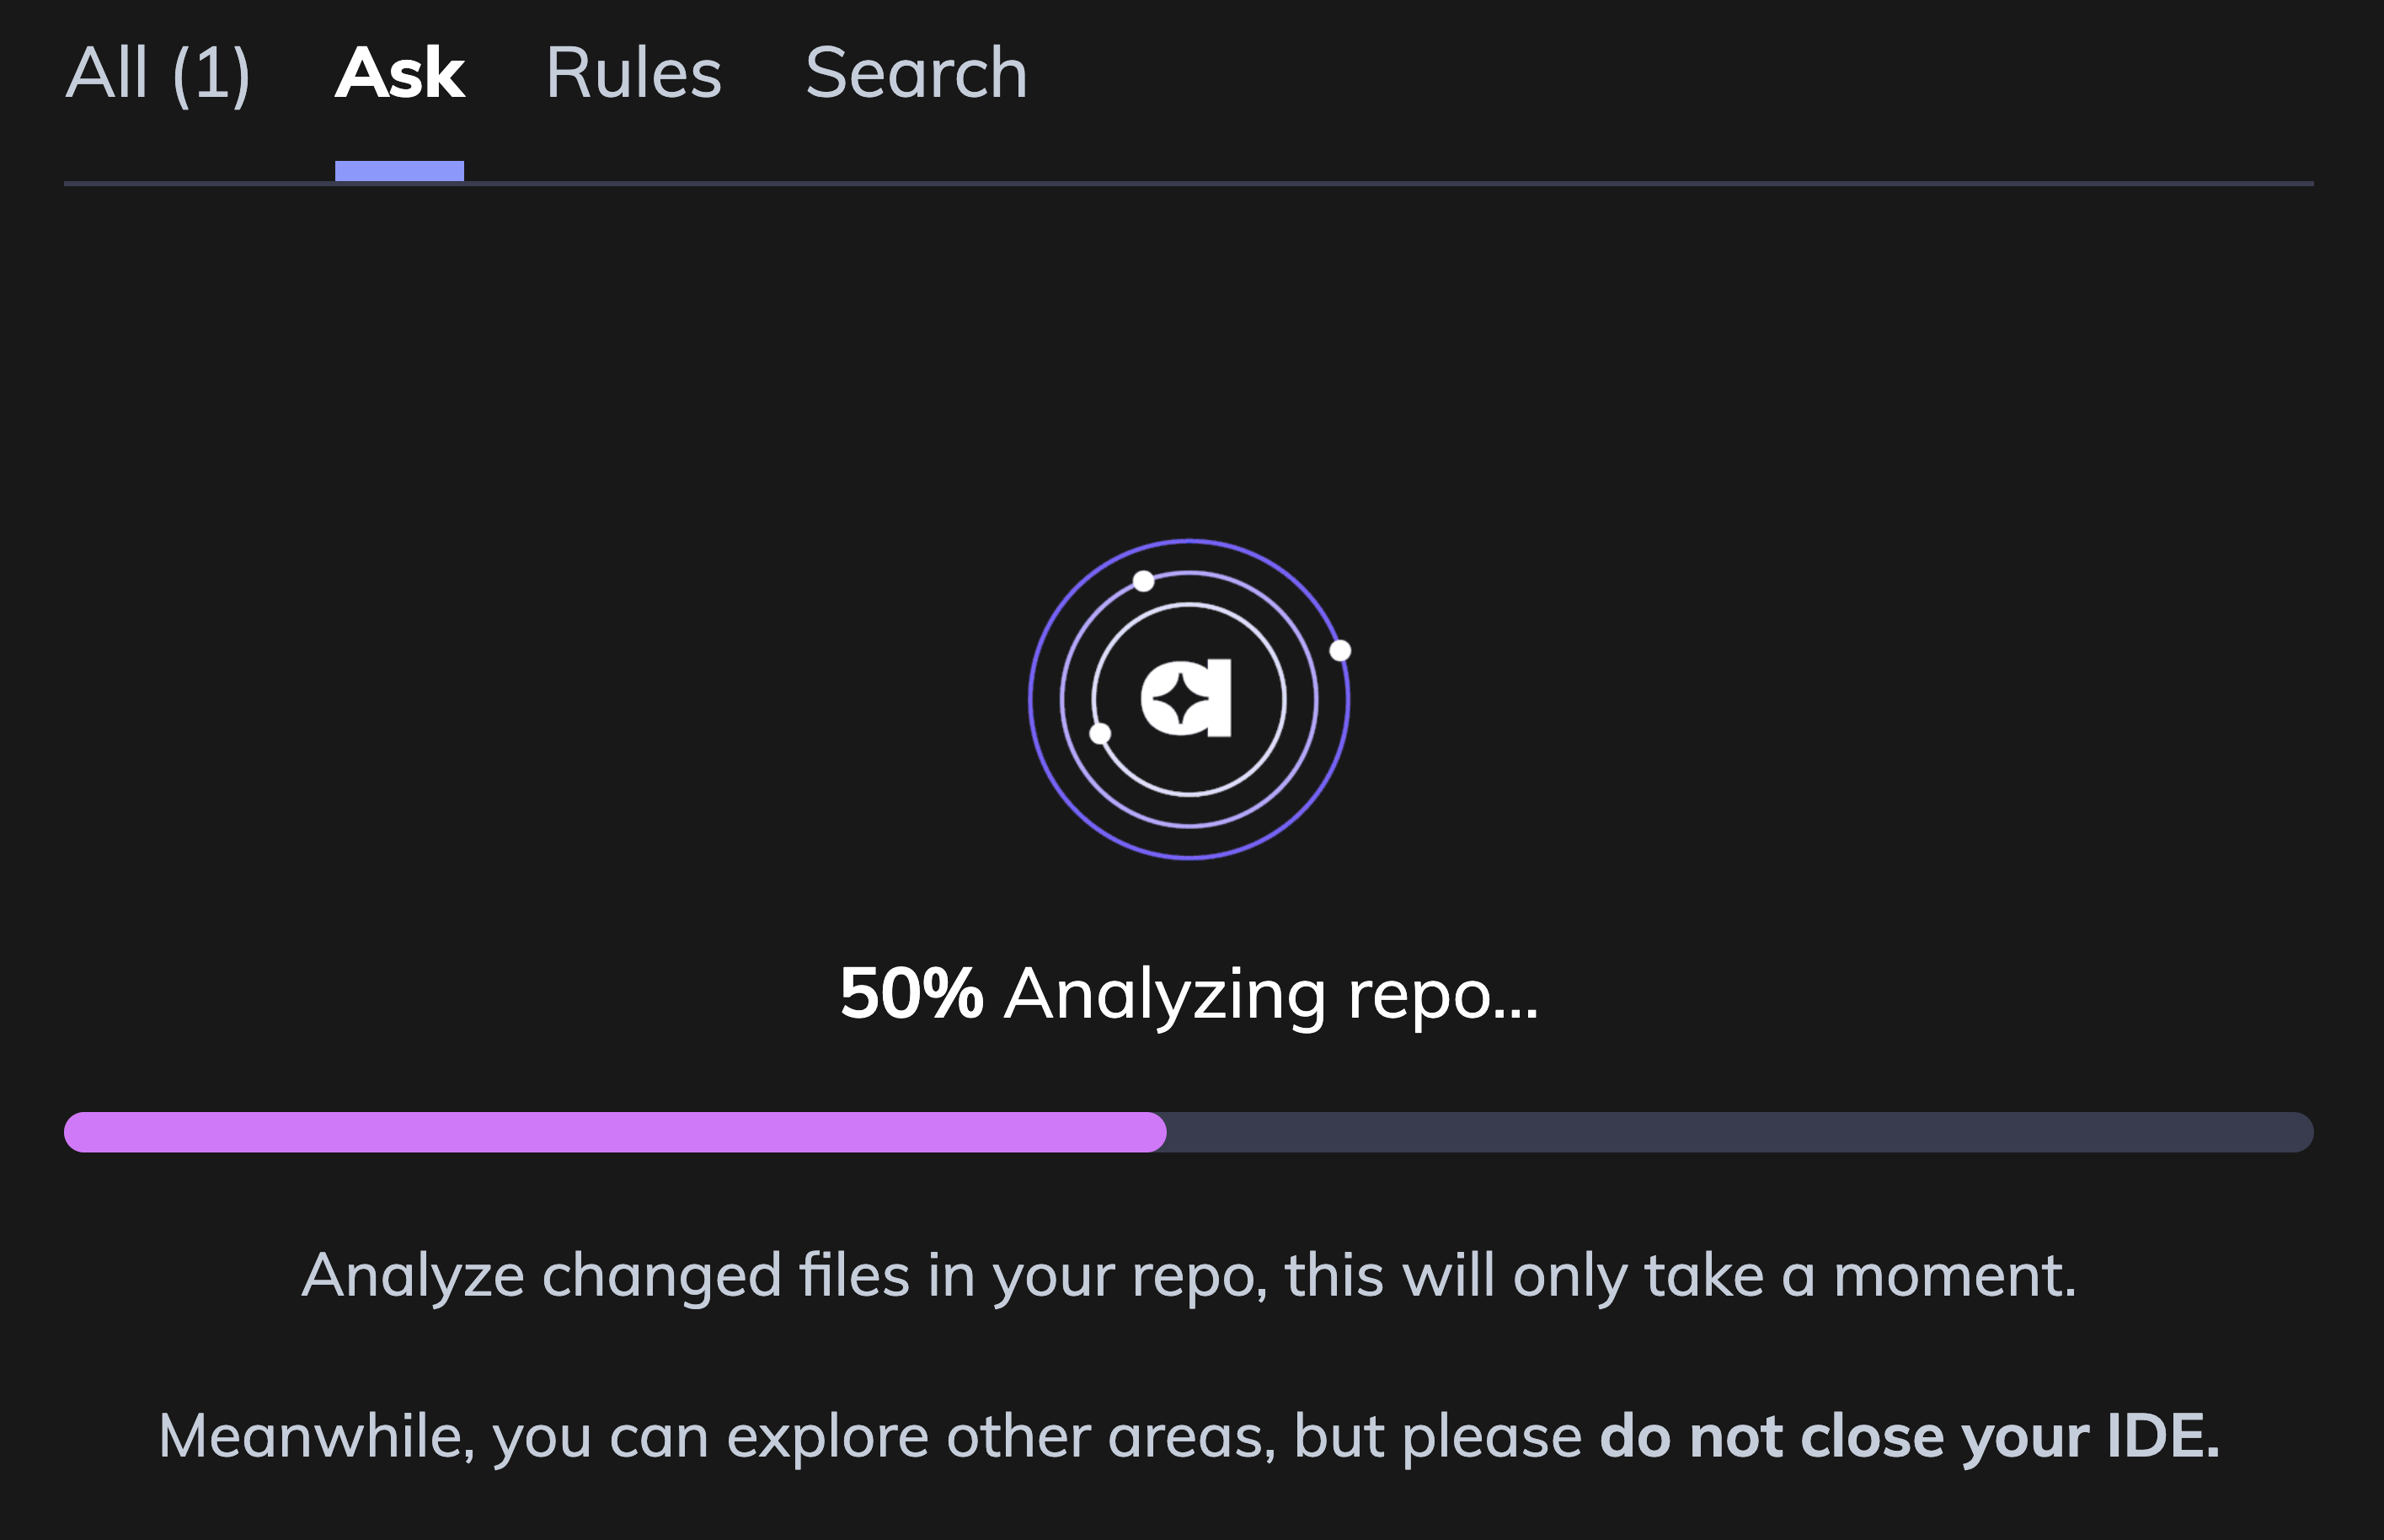
Analyze your repository
If this is your first time using /ask, click Analyze to understand your repository's codebase and provide relevant answers to your questions.
This may take up to 30 minutes, depending on the size of your repository. You're free to explore other areas, but please keep your IDE active during this process.
Ask Questions
For the best results, frame your questions clearly and concisely. /ask Swimm understands your codebase and can help you answer a variety of questions related to coding practices, troubleshooting, and workflow optimization.
Example questions
- What is X? - “What is a Playlist in this repository?”
- Where is X implemented? - “Where is the editor implemented?”
- How do we X in Y? - “How do we send analytics in the editor?”
- Where do we use X? - “Where do we use the Firestore API in the code?”
- How to add X? - “How should I add a new plugin to the system?”
Best practices
Be specific
✅ “Where is the Playlist feature implemented?”
❌ “Where is the Playlist feature implemented and how do we use it effectively?”
✅ “How do we trigger a run of the CLI?”
❌ “How do we trigger a run of the CLI and why would we do it in the backend?”
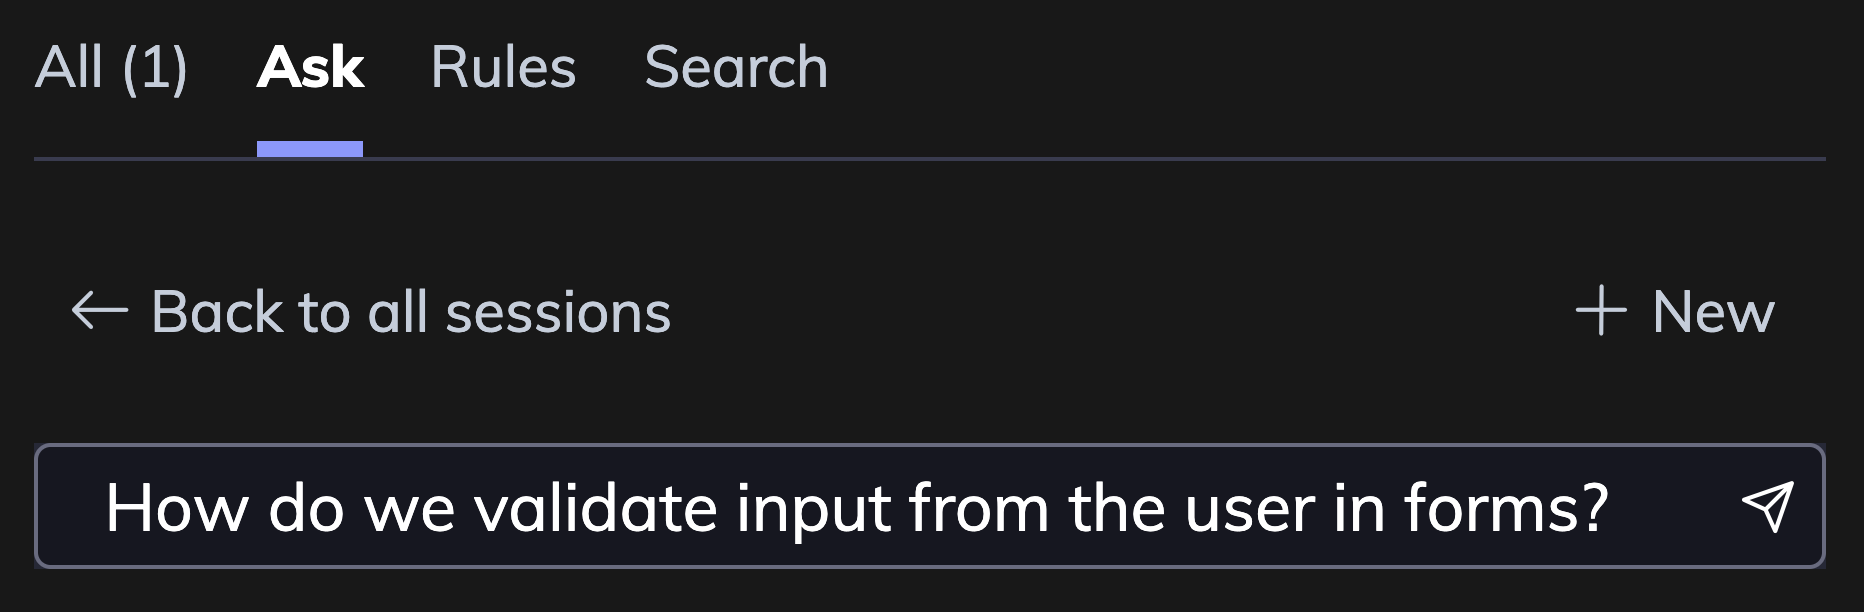
Keep it short
✅ “How do we validate input from the user in forms?”
❌ “When the user provides information, it can be in many places, and we need to validate the information that the user provided. How do we do that?”
Ask follow-up questions
When asking a question, you might get an incomplete answer or one that doesn’t answer your question. When this happens, ask follow-up questions on the same thread. /ask is aware of the conversation and this will help improve present and future responses.
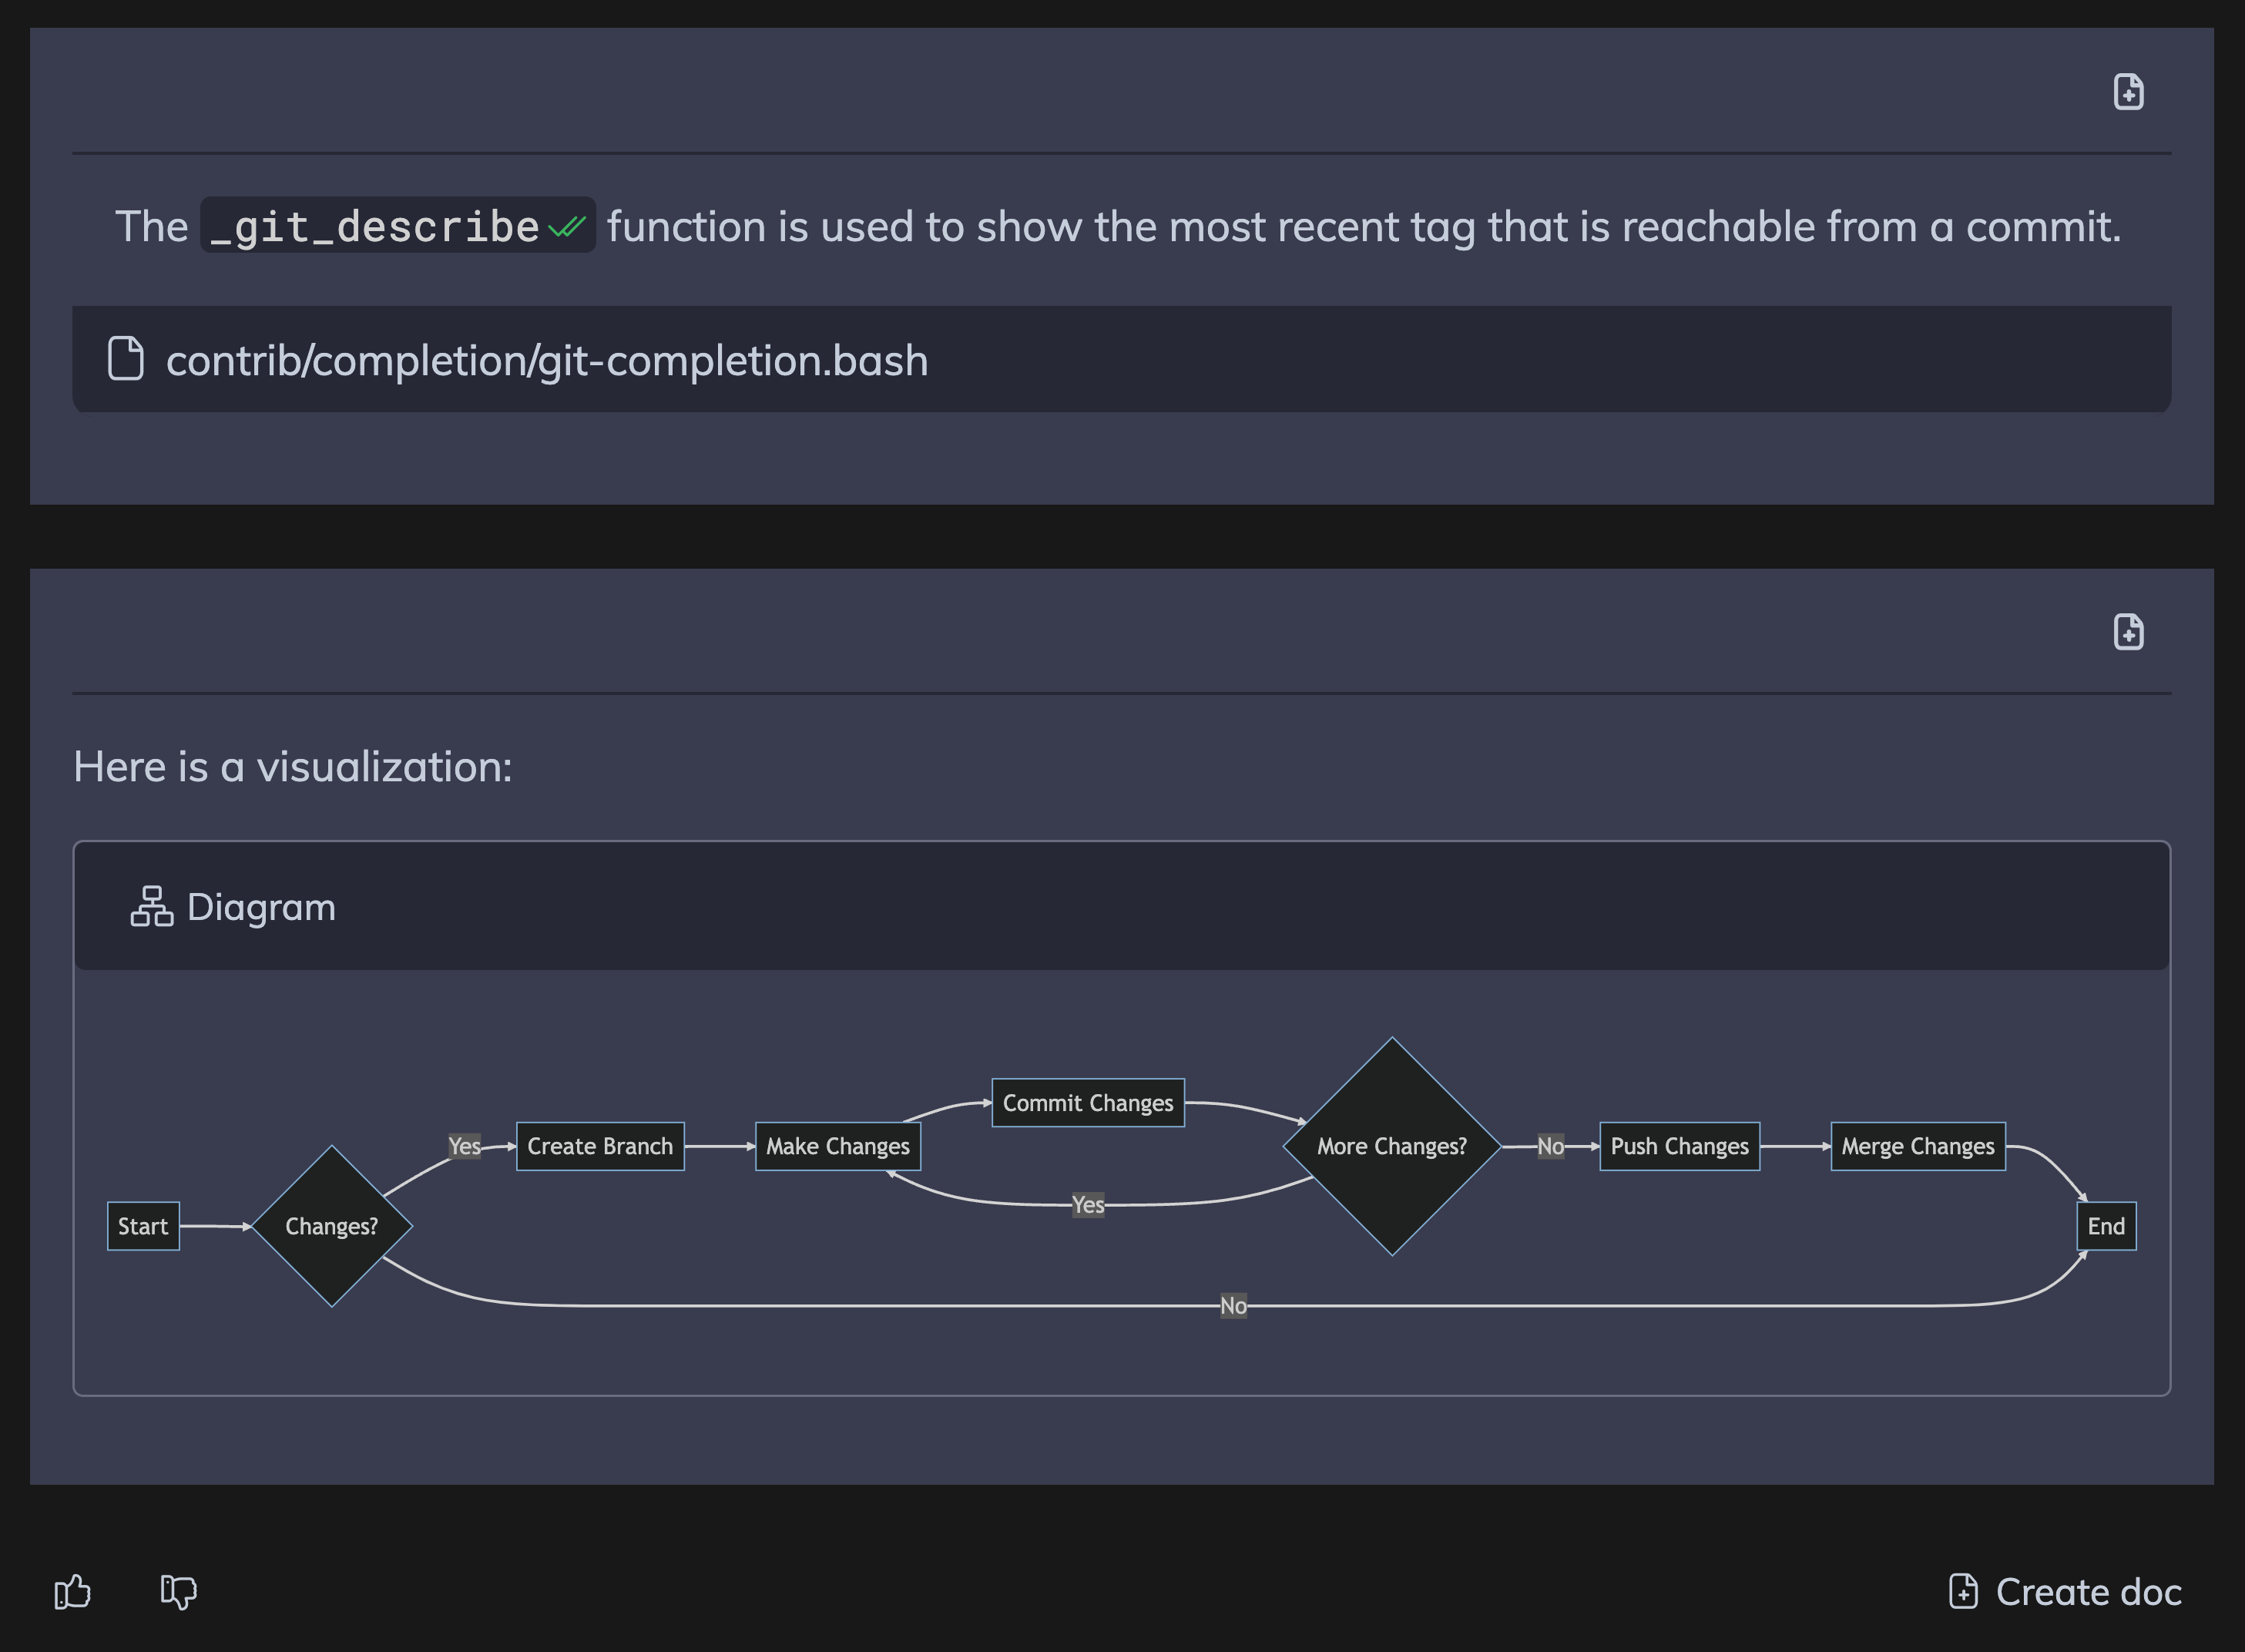
Capture knowledge
It's recommended to create a Swimm document with the insights or solutions provided by /ask after a chat session. This helps to create a valuable knowledge base in your repository for your colleagues.
Any AI model you use may not understand the many nuances of your codebase, such as reasoning for your development - business logic, architectural decisions and more.
The more human-level context you add to your docs, the more intuitive /ask becomes. We analyze the code and use your existing documentation and knowledge sources as context so that we can provide better answers to your questions.
Save and Commit
-
Navigate to your Git repository directory in the terminal.
-
Add the Swimm markdown file to staging:
git add [yourSwimmDoc].sw.md. -
Commit the file:
git commit -m "Your commit message". -
Push the commit to the remote repository:
git push.
All docs will be saved under the .swm folder once the docs are committed to the repository. Your team can now git pull your Swimm docs(s) with the rest of the codebase.
Web app
Because you can connect many repositories to your Swimm workspace, ensure you are working in your desired repo. By default, Swimm docs will be created on the default branch. To create a doc on a specific branch, navigate to the repository and select the branch from the dropdown in the breadcrumbs found top center of your document.
Docs created and committed to your repo are saved as Markdown files .swm > [yourSwimmDoc].sw.md just like other code files within that branch.
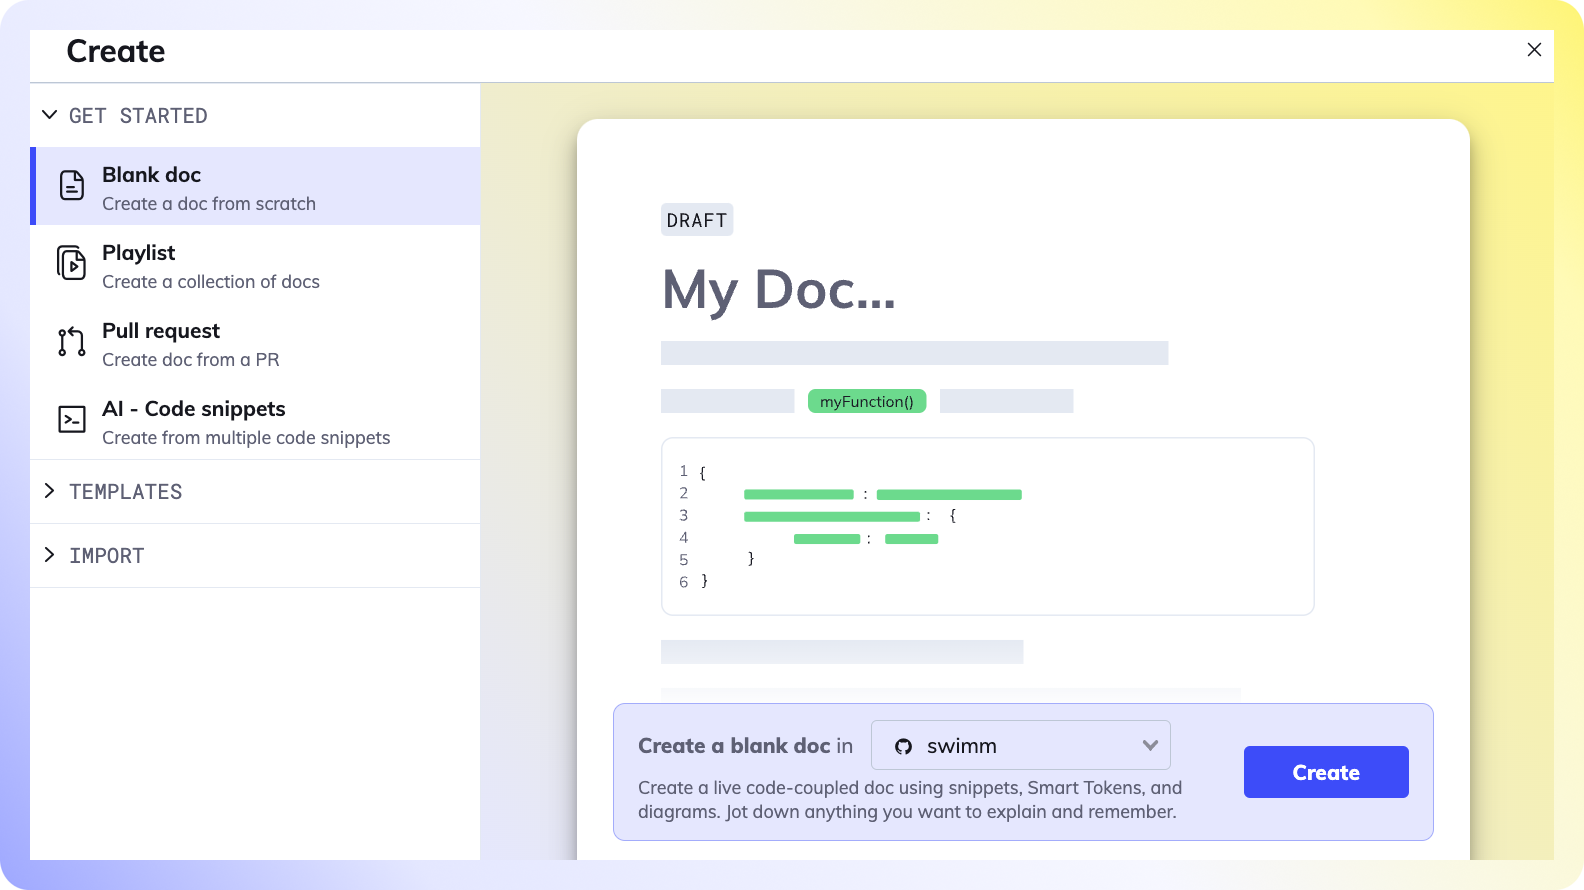
Pick a way to get started
| Create | Description |
|---|---|
| Blank doc | Start from scratch. Choose this option if you are clear about what you want to write. |
| Playlist | An ordered sequence of documents and other resources. Choose this option if you want to create a series of Swimm documents that are related to each other. |
| Pull Request | Option 1 - Swimm will use the code in the PR to scaffold your doc with code-coupled snippets. Add your content. Option 2 - (with AI) Swimm will use the code to scaffold your doc and send your snippets to OpenAI to write the content for the doc. Review, edit and add content as desired. |
| AI - Code snippets | Select multiple snippets from your repositories and Swimm's AI will generate a full document for you to review and/or modify. |
Add a title
Start by giving your document a title. Our recommendation is to be as descriptive as possible - How to post analytics is a better title than Analytics, as the former tells the reader what they will learn from reading the doc.
Use Swimm’s code-coupled editor to edit and add content
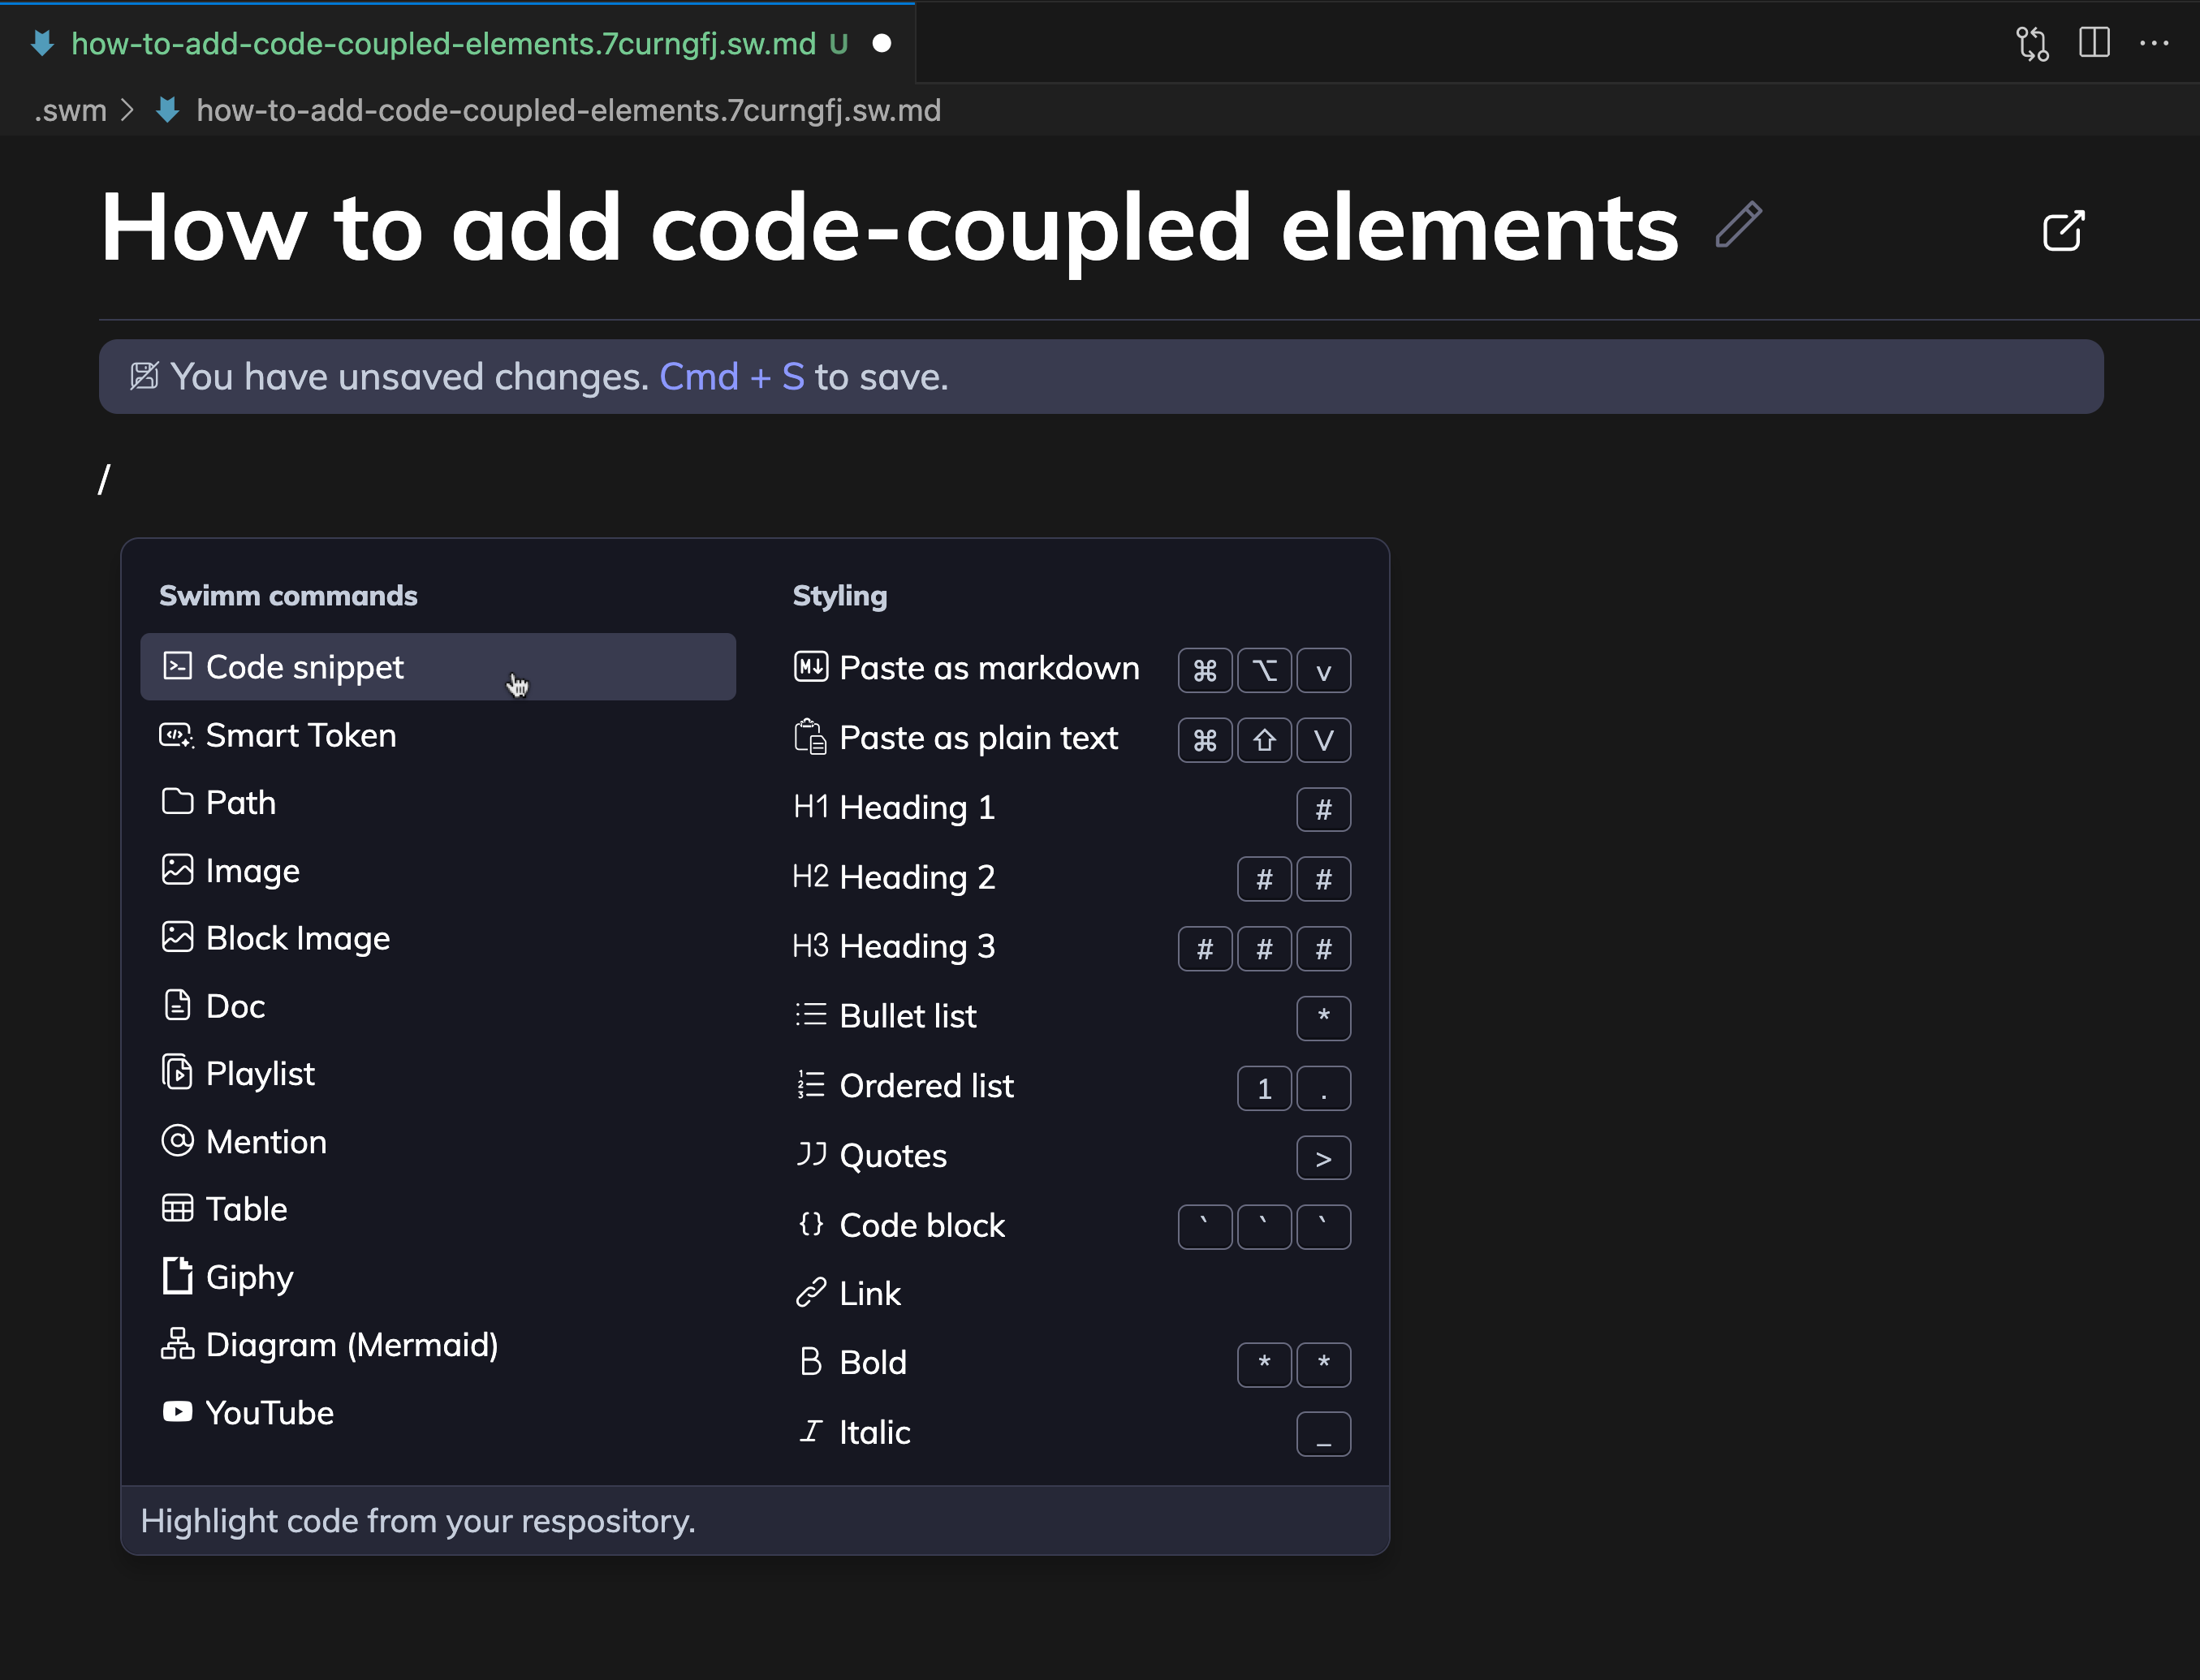
Swimm’s slash editor commands are a great way to quickly create and edit content in your documents.
Swimm commands menu
To use these commands, type / at any line, and you will see the commands menu.
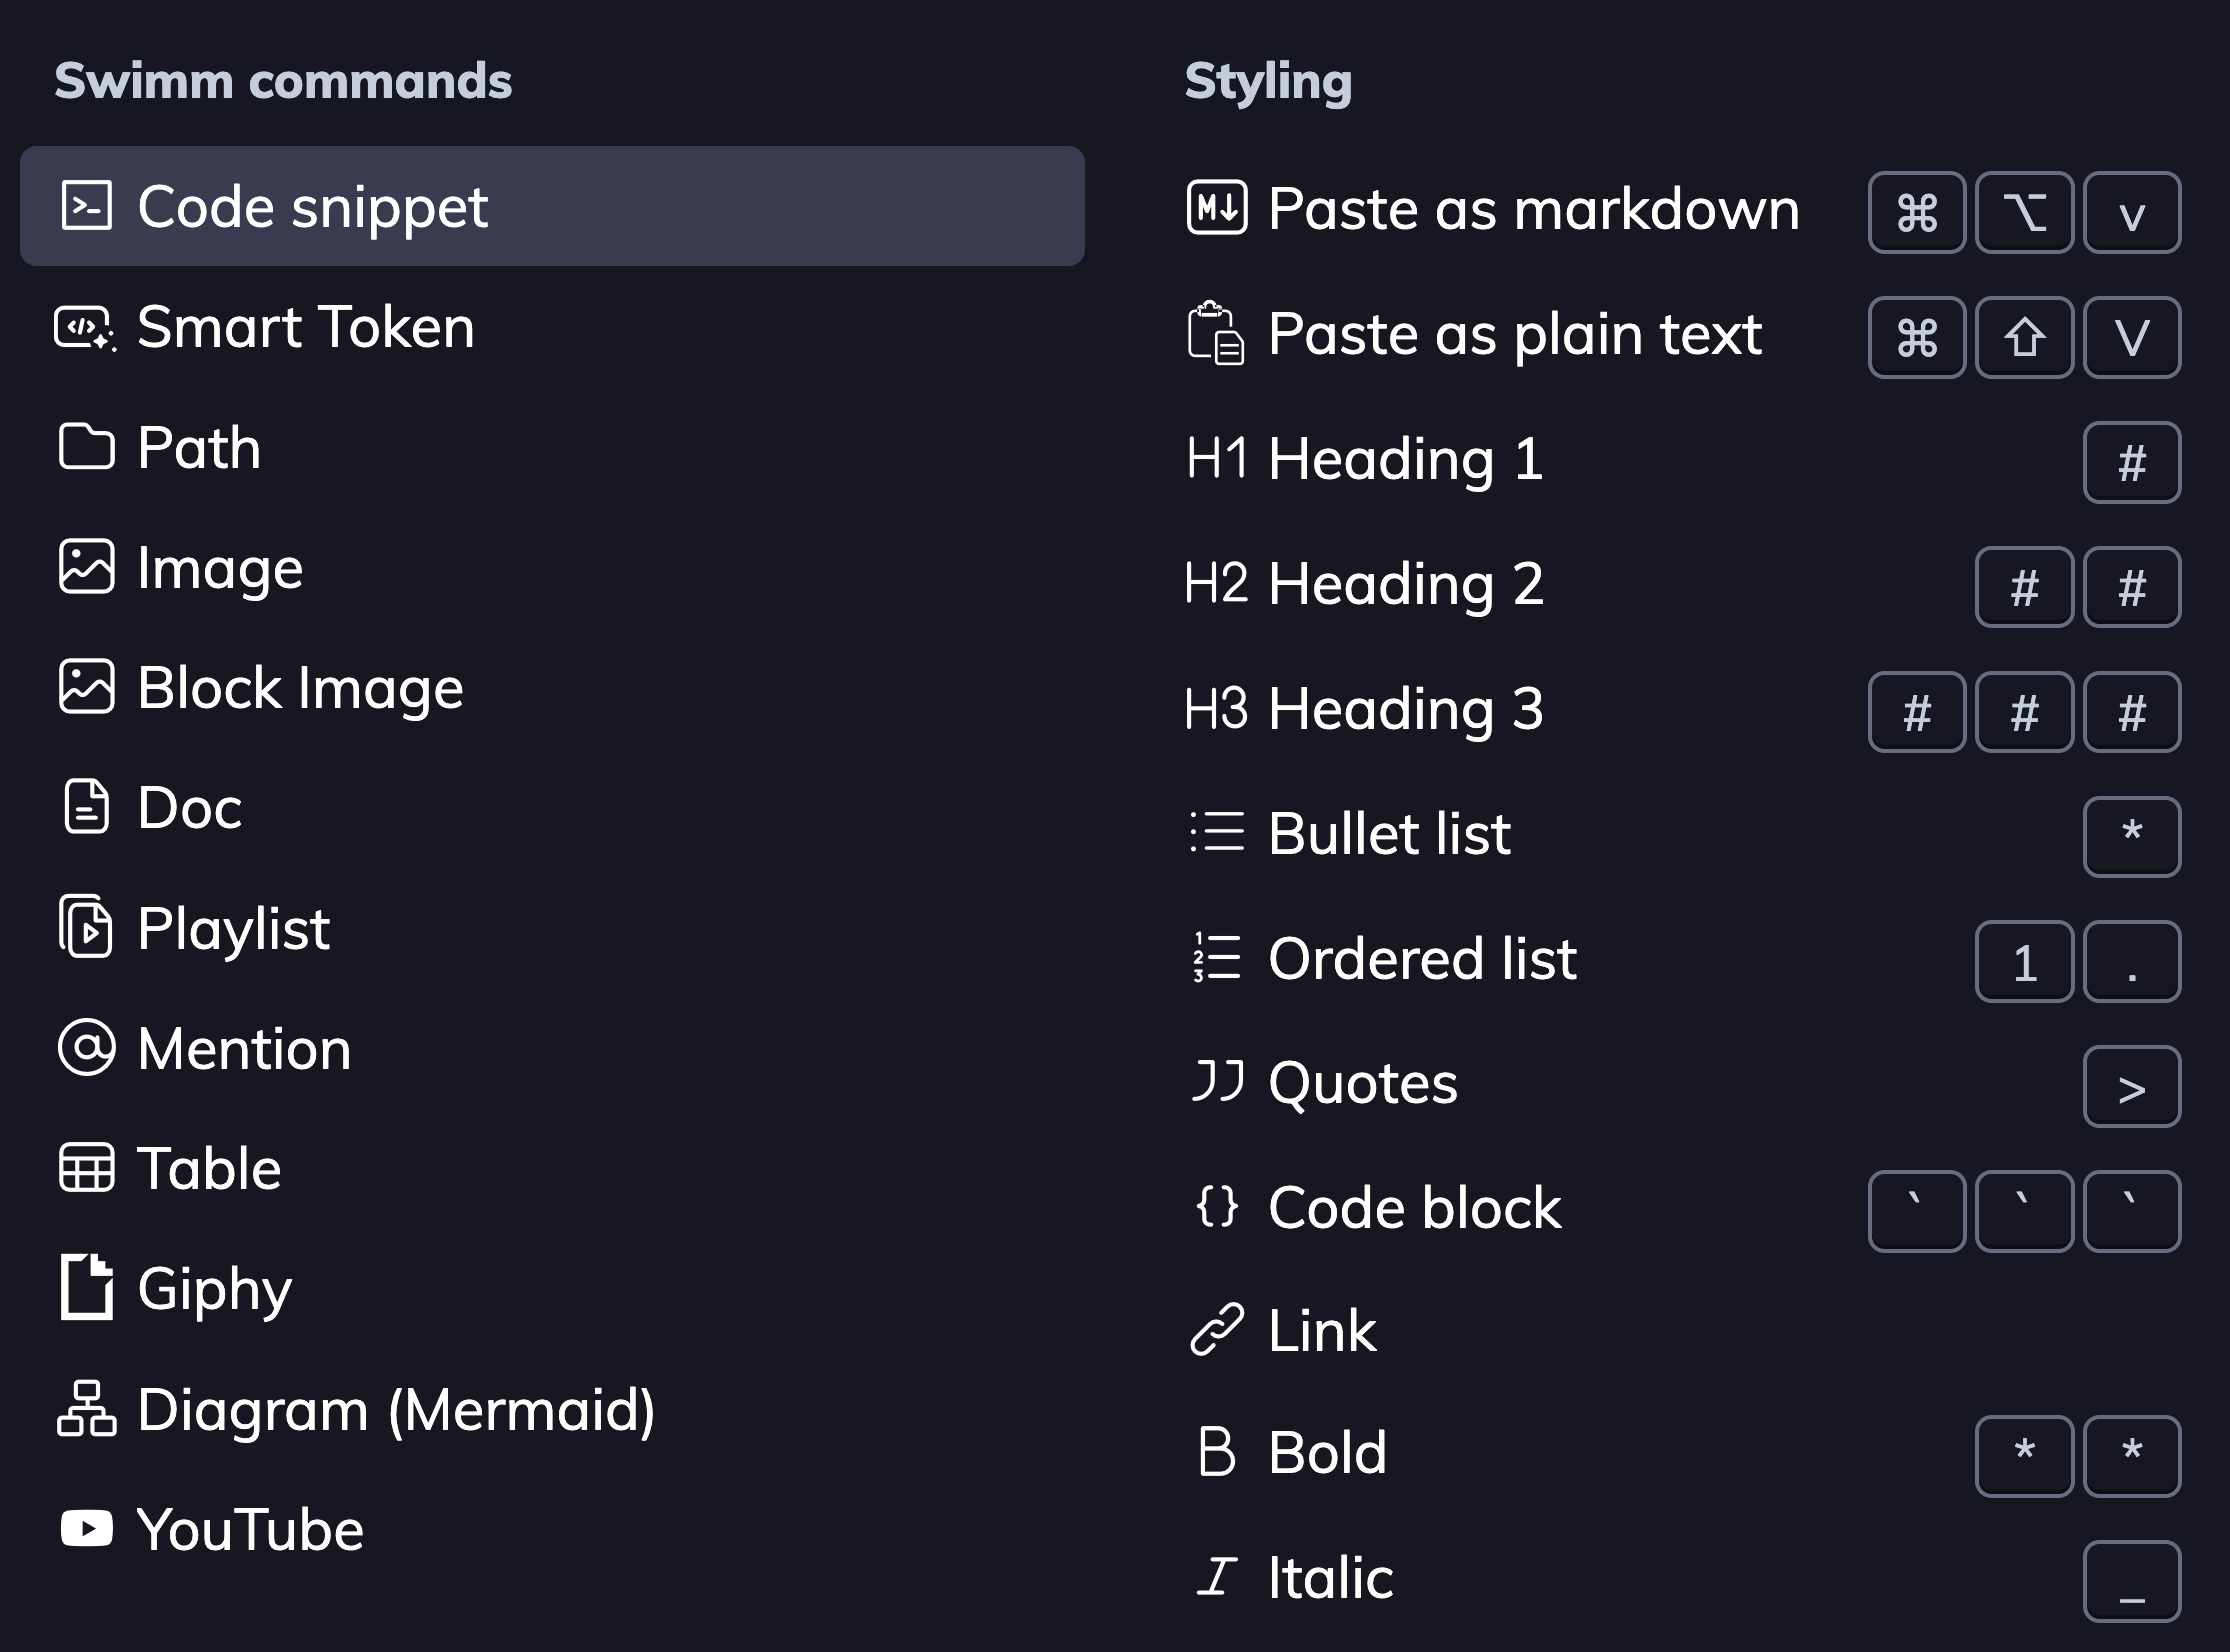
To pick a command, start typing its name and press Enter, or click on the command.
Important Swimm commands
| Command | Description |
|---|---|
/Code snippet | Add live code to your document with code snippets. |
/Smart Token | Link to a specific token from your code, like a function name, variable or specific value. |
/Path | Add a path of a directory or a file in your document. Swimm will track it in case it is renamed, moved, or deleted. |
/Image | Add an image to your document, stored in your repository (default) or Swimm's cloud servers. |
/Doc | Add a link to an existing Swimm doc. Swimm will track it in case it gets out of date and notify. |
/Playlist | Add a link to an existing Playlist. Swimm will track it and notify you if it’s out of date. |
/Diagram | Add a code-coupled diagram. |
/AI or /Generate description | Generate a description for the snippet with Generative AI. |
Add Code Snippets
It is so much easier to create an effective document when you start from the code. Select your code snippets first, and write text later.
Type and select /Code snippet to add a code-coupled snippet from the Snippet Studio that came into view.
Snippet Studio provides you with an easy way to locate a file and select a certain section from it. Once you have selected the desired lines of code, click Add (or press Enter) to exit and add the code snippet to your document.
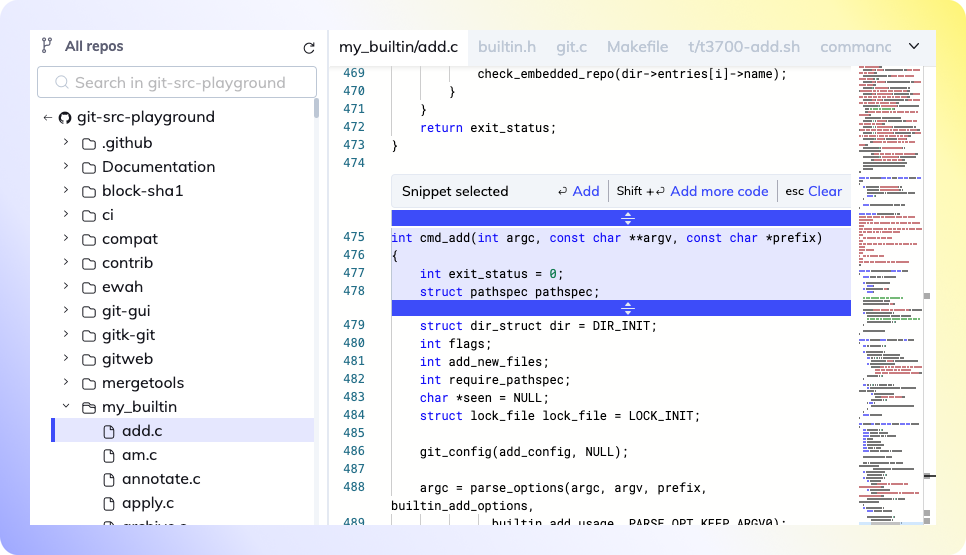
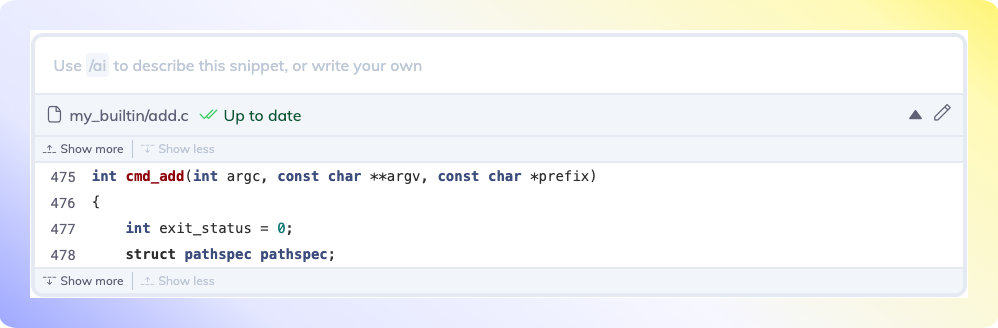
Above the code snippet, there's a section for a brief description about the snippet. This part should be concise, focusing mainly on explaining the purpose and functionality of the snippet.
Since Swimm has access to all repos authorized, we take advantage of being able to include code-coupled elements from multiple repositories.
Add Smart Tokens
Smart Tokens help you seamlessly integrate parts of your code into the documentation. They update automatically when there are changes in the code, keeping the document current.
Single-word tokens
These tokens are great for referencing specific elements like variables, methods or functions.
Multi-word tokens
Group multiple values in a Smart Token by typing them together within a single line, enhancing its linking capability.
Can't find the token you are looking for? Check out Editor tips and tricks.
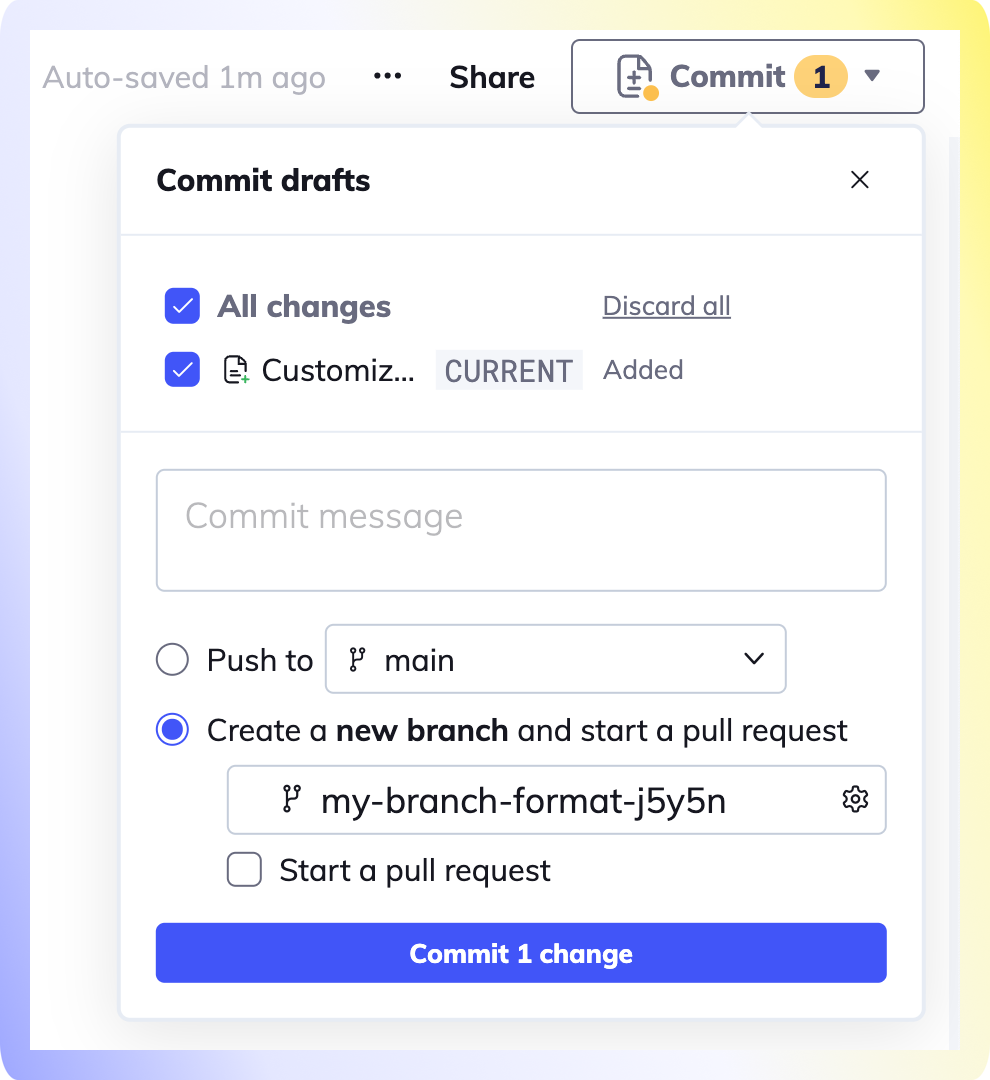
Save and commit
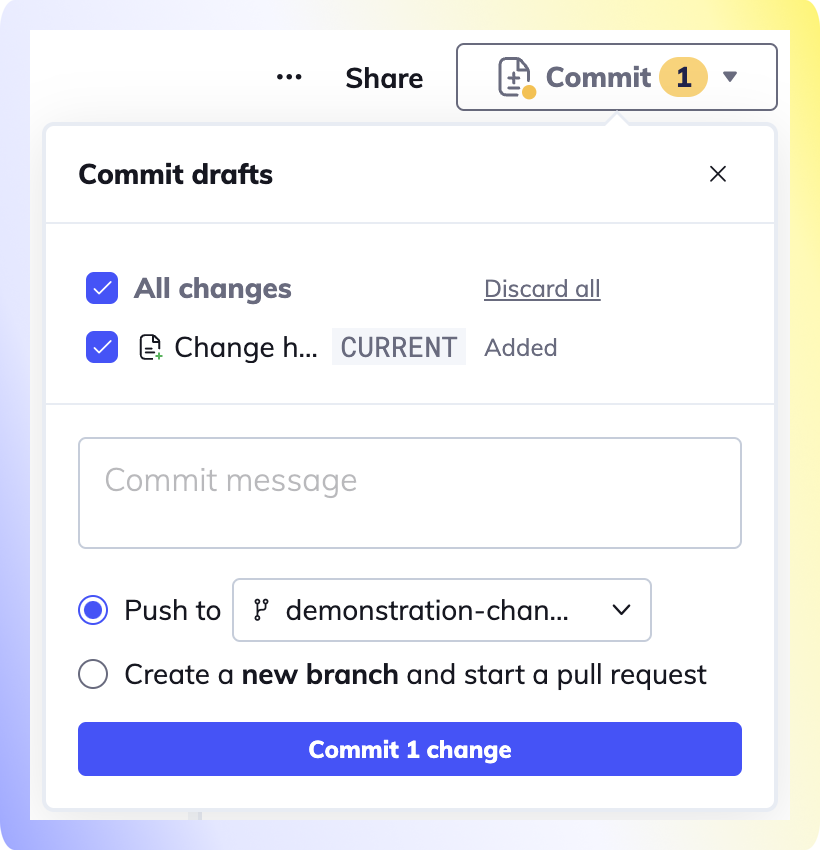
Swimm docs are auto-saved to your local browser as you go. Docs you create and modify will not be accessible by others until you commit to the repository.
- Click on the
Commit #button in the top right corner of your screen. - Select the files you want to commit.
- In the commit modal: push directly to an existing branch, or create a new branch and start a new pull request.
Signed commits
- If you have GPG keys set up for your git hosting, your commits will be automatically signed.
Custom branch name format
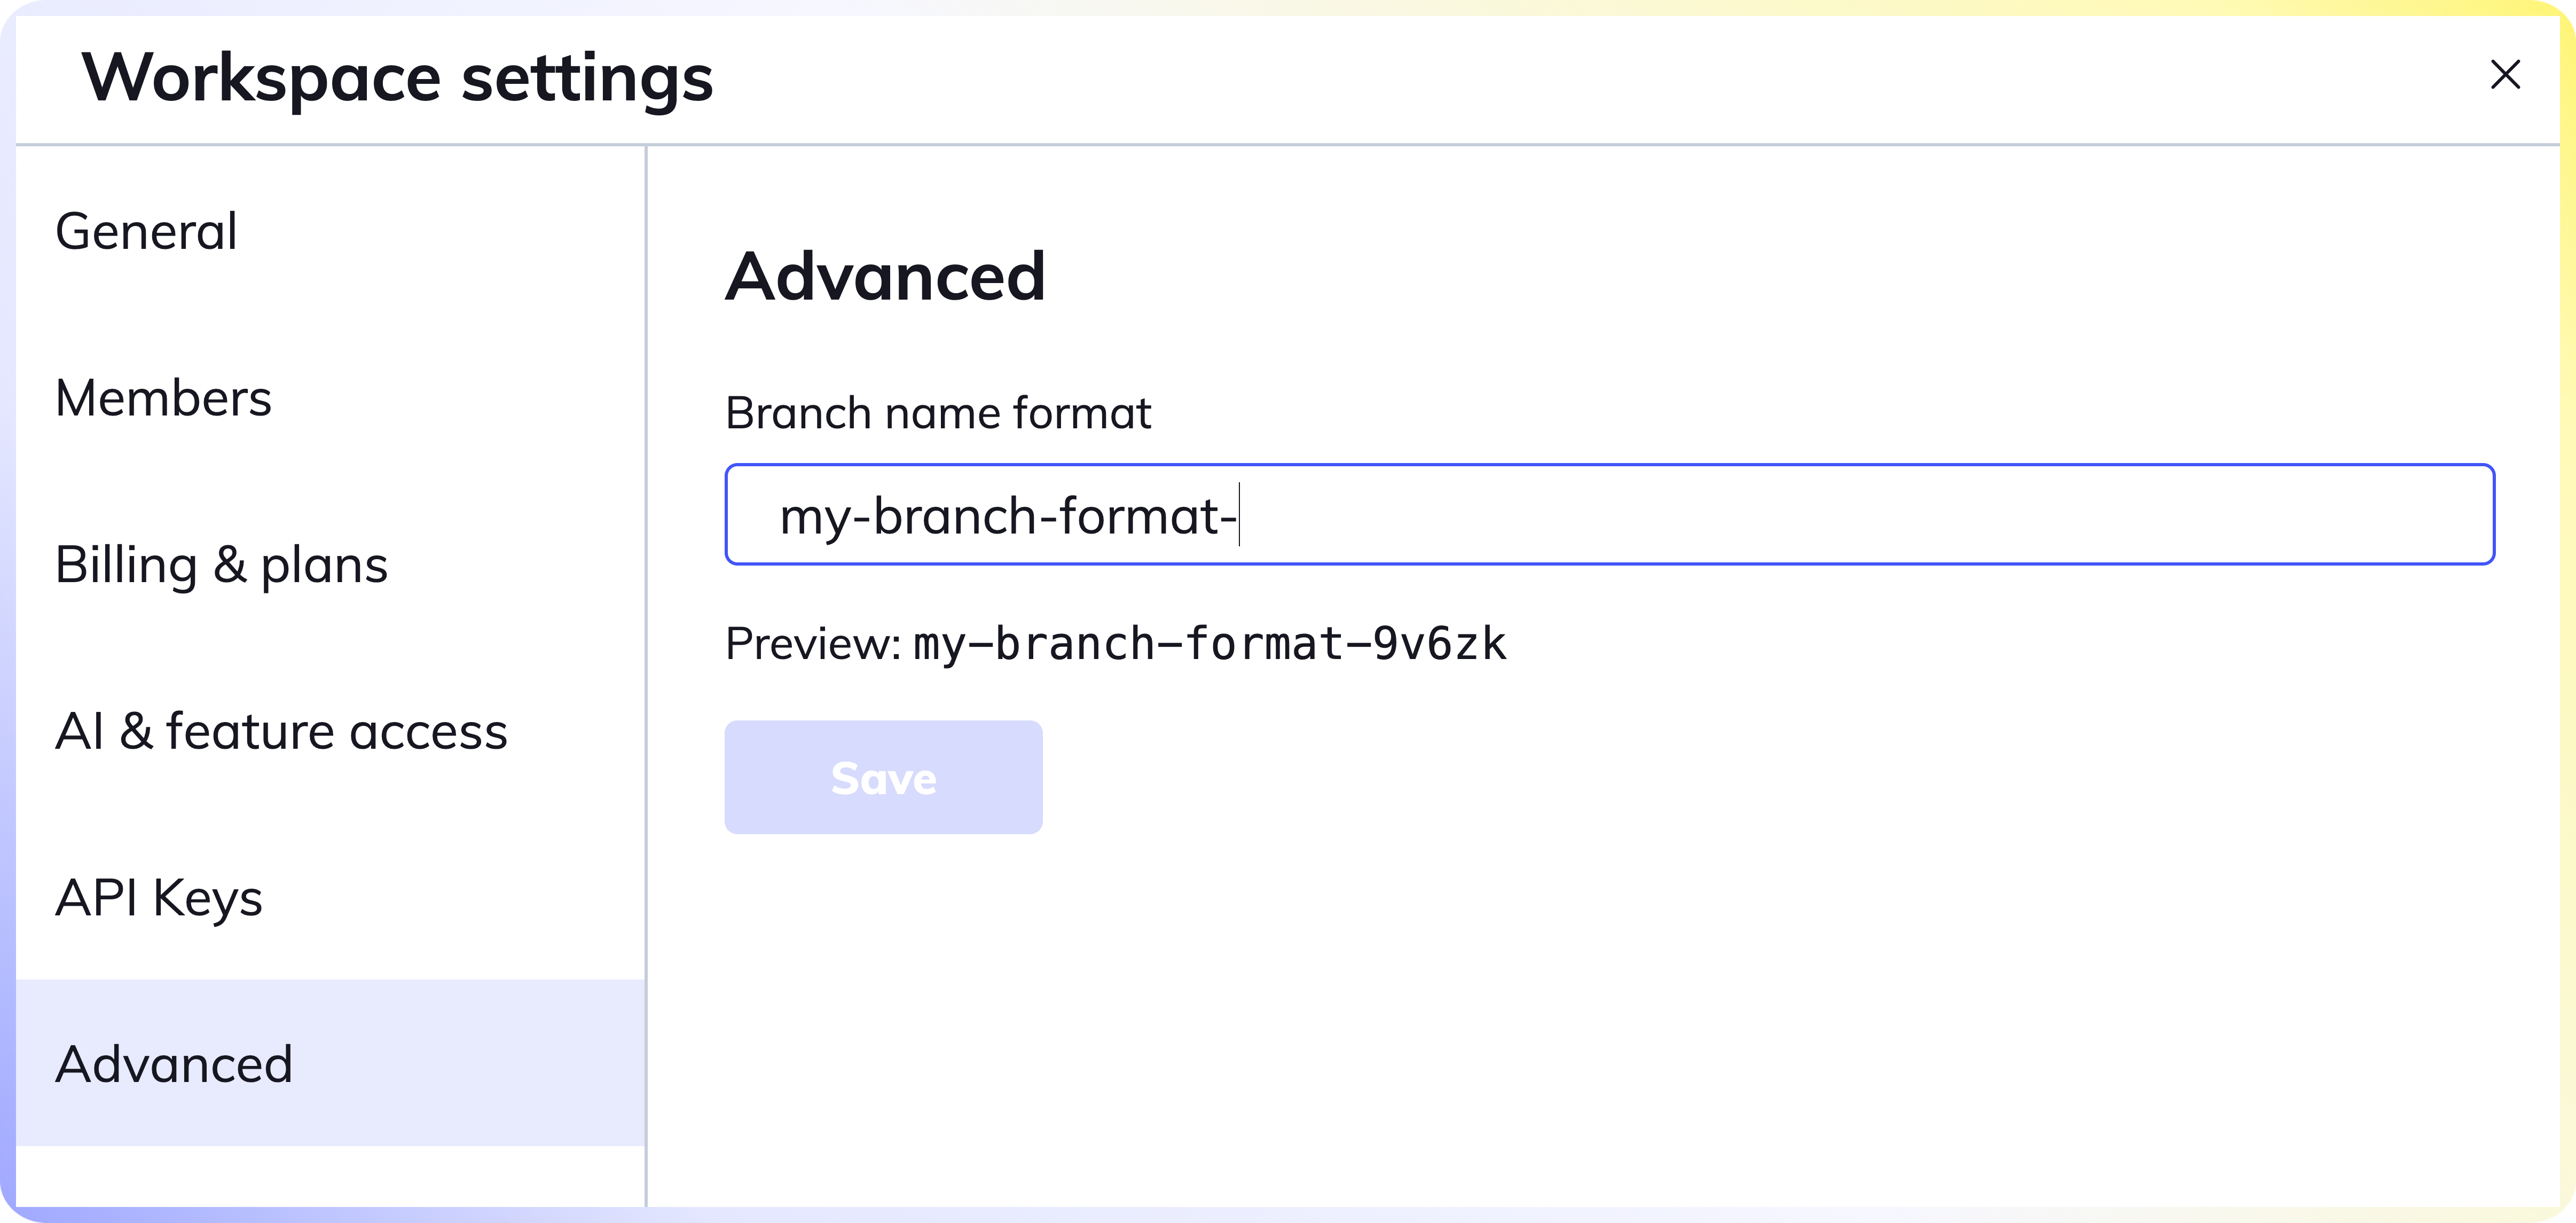
When you create a new branch to commit your Swimm docs, the branch name is prefixed with update-swimm-docs-[hashID], by default.
You have the ability to customize your workspace's branch name format Workspace settings -> Advanced.
Commit Swimm docs with new branch name format
This document is automatically kept up to date using Swimm.