Quick Guide: Getting Started with Swimm's VS Code Plugin
Swimm is a handy tool that lets teams write, update, and find code documentation right inside their development environment. Swimm's VS Code plugin lets you create, read and navigate through your code docs smoothly, so you don't have to juggle between windows. It also takes use of Swimm's Auto-sync feature to keep your documentation always up to date. This guide will show you how to set up and use Swimm's VS Code plugin.
Set up
- Download Swimm's VS Code plugin from the VS Code marketplace. After it's installed, you'll see the Swimm icon pop up in the "Activity Bar" on the left side of your screen.
-
Click the
Sign Upbutton and create a Swimm account, if you don't already have one. It's free and quick to do. Clicking onSign upwill take you over to the Swimm web app. You can take a quick tour of Swimm or skip it if you prefer, but make sure to continue all the way until you create an account. -
After signing up, be sure to create an account, or join an existing workspace. Then, head back to the IDE and log in.
-
Authorize VS Code to access Swimm by logging into your Swimm account.
Notice you do not need to authorize your Git provider account in order to work with Swimm from VS Code.
Working with Repositories
To start using your Swimm workspace, your repository needs to be linked to your account.
Things you'll need:
- A local Git repo.
- Your git remote properly configured. To validate that - you can run
git remote -vfrom the repository's directory. - Your repo project opened in VS Code.
What you should know about Workspaces and Repositories:
- A Swimm workspace can link to many repositories.
- Private repositories can link to just one workspace.
- Public repositories can link to multiple workspaces.
- To connect a repo to a workspace, you need to be a workspace admin.
Opening one or multiple Repositories
VS Code also uses something called "Workspaces", but they're different from Swimm Workspaces. In VS Code, a Workspace is like a container that can hold one or more folders, along with their settings and configurations. This makes it easy to switch between different projects or contexts.
Swimm is compatible with VS Code workspaces and can handle multiple repositories in the same view, as long as they're all on the same level. Your panels will display documentation based on the files you have open.
Navigating Swimm's VS Code Plugin
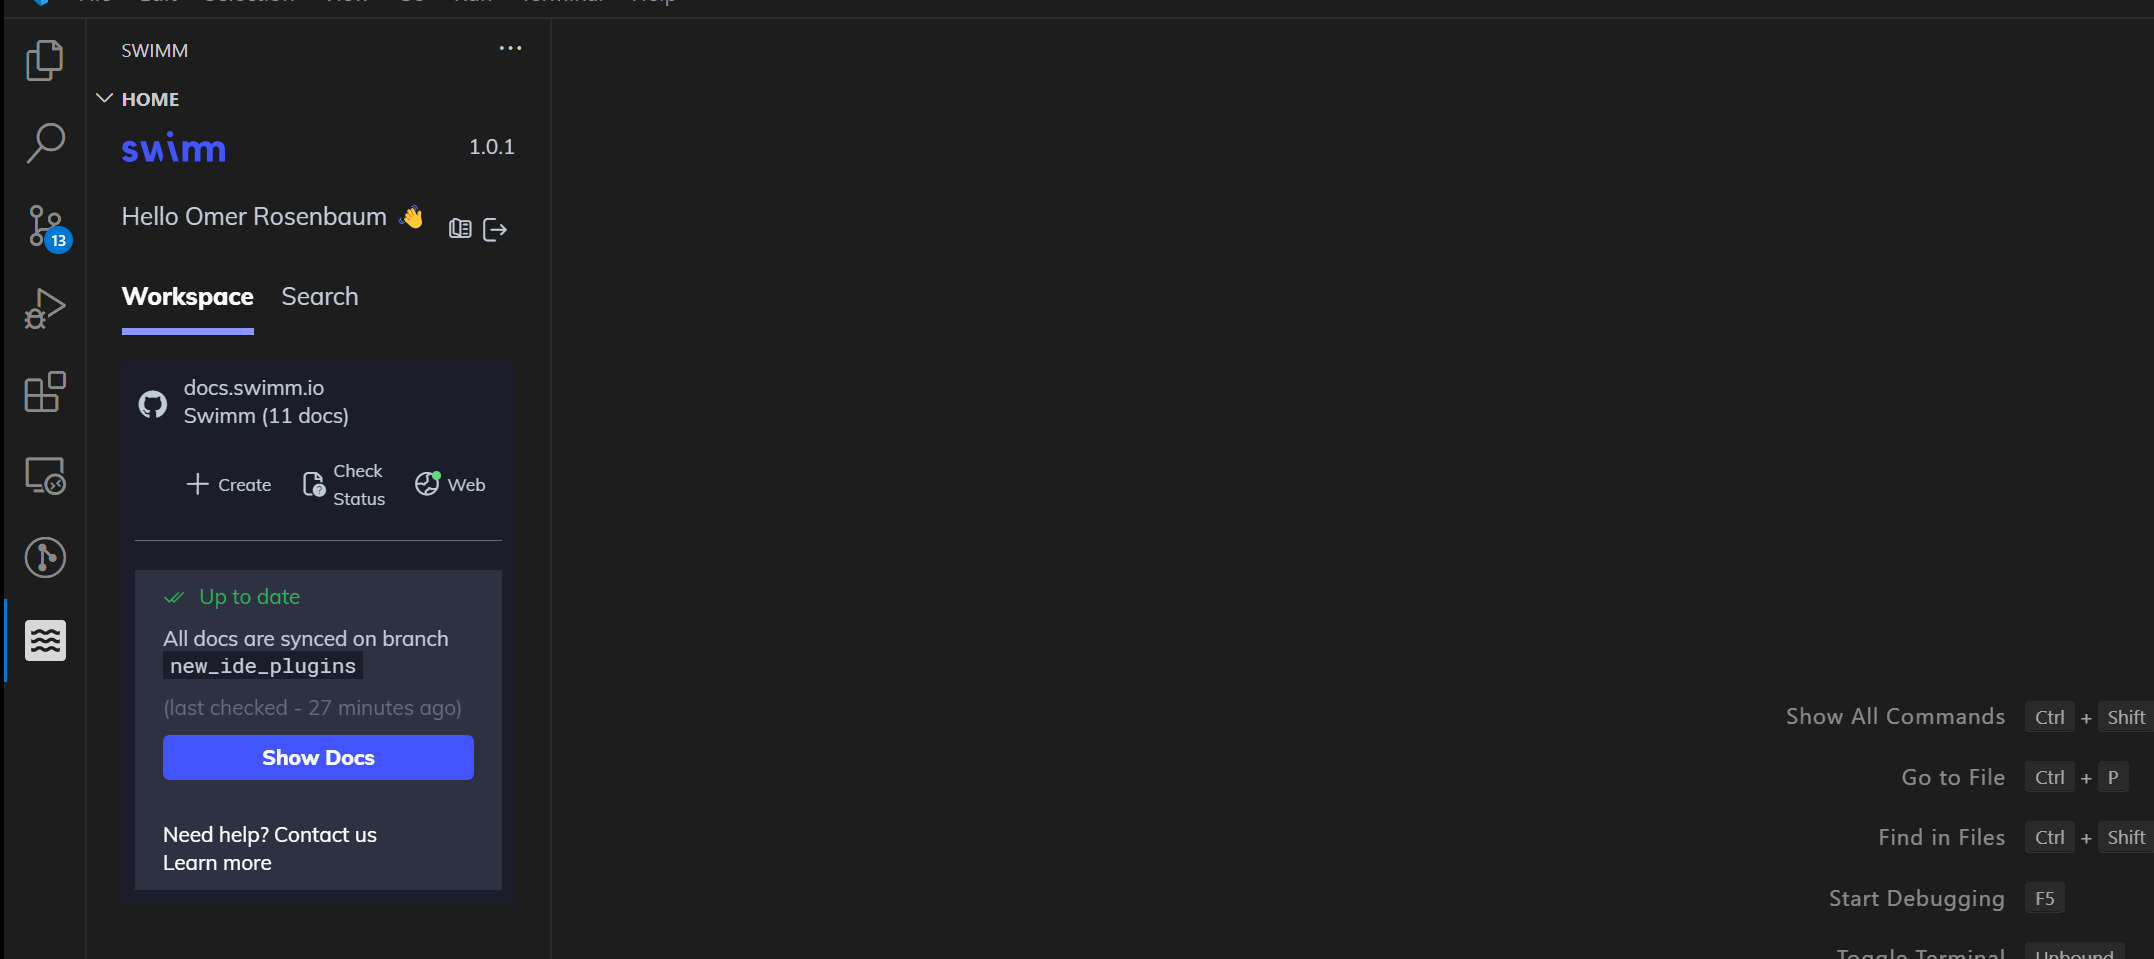
You'll find the Swimm plugin on the left sidebar in VS Code. The plugin consists of 3 panels:
- Workspace panel (HOME) - Here you can set up repositories, create docs, check status, and search for docs.
- TUTORIALS - Videos and docs explaining how to use the plugin.
- REPO DOCS panel - This panel shows all your Swimm docs.
- CURRENT FILE panel - This panel shows only docs related to the code file you have open.
Tweaking the Plugin Settings
You can adjust some of the plugin's default behavior by going to VS Code's Extensions panel, and selecting Extension Settings for Swimm's plugin.
What to Show
- "Swimm: Code Lens Style" - lets you choose what you want to see in the annotations above code lines. You can choose to see the snippet comment from the doc, the doc title, or nothing at all.
How to Show
- "Swimm: Open Docs In Split" - by default, documents open side by side. You can change this if you prefer a different layout.
This document is automatically kept up to date using Swimm.