SCIM with Microsoft Entra
SCIM (System for Cross-domain Identity Management) provisioning with Microsoft Entra ID enables automatic user and group synchronization to your Swimm workspace.
Prerequisites
Before setting up SCIM, ensure you have:
- Admin access to your Microsoft Entra ID tenant
- Admin access to your Swimm workspace
- The SCIM tenant URL and secret token provided by Swimm
Setup Steps
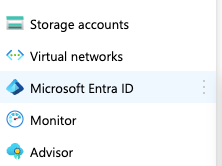
1. Navigate to Microsoft Entra ID
In the Azure portal, go to Microsoft Entra ID from the main navigation menu.
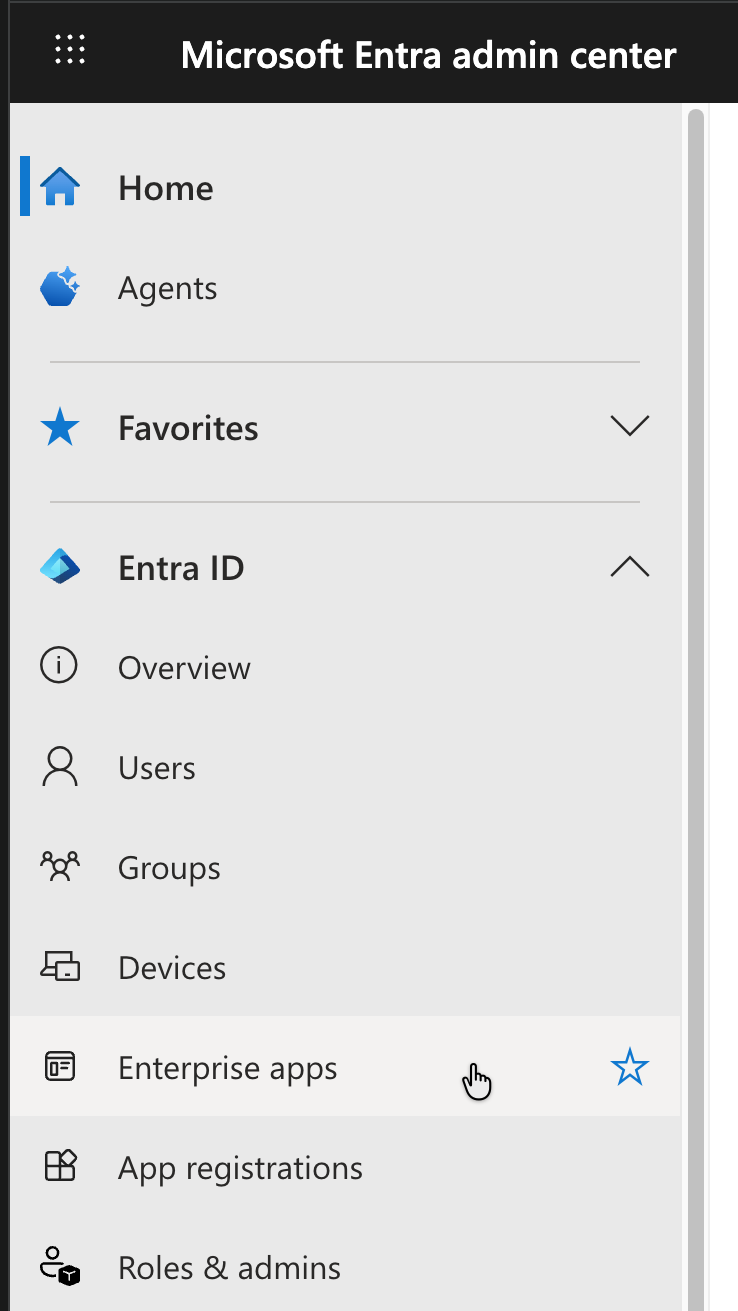
2. Access Enterprise Applications
From the Microsoft Entra ID overview page, navigate to Enterprise applications under the Manage section.
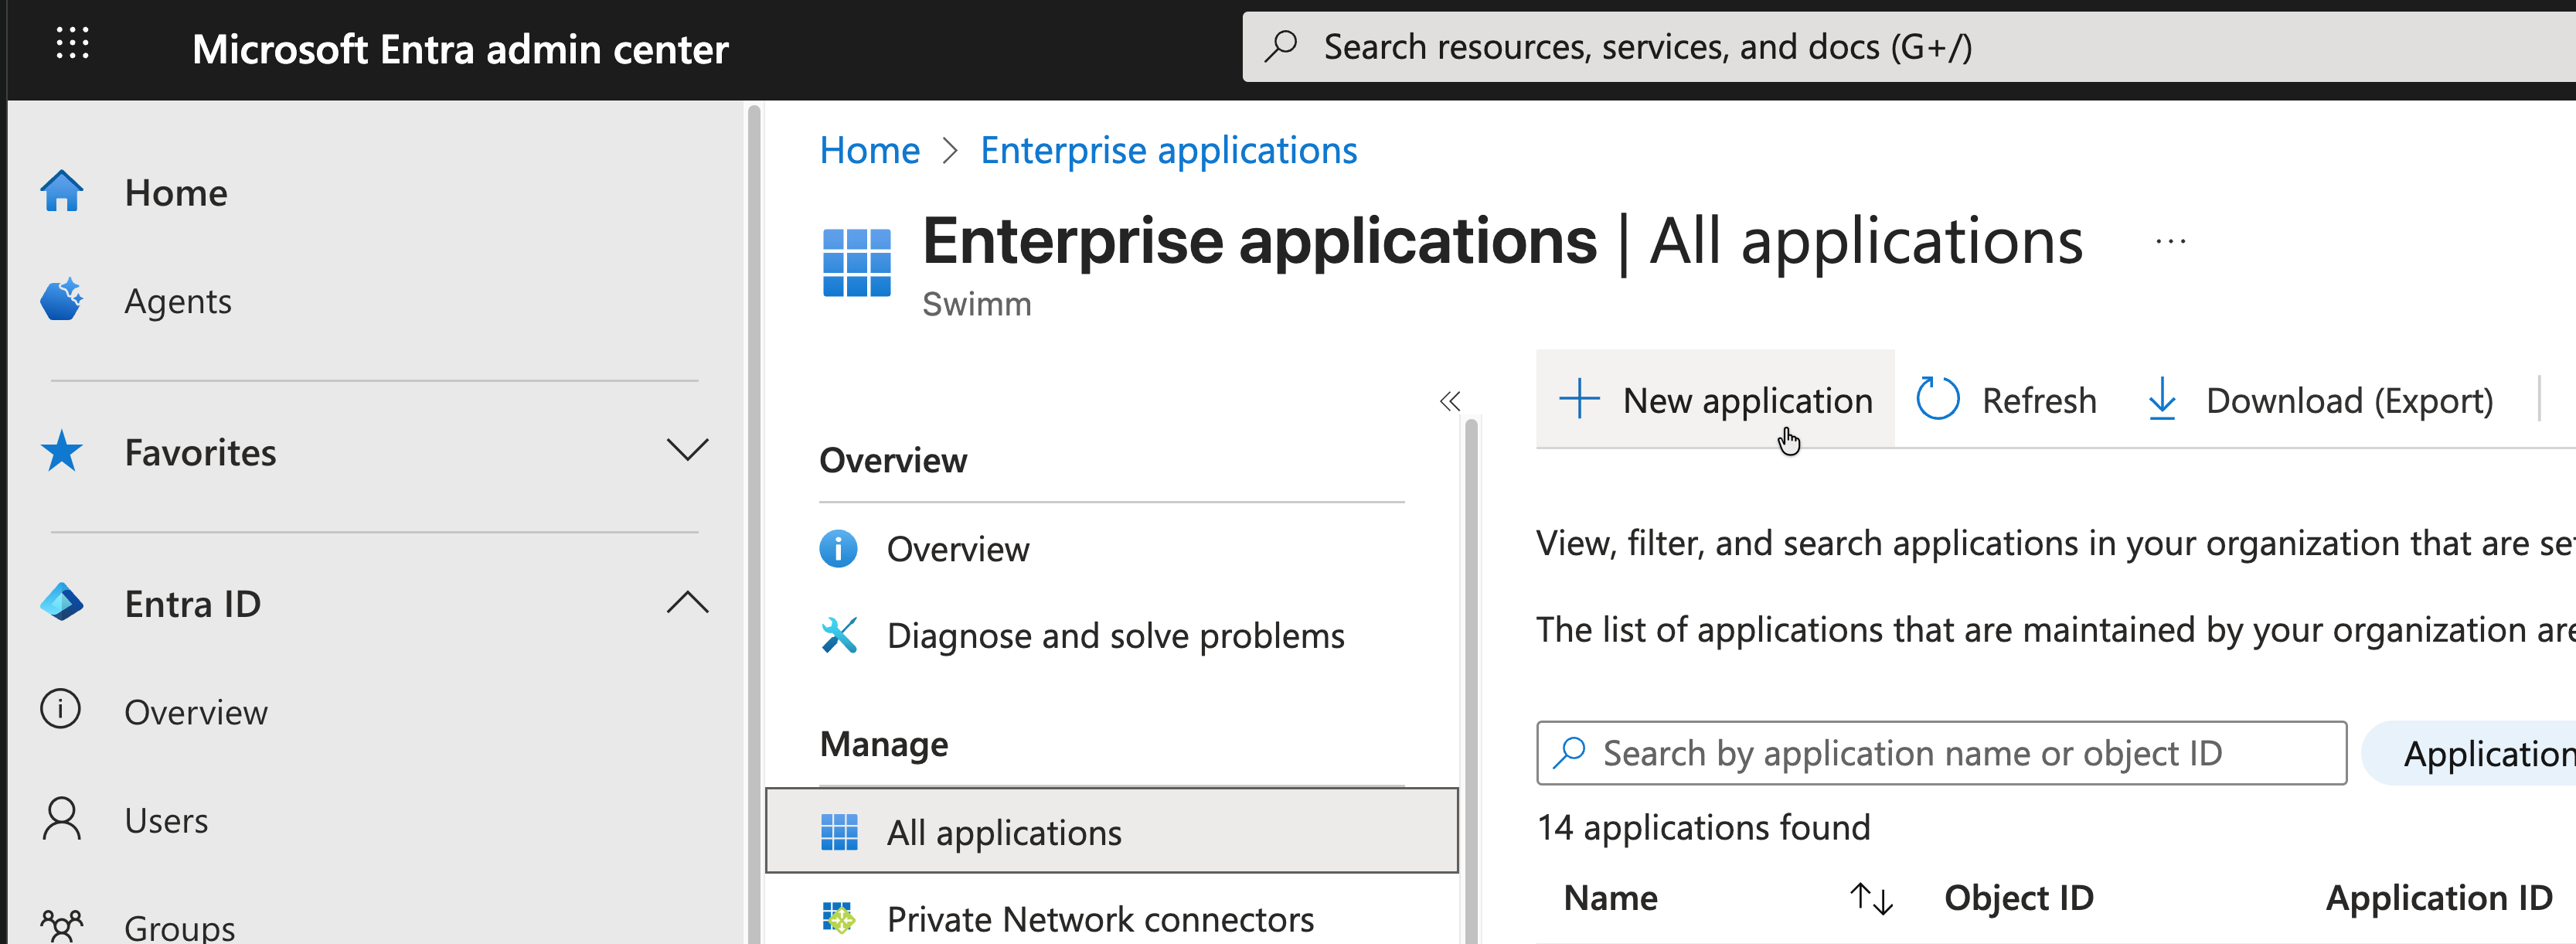
3. Create a New Enterprise Application
Click New application to create a new enterprise application for Swimm SCIM integration.
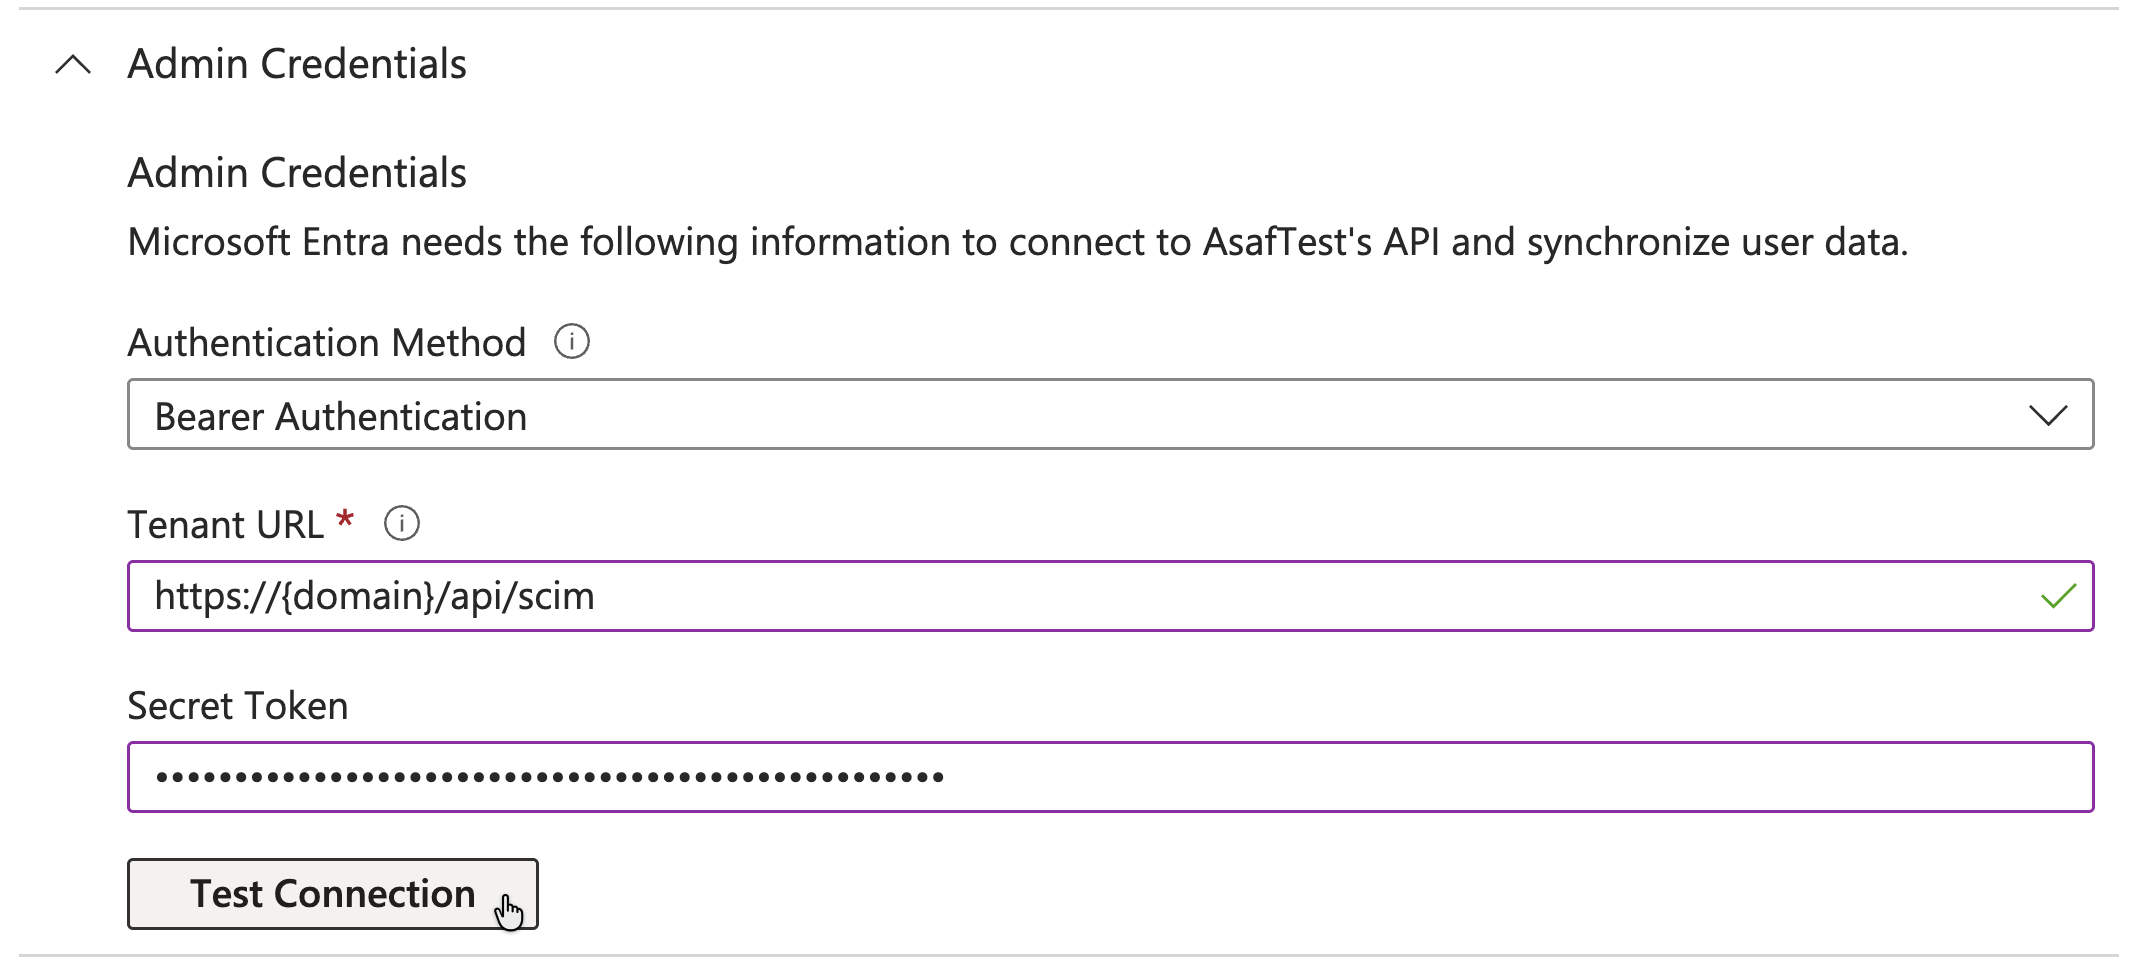
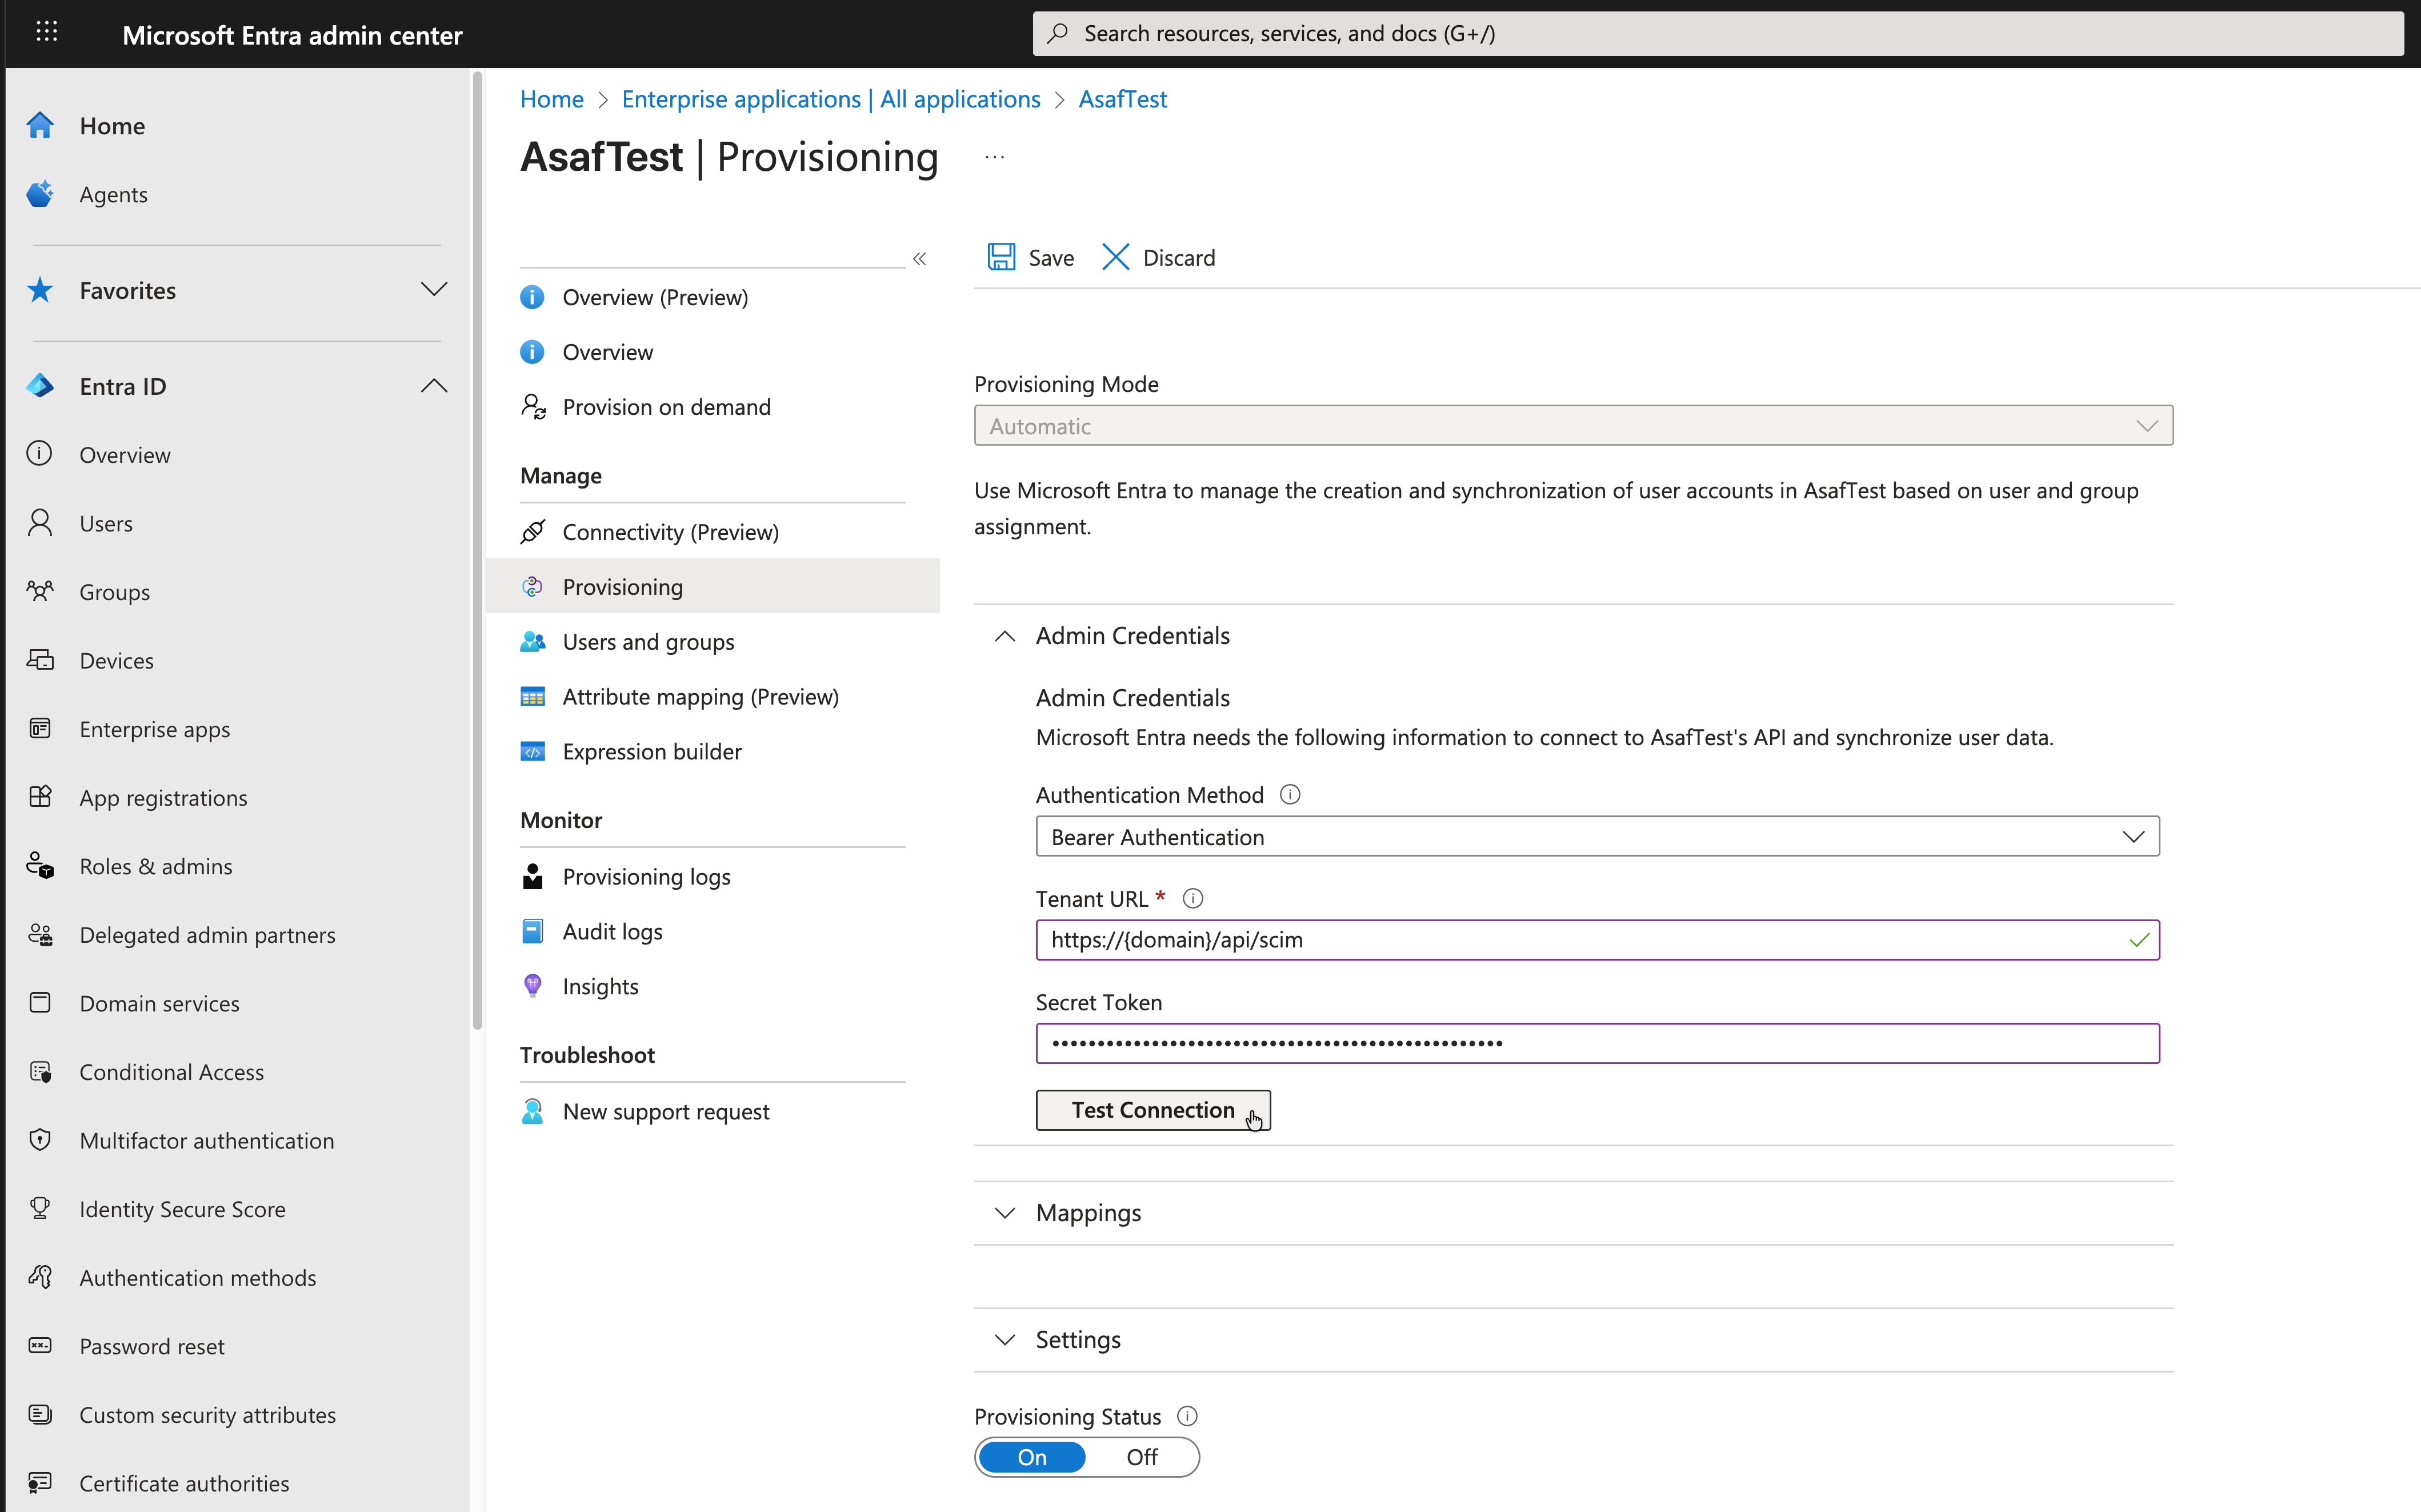
4. Configure Provisioning Settings
Navigate to the Provisioning section of your newly created application and enter:
- Tenant URL:
https://mycompany-swimm.io/api/scim - Secret Token: The token provided by your Swimm workspace administrator
Click Test Connection to verify the configuration.
5. Enable Provisioning
Once the test connection is successful:
- Set Provisioning Mode to Automatic
- Configure your Mappings and Settings as needed
- Set Provisioning Status to On
- Click Save to apply changes
Next Steps
After enabling provisioning:
- Users and groups assigned to this enterprise application will be automatically provisioned to your Swimm workspace
- User lifecycle changes (additions, updates, deactivations) will be automatically synchronized
- Monitor provisioning activity in the Provisioning logs section
Troubleshooting SCIM
If you encounter issues:
- Verify the tenant URL and secret token are correct
- Check that the enterprise application is assigned to appropriate users and groups
- Review provisioning logs for detailed error messages
- Ensure your Swimm workspace has SCIM provisioning enabled
This document is automatically kept up to date using Swimm.