Quick reference guide
This guide is designed to help you get started with Swimm, and to provide you with a quick reference for the most common tasks you'll perform while using Swimm.
Why use Swimm?
Traditional documentation solutions are often difficult to maintain, and engineers spread content across multiple tools, making it difficult to find and trust information when code changes regularly.
Swimm is designed to make it easy to create, maintain, and share your documentation with your team. Swimm Docs are markdown files that contain your documentation content and are stored in a git repository.
Getting Started with Swimm
To get started with Swimm, you'll need to create a Swimm user account under your organization's workspace. Once you've created an account and logged in, you will notice that your admin may have added repositories to the workspace for your organization's git hosting provider.
Note: If you do not see the repositories you would like to use with Swimm, reach out to the admin to add them to your workspace.
Once you have the repository you would like to use with Swimm, you can start creating Swimm docs.
Install the Swimm IDE plugin
Download the Swimm plugin for your favorite IDE to access Swimm docs directly from your code editor. Go to your extension marketplace and search for "Swimm", or use the links below:
| VS Code | JetBrains |
|---|---|
| Download Plugin | Download Plugin |
Having trouble? Check out our IDE troubleshooting guide for more information.
Doc features
Create and edit documents
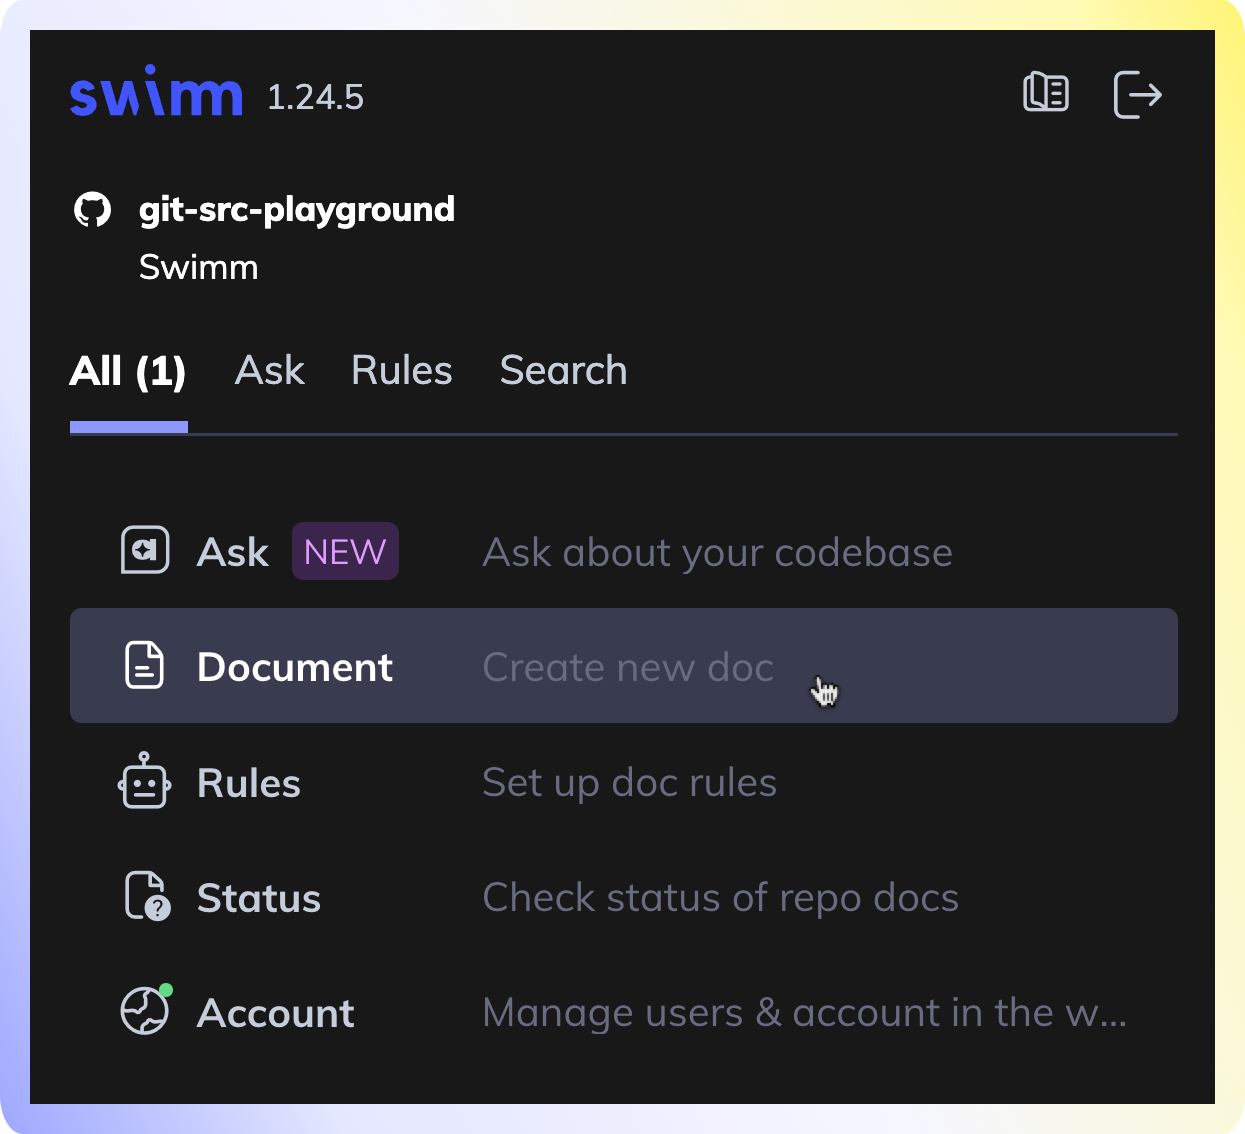
To create a new Swimm doc, click on the Document button in the IDE plugin. This will open a new markdown file in your IDE within the .swm directory.
- If you do not have any Swimm documents in your repository, the plugin will create the
.swmdirectory for you. - If you
git pulla repository with Swimm docs, the plugin will recognize the existing.swmdirectory and display the docs in the plugin.
Give your document a title
Start by giving your document a title. Our recommendation is to be as descriptive as possible - How to post analytics is a better title than Analytics, as the former tells the reader what they will learn from reading the doc.
Add content to your document
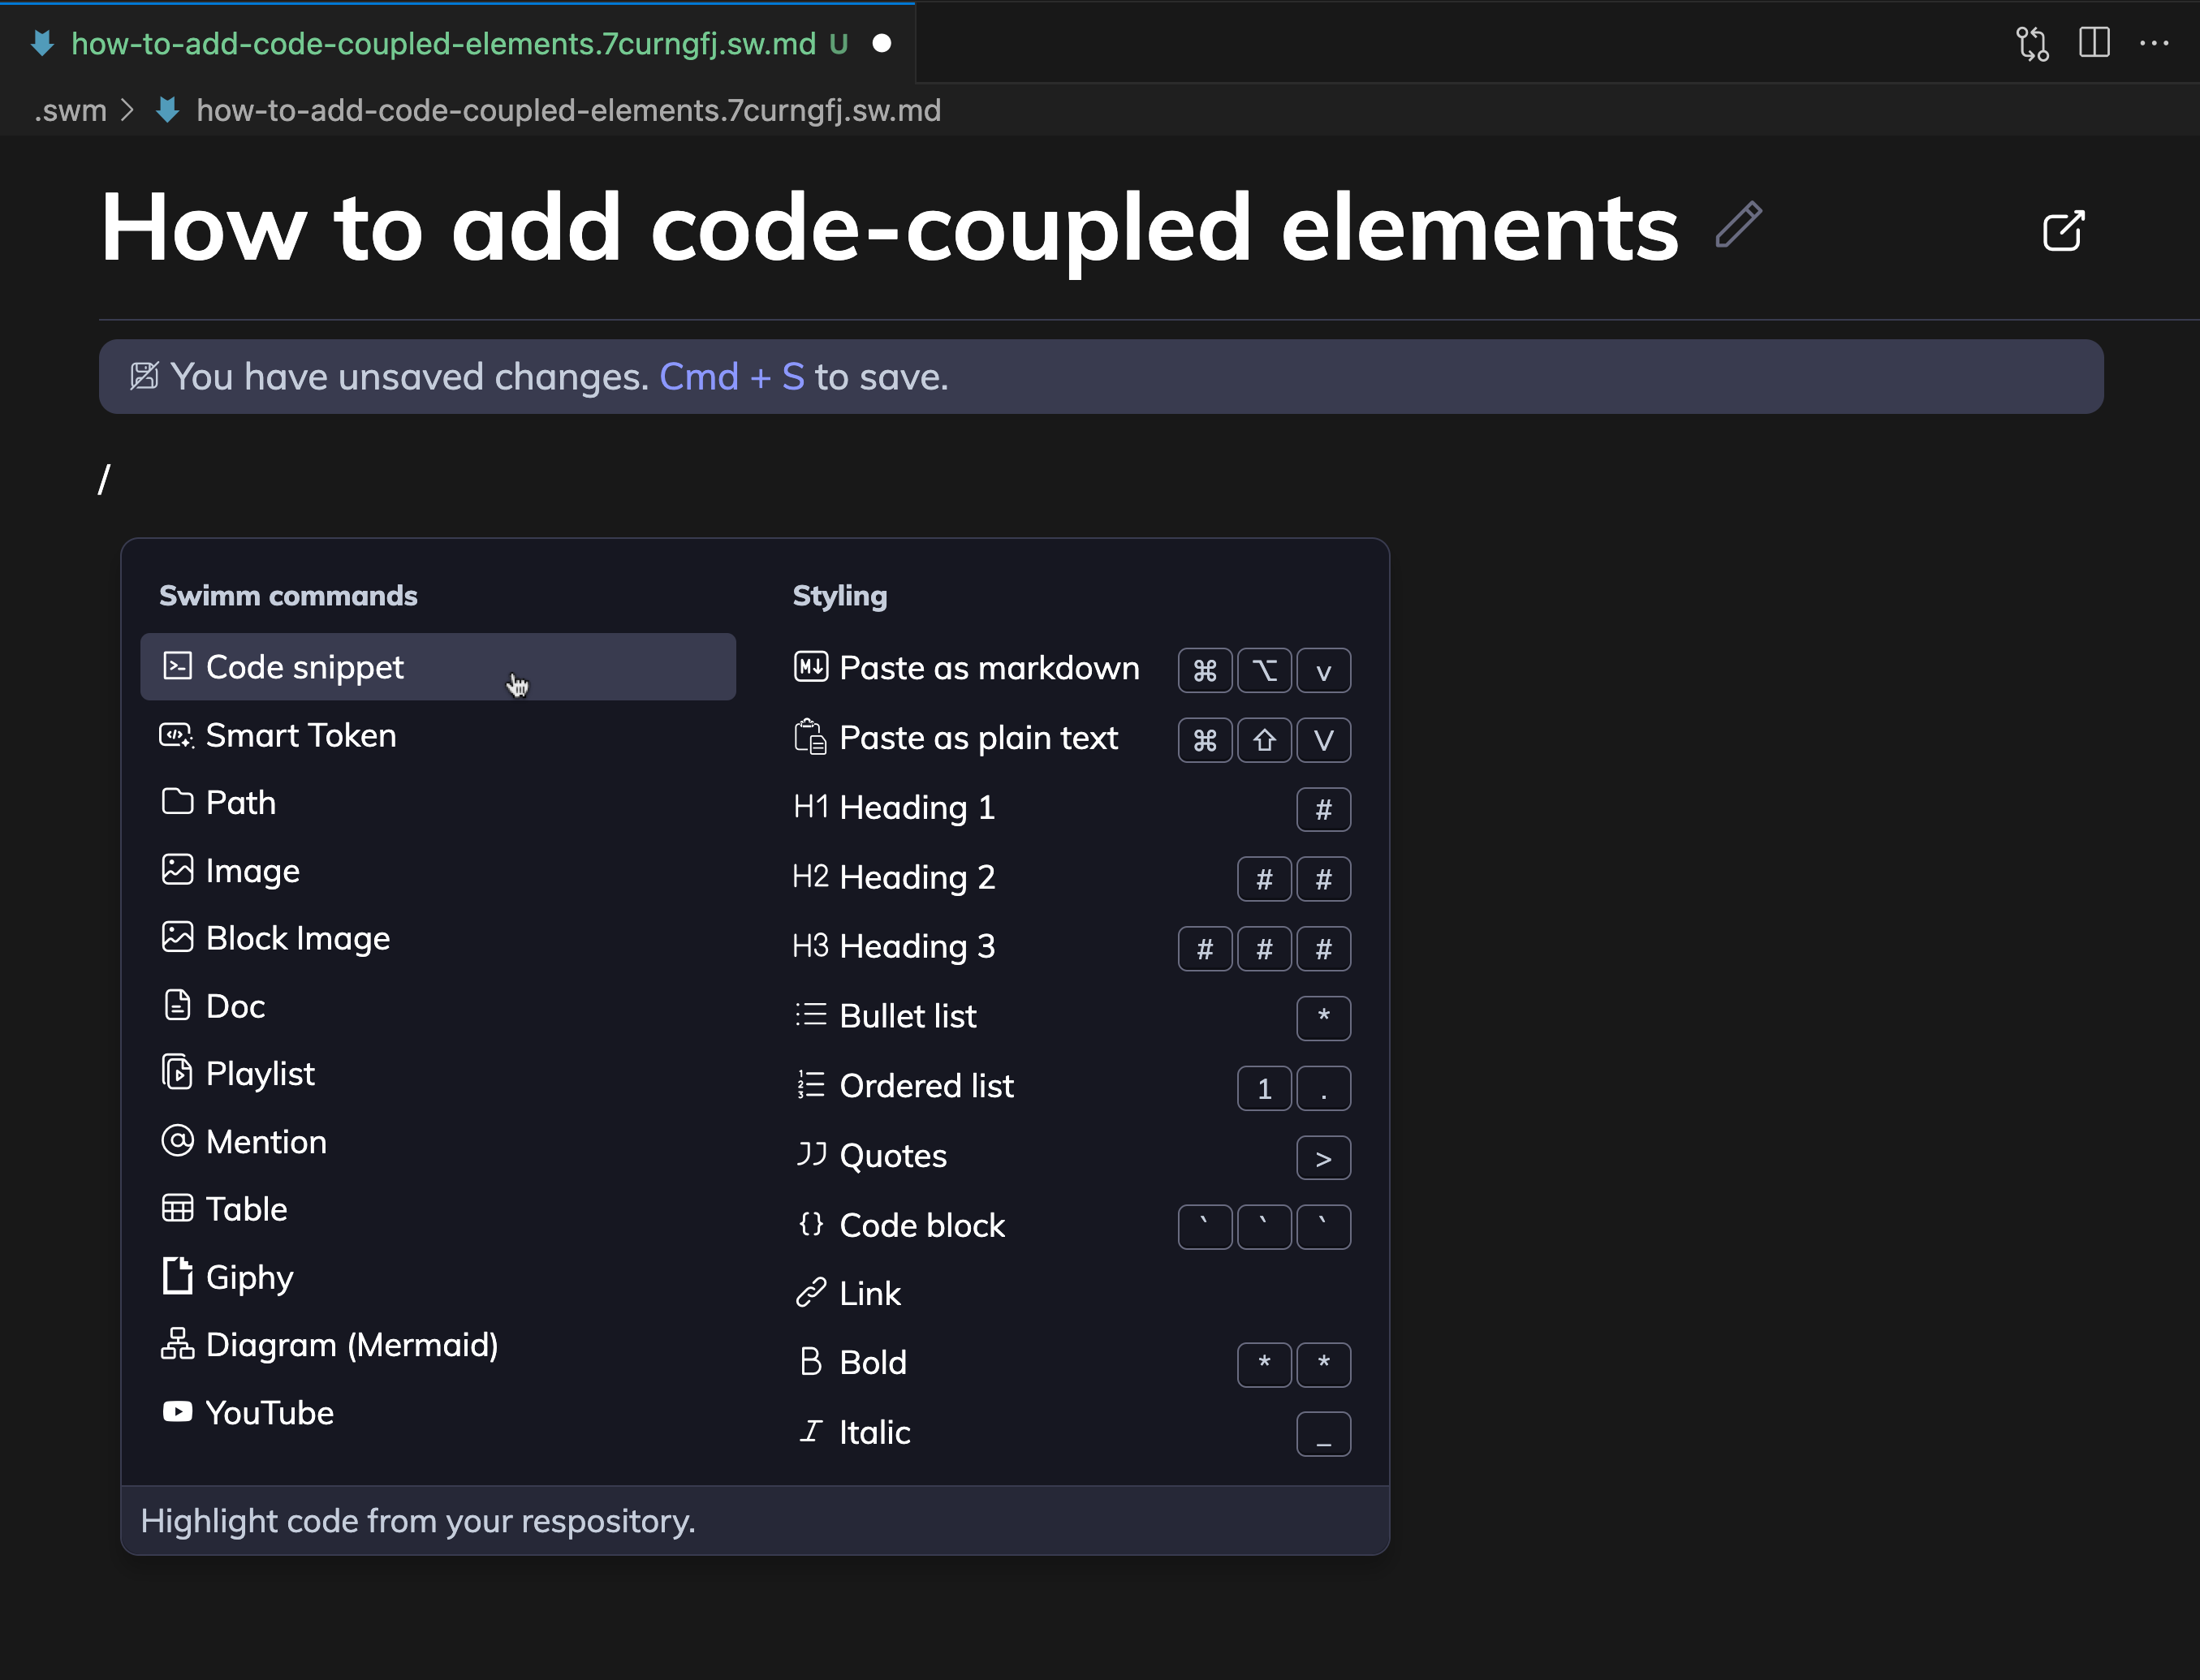
Write with Markdown to add content to your Swimm doc. We encourage writers to take advantage of our Editor commands to make writing easier and code-couple your documentation to your codebase.
Any time you link code to your documentation, Swimm will automatically update the code snippets in your docs when the code changes. This ensures that your documentation is always up-to-date.
1. Type /Code snippet and press enter
2. Select snippet from codebase and click Add to Doc
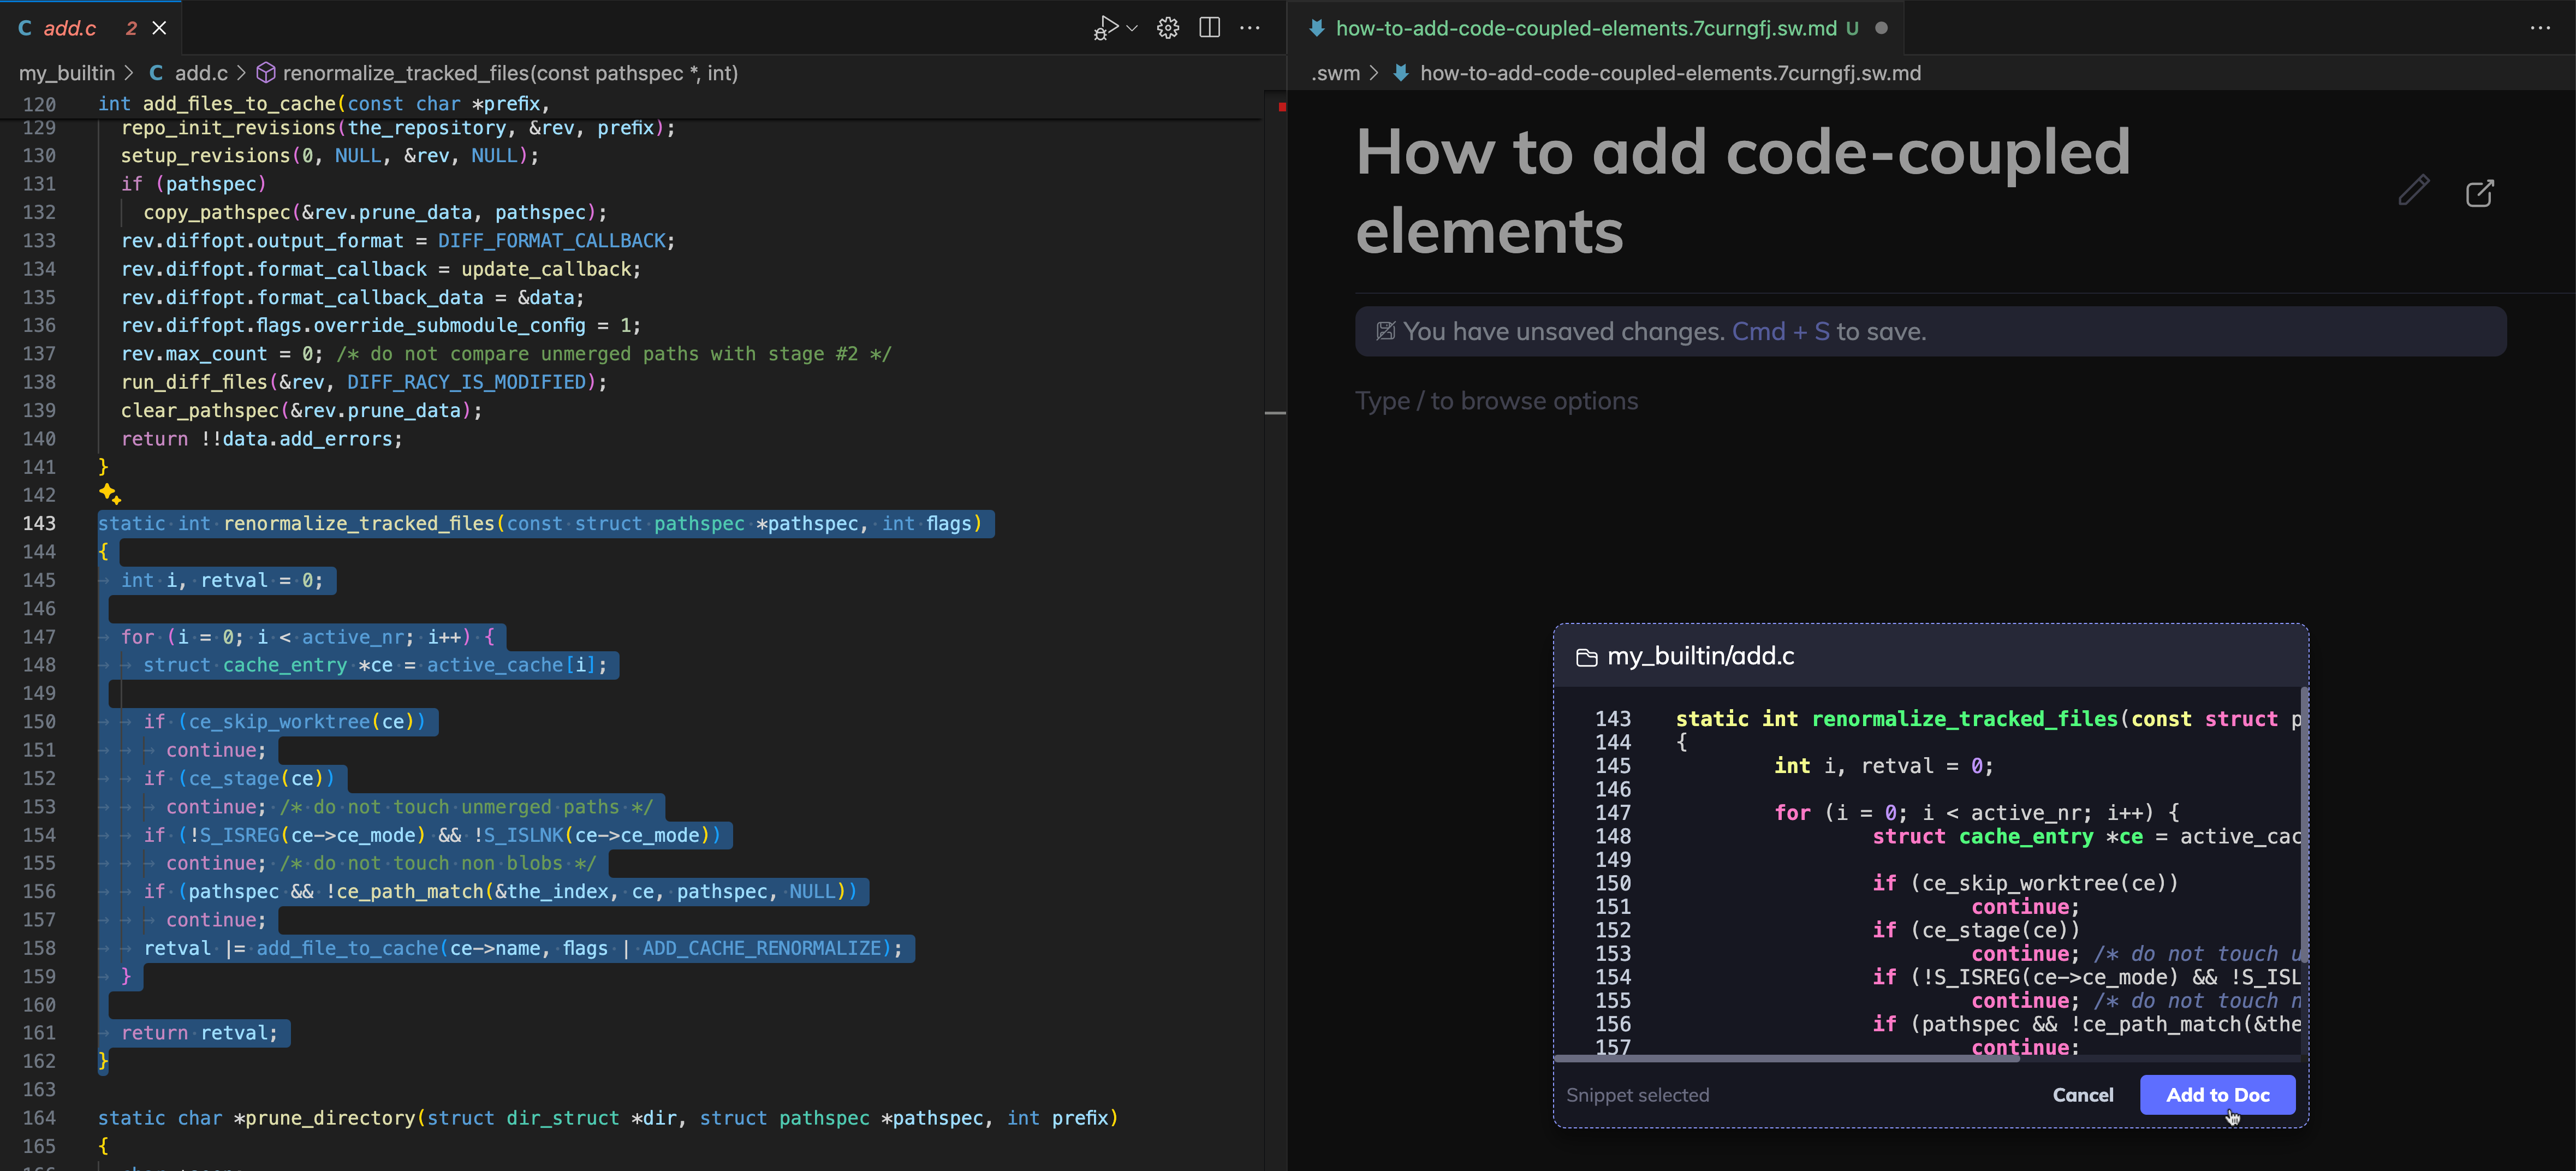
3: Save Swimm doc
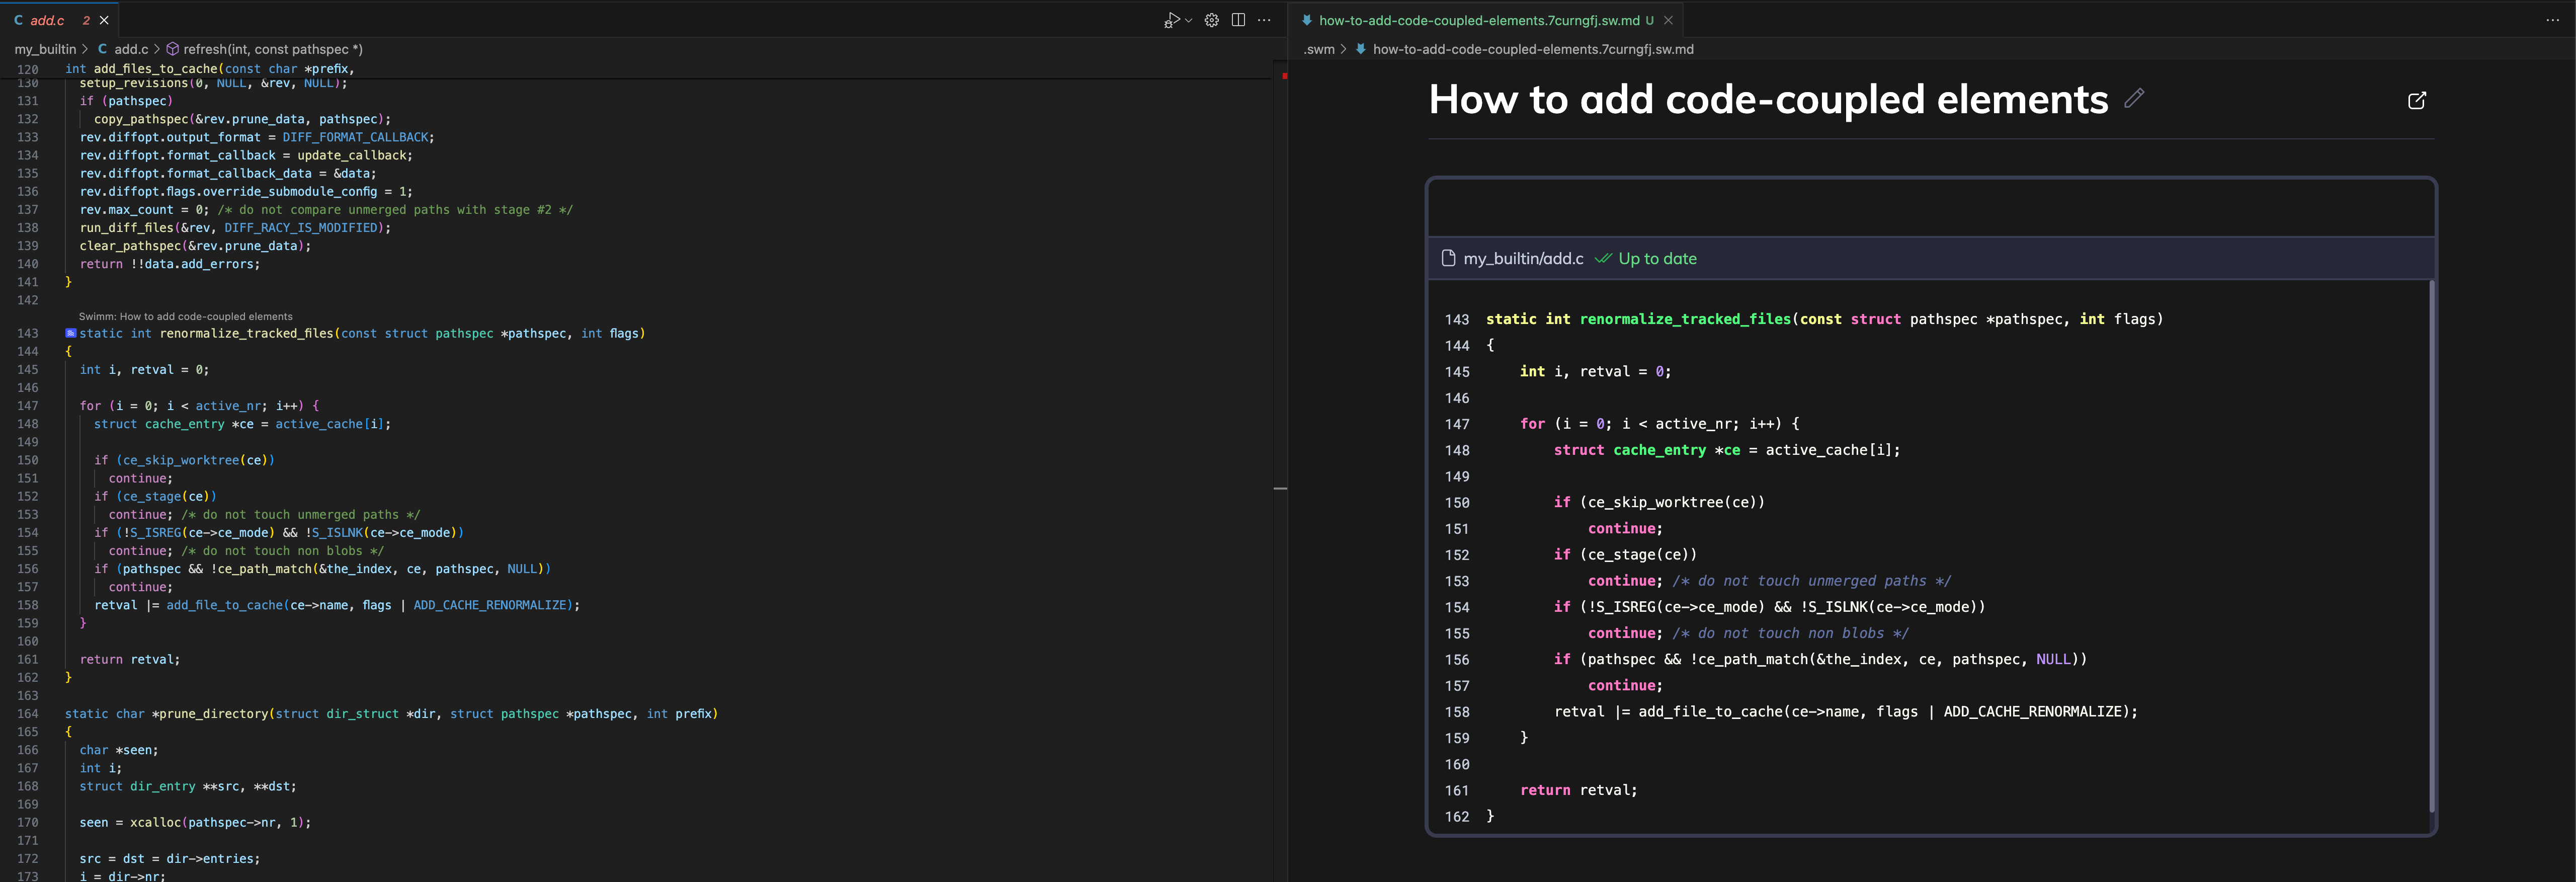 Note the blue icon in the gutter that indicates a code snippet is linked to this doc.
Here is a list of important Swimm commands.
| Command | Description |
|---|---|
/Code snippet | Add live code to your document with code snippets. |
/Smart Token | Link to a specific token from your code, like a function name, variable or specific value. |
/Path | Add a path of a directory or a file in your document. Swimm will track it in case it is renamed, moved, or deleted. |
/Image | Add an image to your document, stored in your repository (default) or Swimm's cloud servers. |
/Doc | Add a link to an existing Swimm doc. Swimm will track it in case it gets out of date and notify. |
/Playlist | Add a link to an existing Playlist. Swimm will track it and notify you if it’s out of date. |
/Diagram | Add a code-coupled diagram. |
/AI or /Generate description | Generate a description for the snippet with Generative AI. |
Discoverability of docs
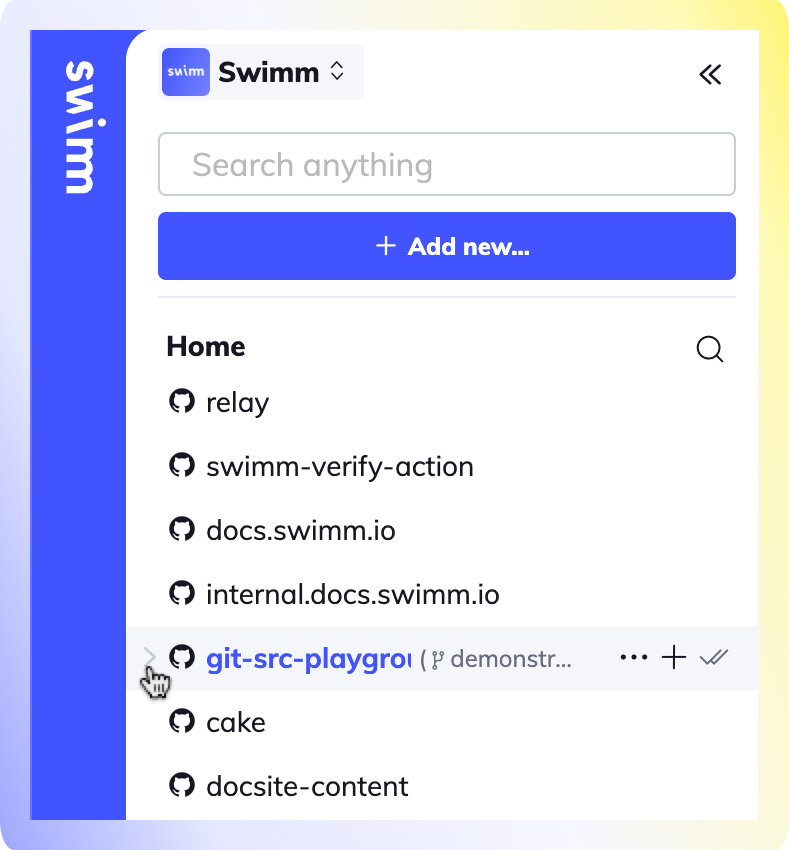
Swimm makes it easy to find the documentation in your IDE in two ways:
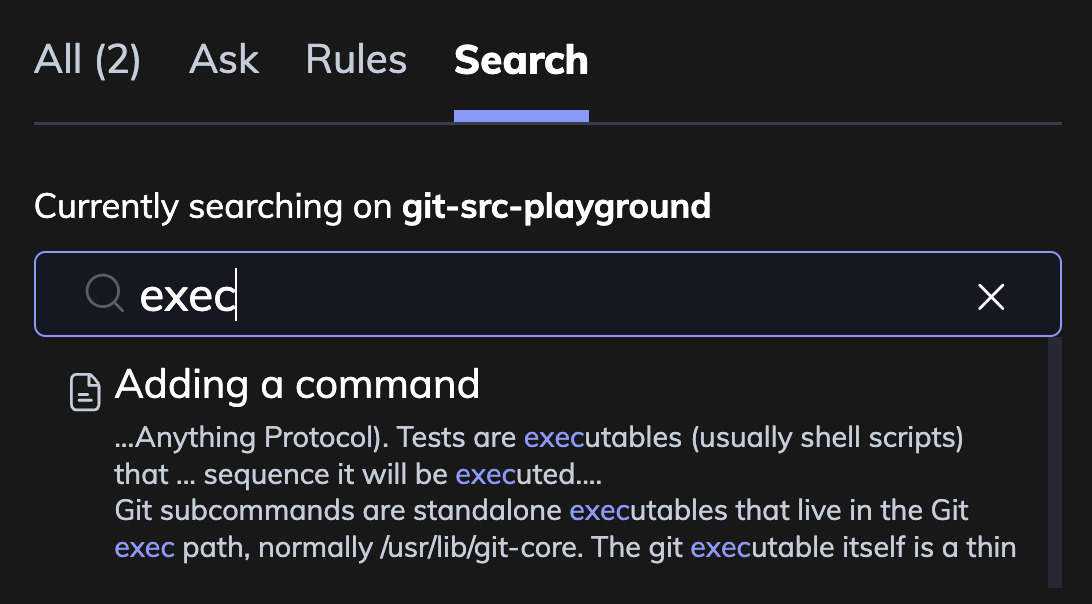
1. Plugin search
The search bar is located at the top of the plugin.
2. Code snippet waves 🌊
Swimm makes it easy for documentation to find you in a file that references a code snippet in a Swimm doc. When you hover over the blue icon in the gutter, you will an option to open the documentation that references it.

Auto-sync and doc maintenance
When you make changes to your code, Swimm will notify you that the code snippet in your doc is out of date.
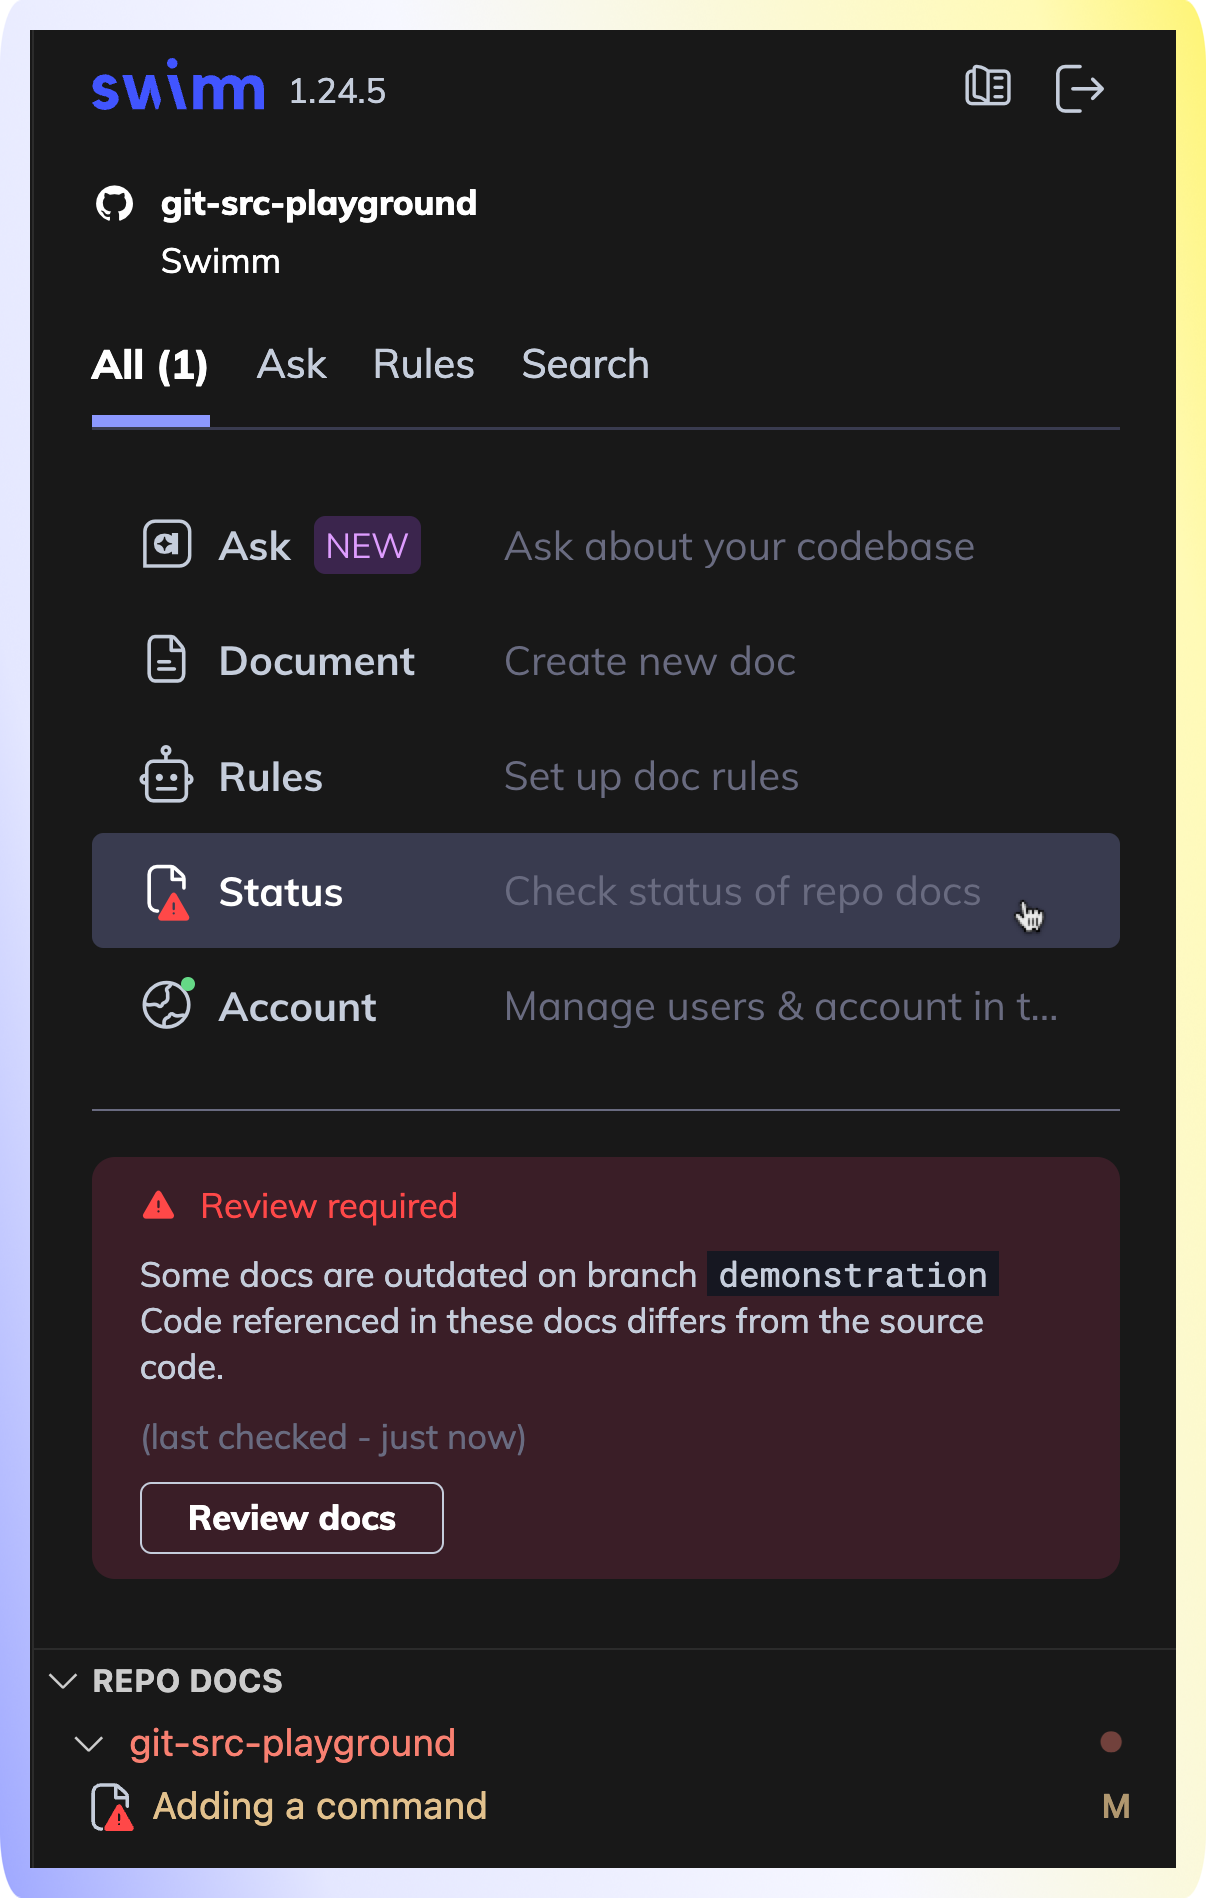
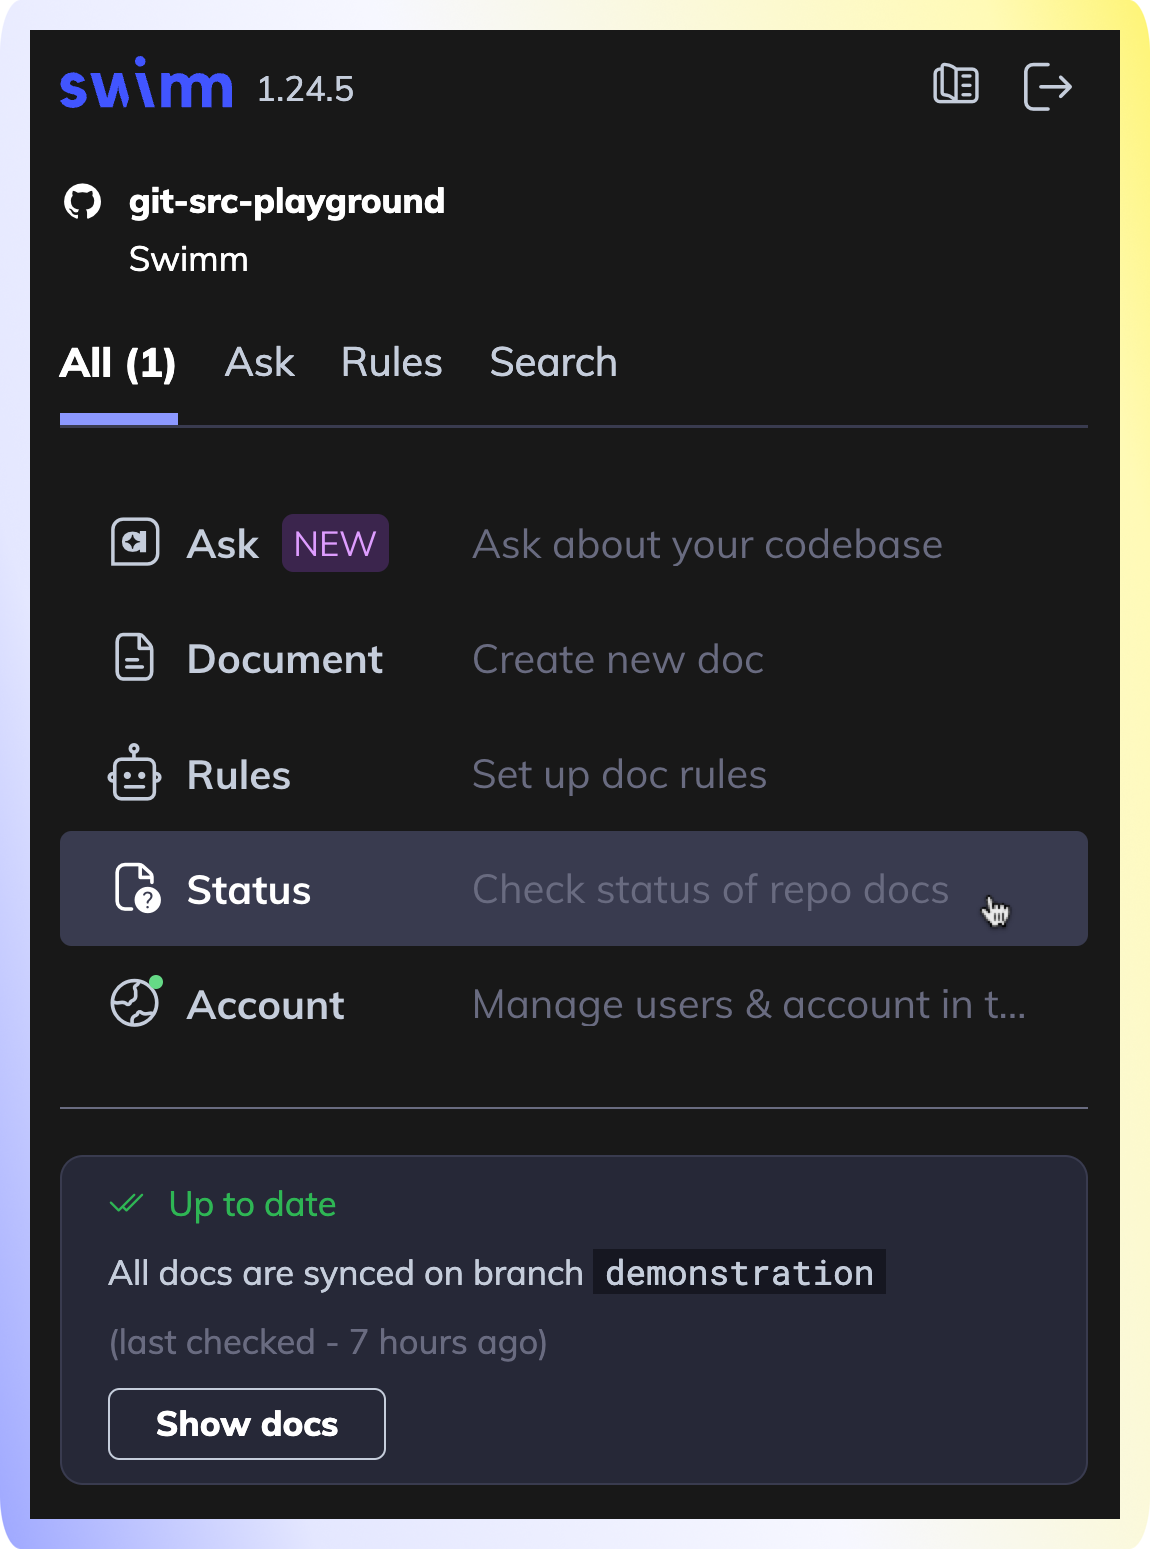
1. Click Status to verify your documents
If your code has changed and haven't updated your Swimm docs, you will see a status of "⚠️ Review required". Click on the affected doc(s) to update the code-coupled elements that are outdated.
2. Open your affected document, reconcile the changes and save it
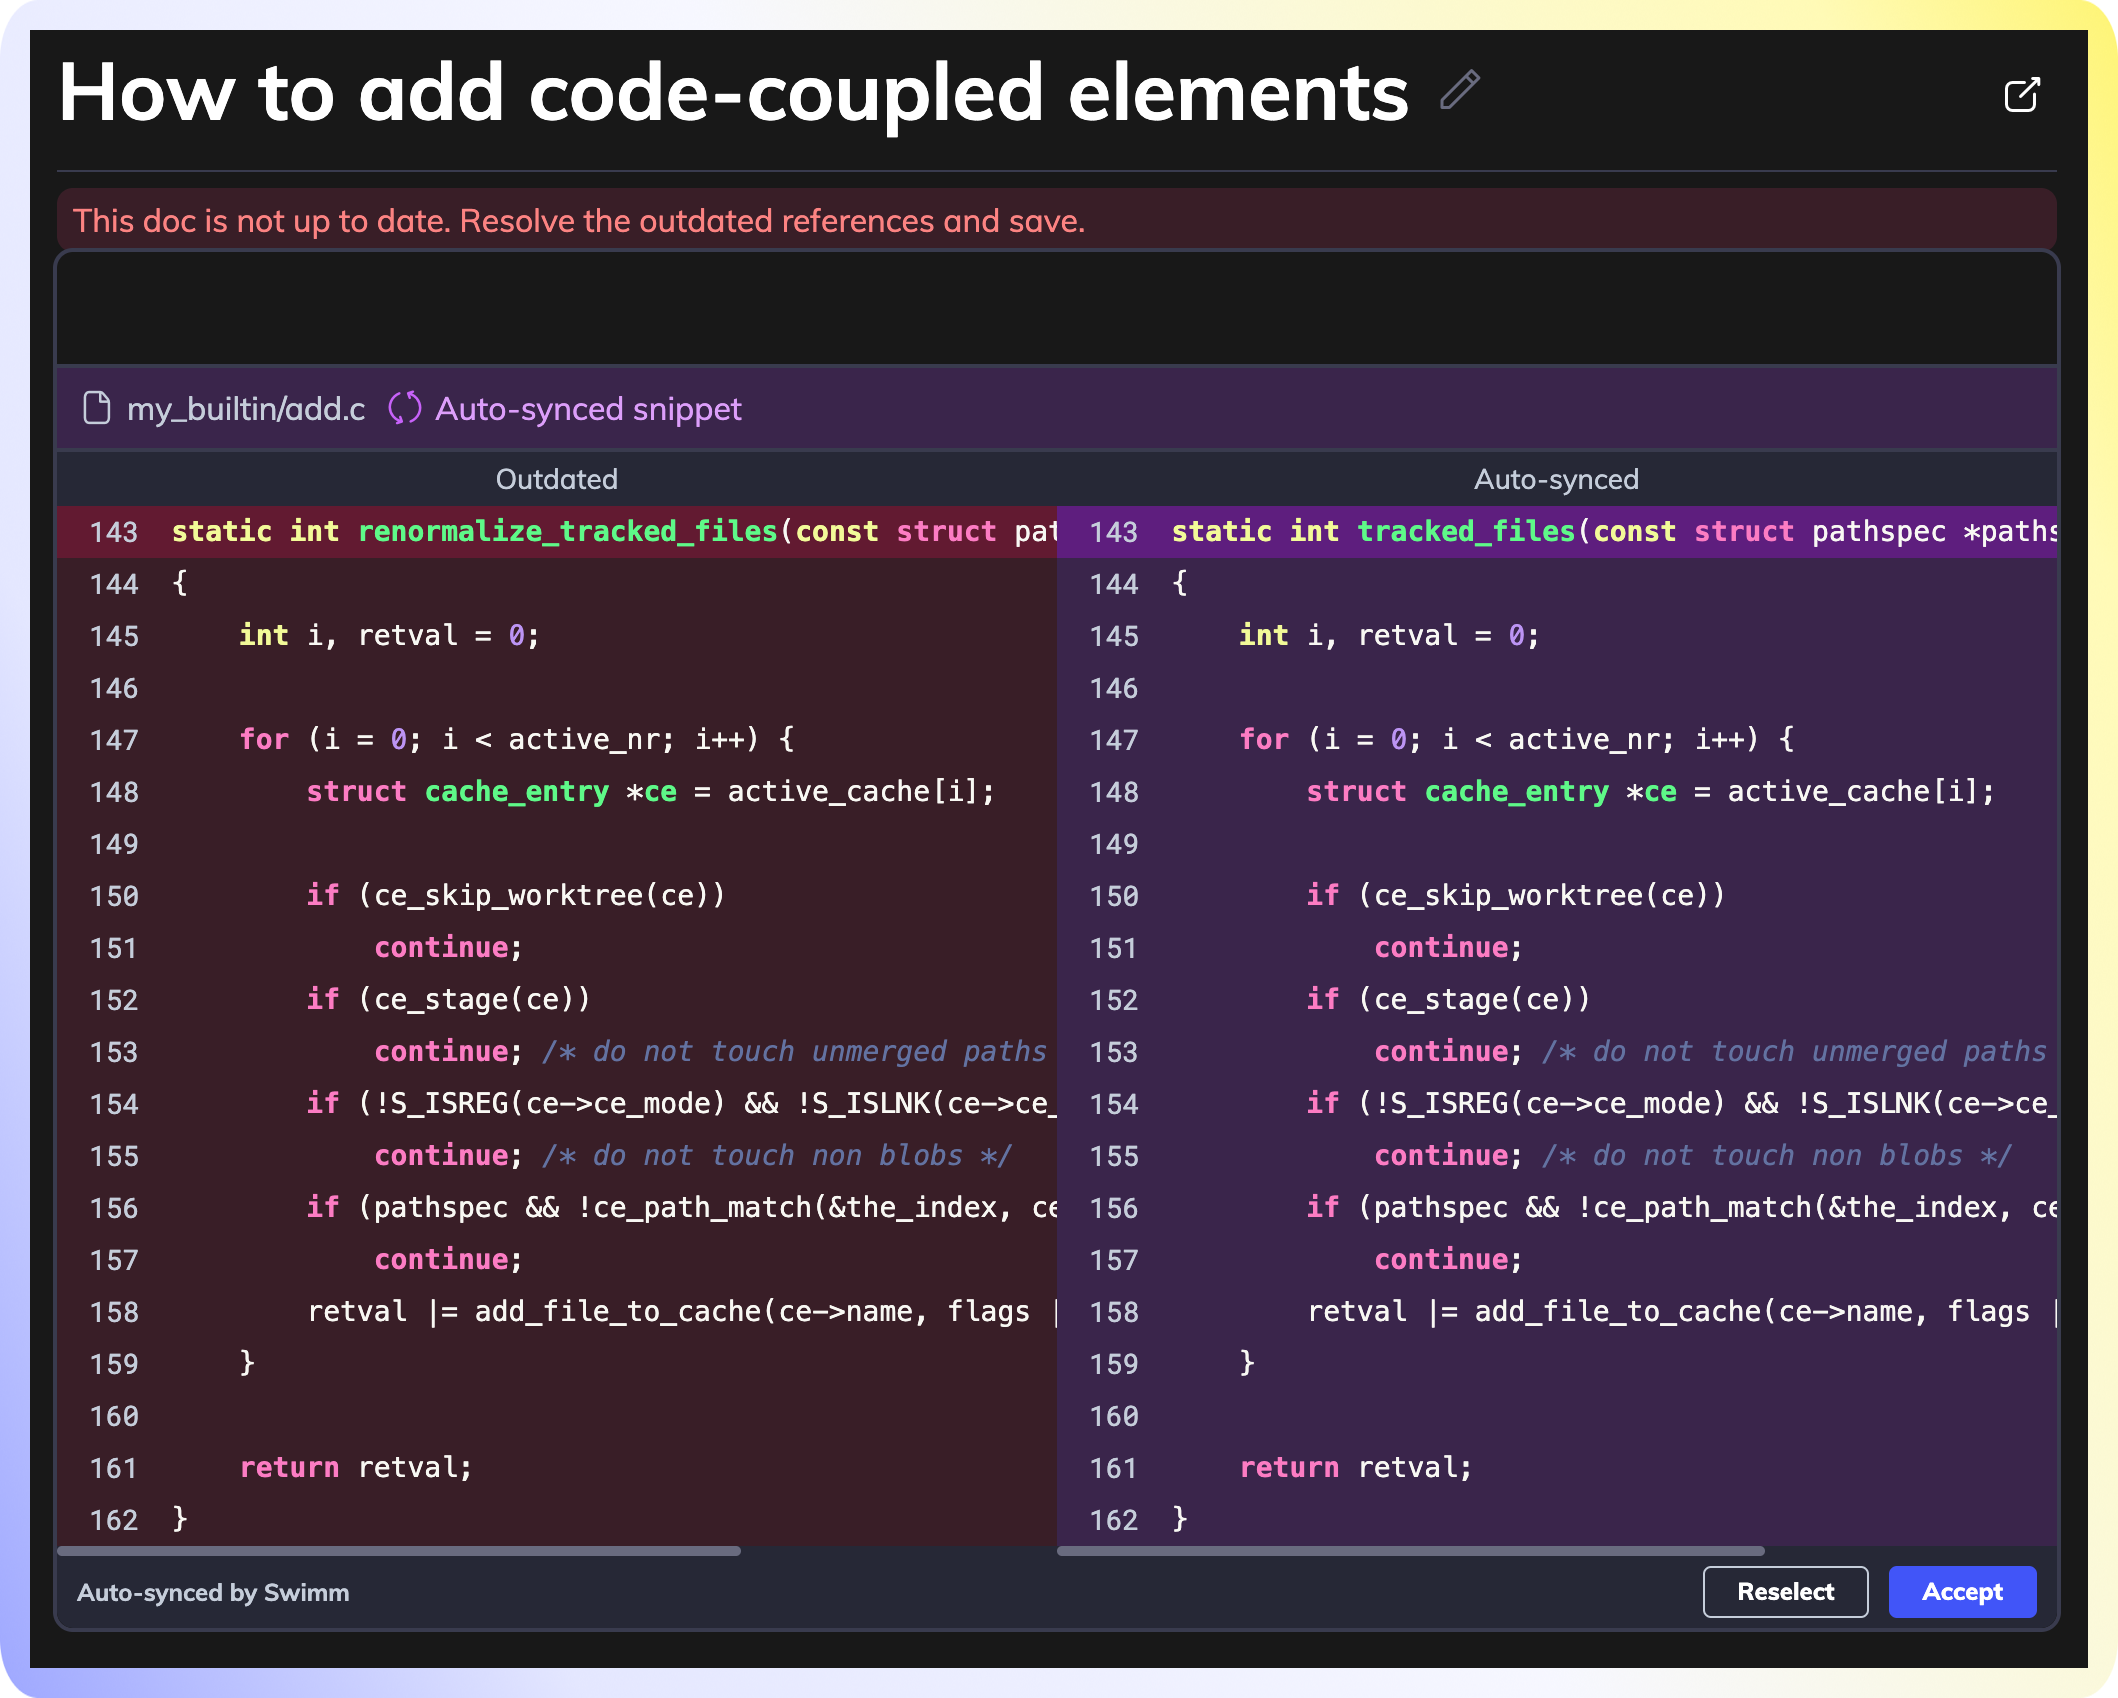
3. Verify your docs are up-to-date and commit to the repository
Doc rules
Doc rules are a way to enforce documentation standards across your organization. You can create rules that surface knowledge to your fellow engineers as they type inside files within the IDE.
Swimm's Rules is a feature that links your codebase to relevant information using Regex rules.
When a rule is triggered, a notification in the form of blue waves that underline the code will appear as you finish typing, prompting the user to hover and read the relevant information and linked Swimm doc, if attached.
Creating rules
-
Create a new rule: In your IDE, open Swimm's plugin. Here, you'll find the
Rulesbutton. Click on it to start creating a new rule. -
Choose the relevant Swimm document (Optional): This document will be linked with your regex rule and will be displayed whenever the rule's conditions are met in the code.
-
Enter rule details:
- Title - will be shown in the
Rulesview to identify this rule. - Description - will be shown when the user hovers over the marked code.
- Restrict rules to paths or types - you can restrict the rule to match only to specific paths or file types.
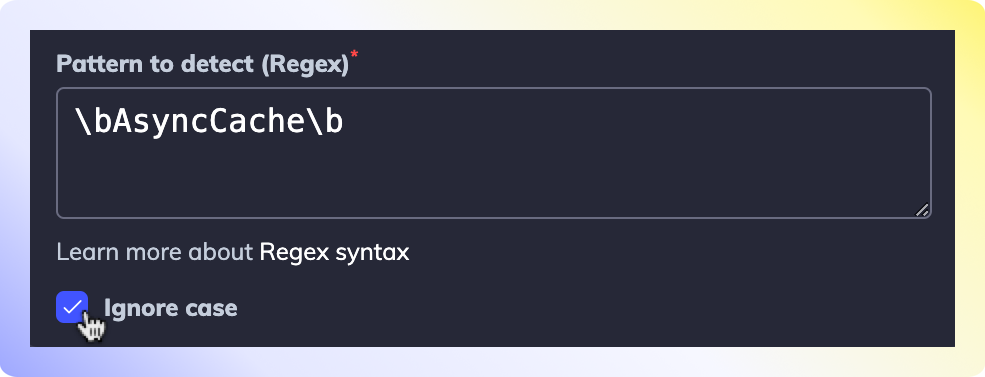
- Regex - the regex that should be met for the rule to apply.
- Title - will be shown in the
(Optional) Case-insensitive rules
If you want your rule to be case-insensitive, click on the Ignore case checkbox.
Save, test and commit
-
Save and test: Click
Apply, and you will be able to see the highlighting in your code. We recommend testing in your IDE to see that the rule works the way you expect. Open a file and type to match the Regex pattern you defined. You should see the Rule match with the text you typed. If it doesn't, you may need to adjust the Regex pattern. -
Commit: Rules are stored in your code under the
.swm/rules.jsonfile. Commit and push your changes to this file. Once your colleagues pull the latest version which includes your changes, everyone will share the same rules.
Playlists (Swimm web app)
Playlists are a way to group related Swimm docs and external resources together. You can create a playlist for a specific feature, project, or team, and share it with your team.
Create a playlist
1. Select your repository and Create your Playlist.
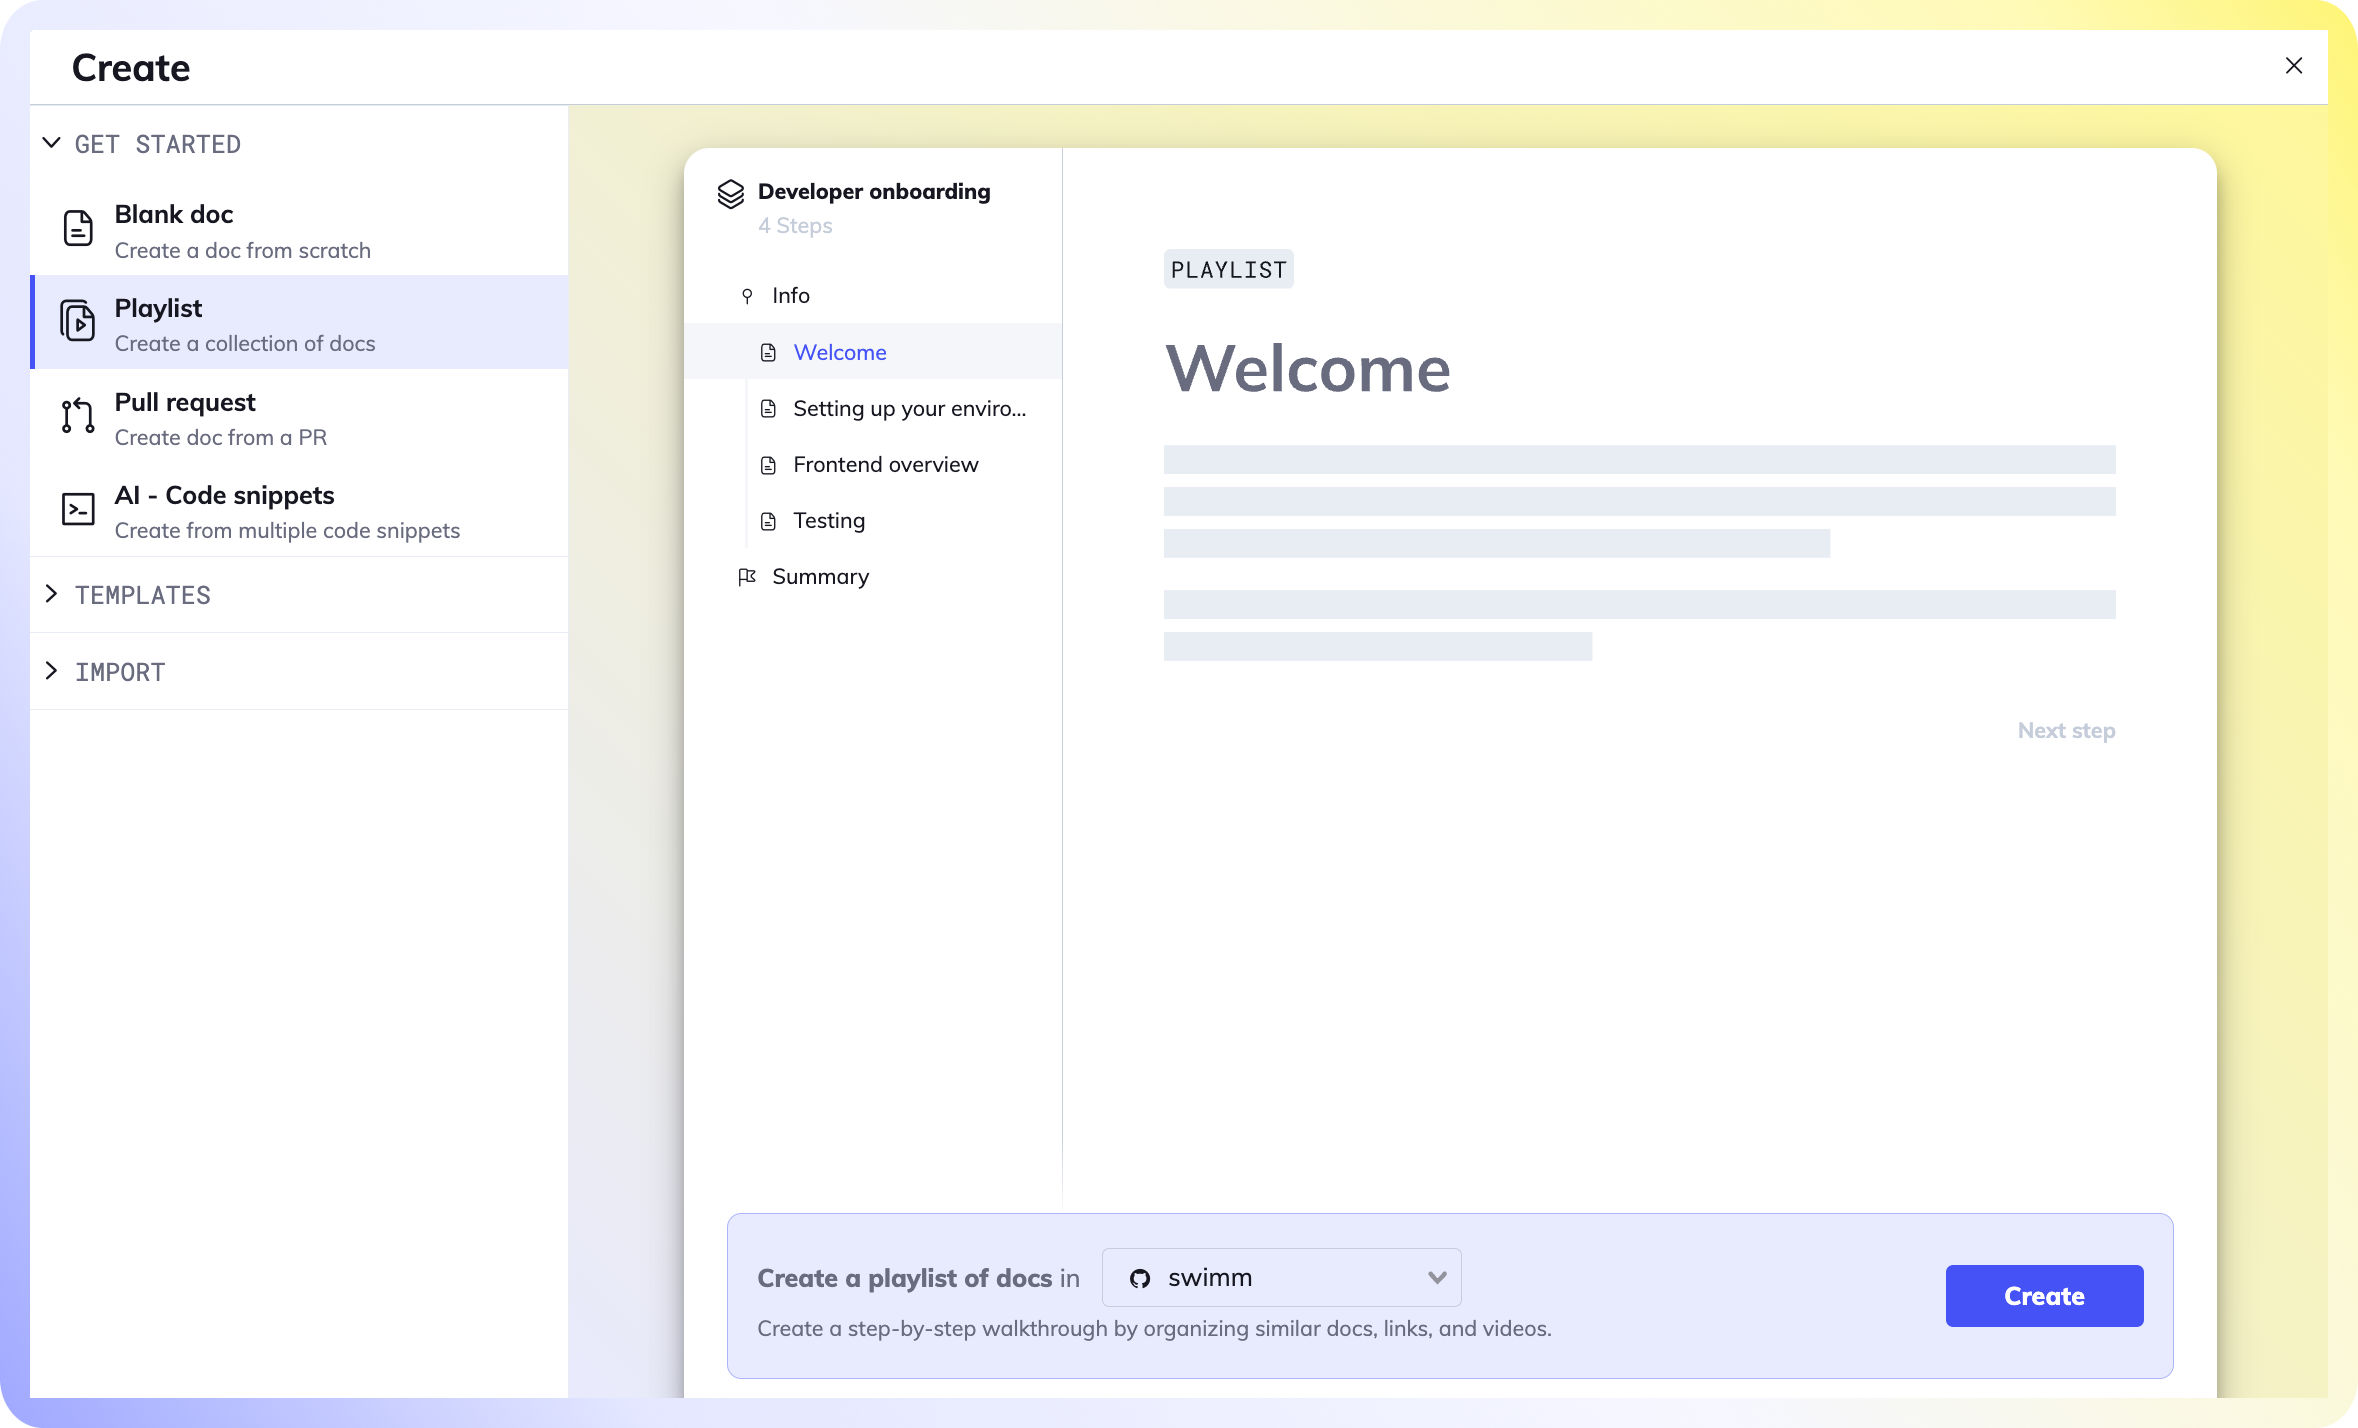
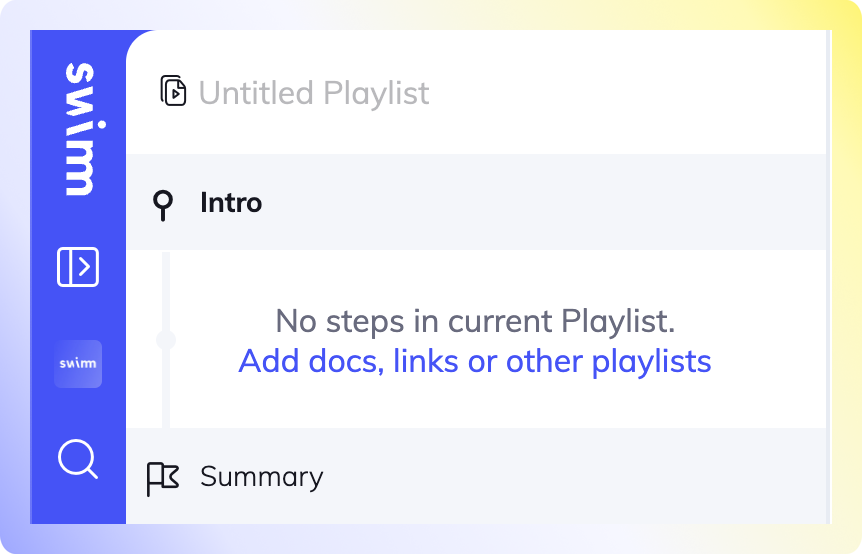
2. In the Intro section, give your playlist a name and description. Add Swimm docs you would like to include.
If you have separate Playlists that relate to each other, you can nest Playlists within Playlists.
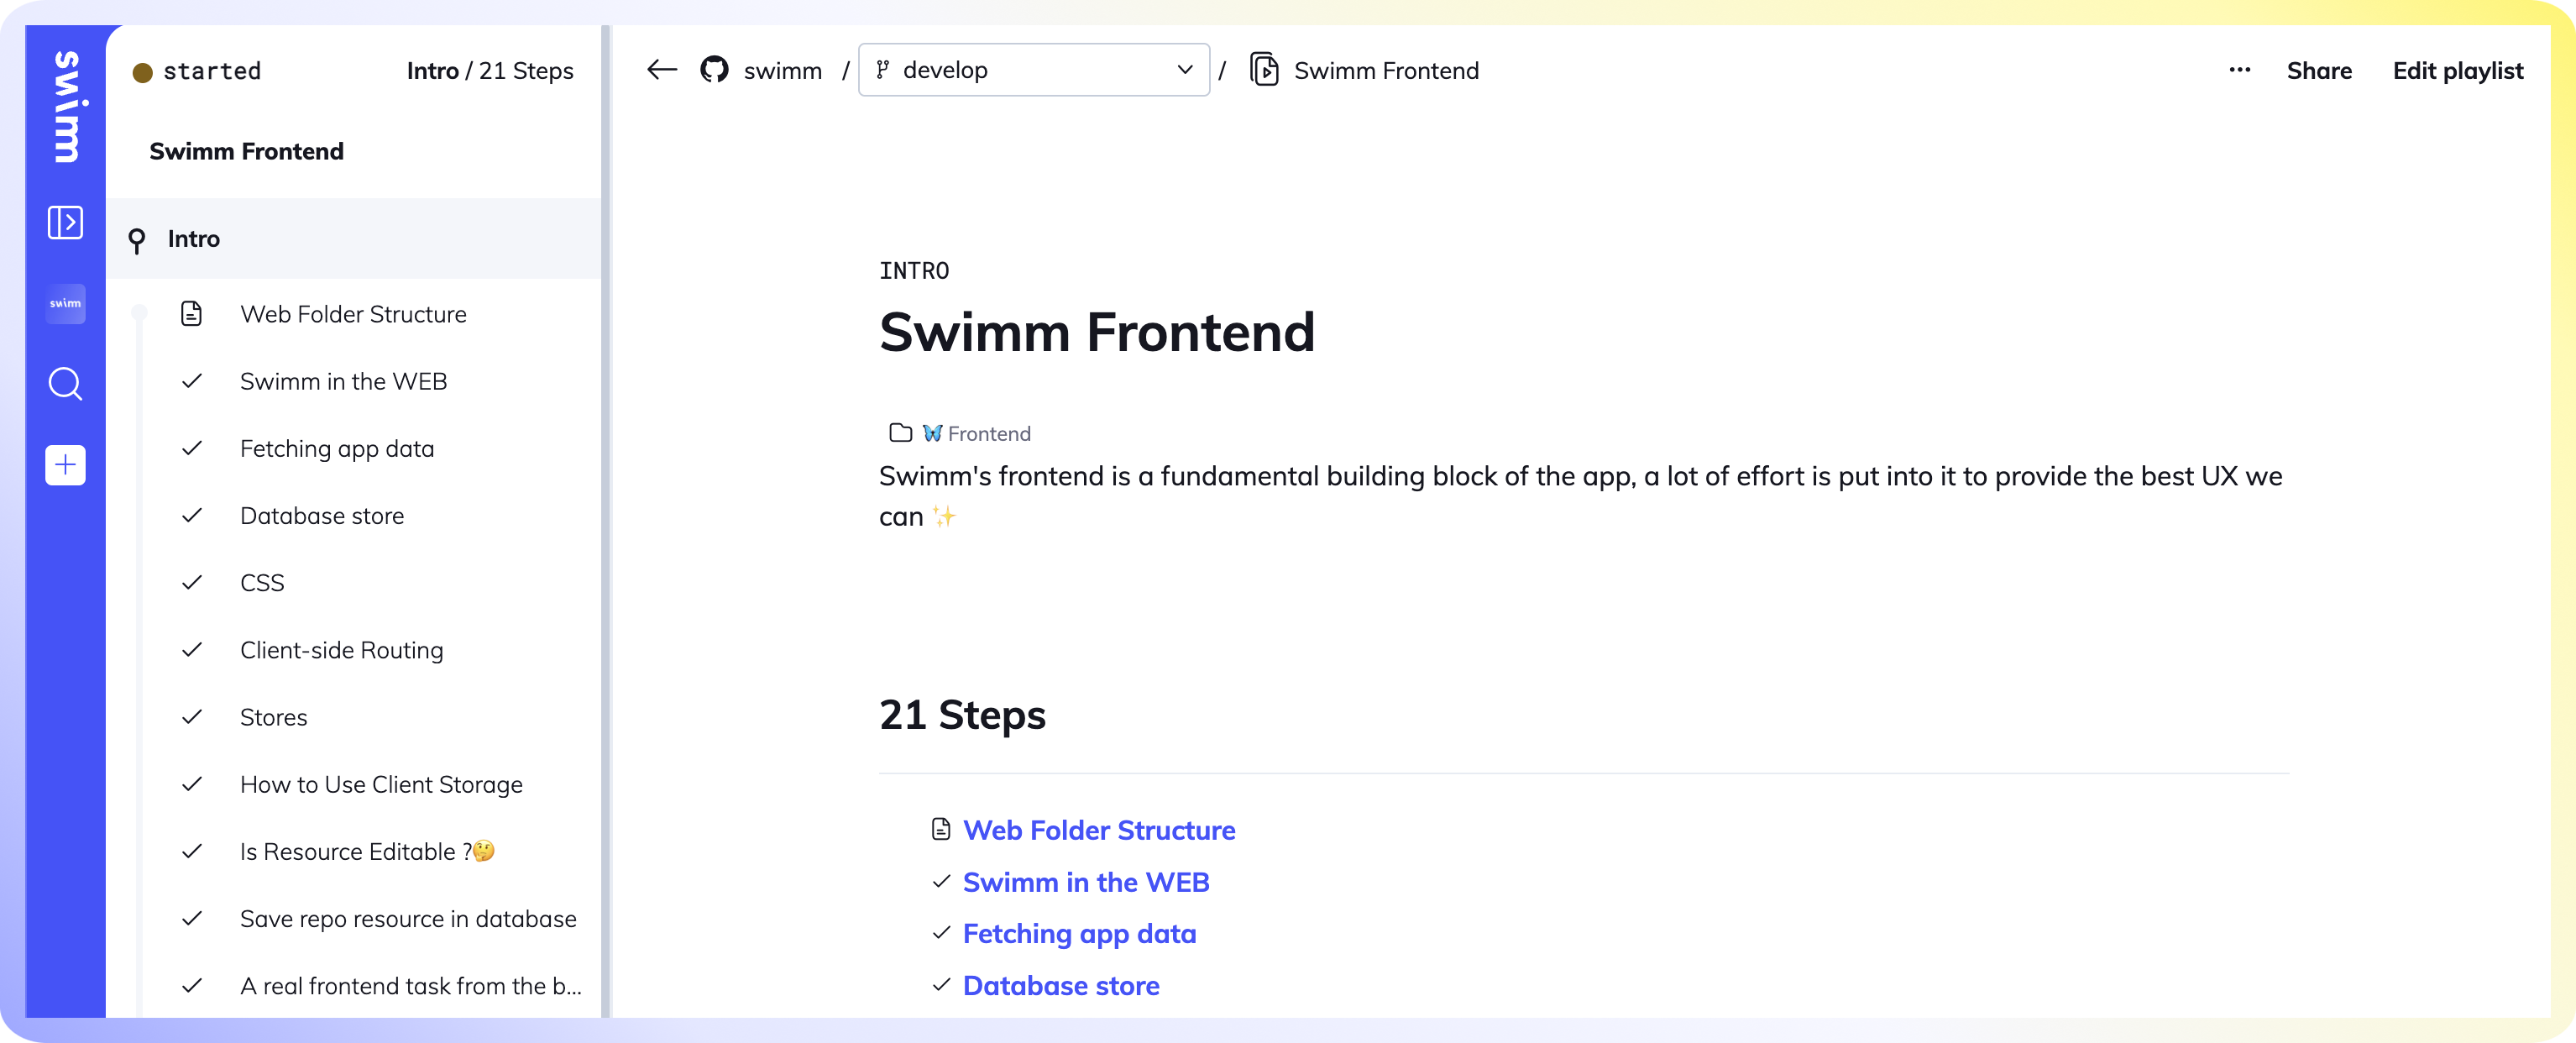
3. Completed Playlists can be accessed within the repository in Swimm
Organize docs (Swimm web app)
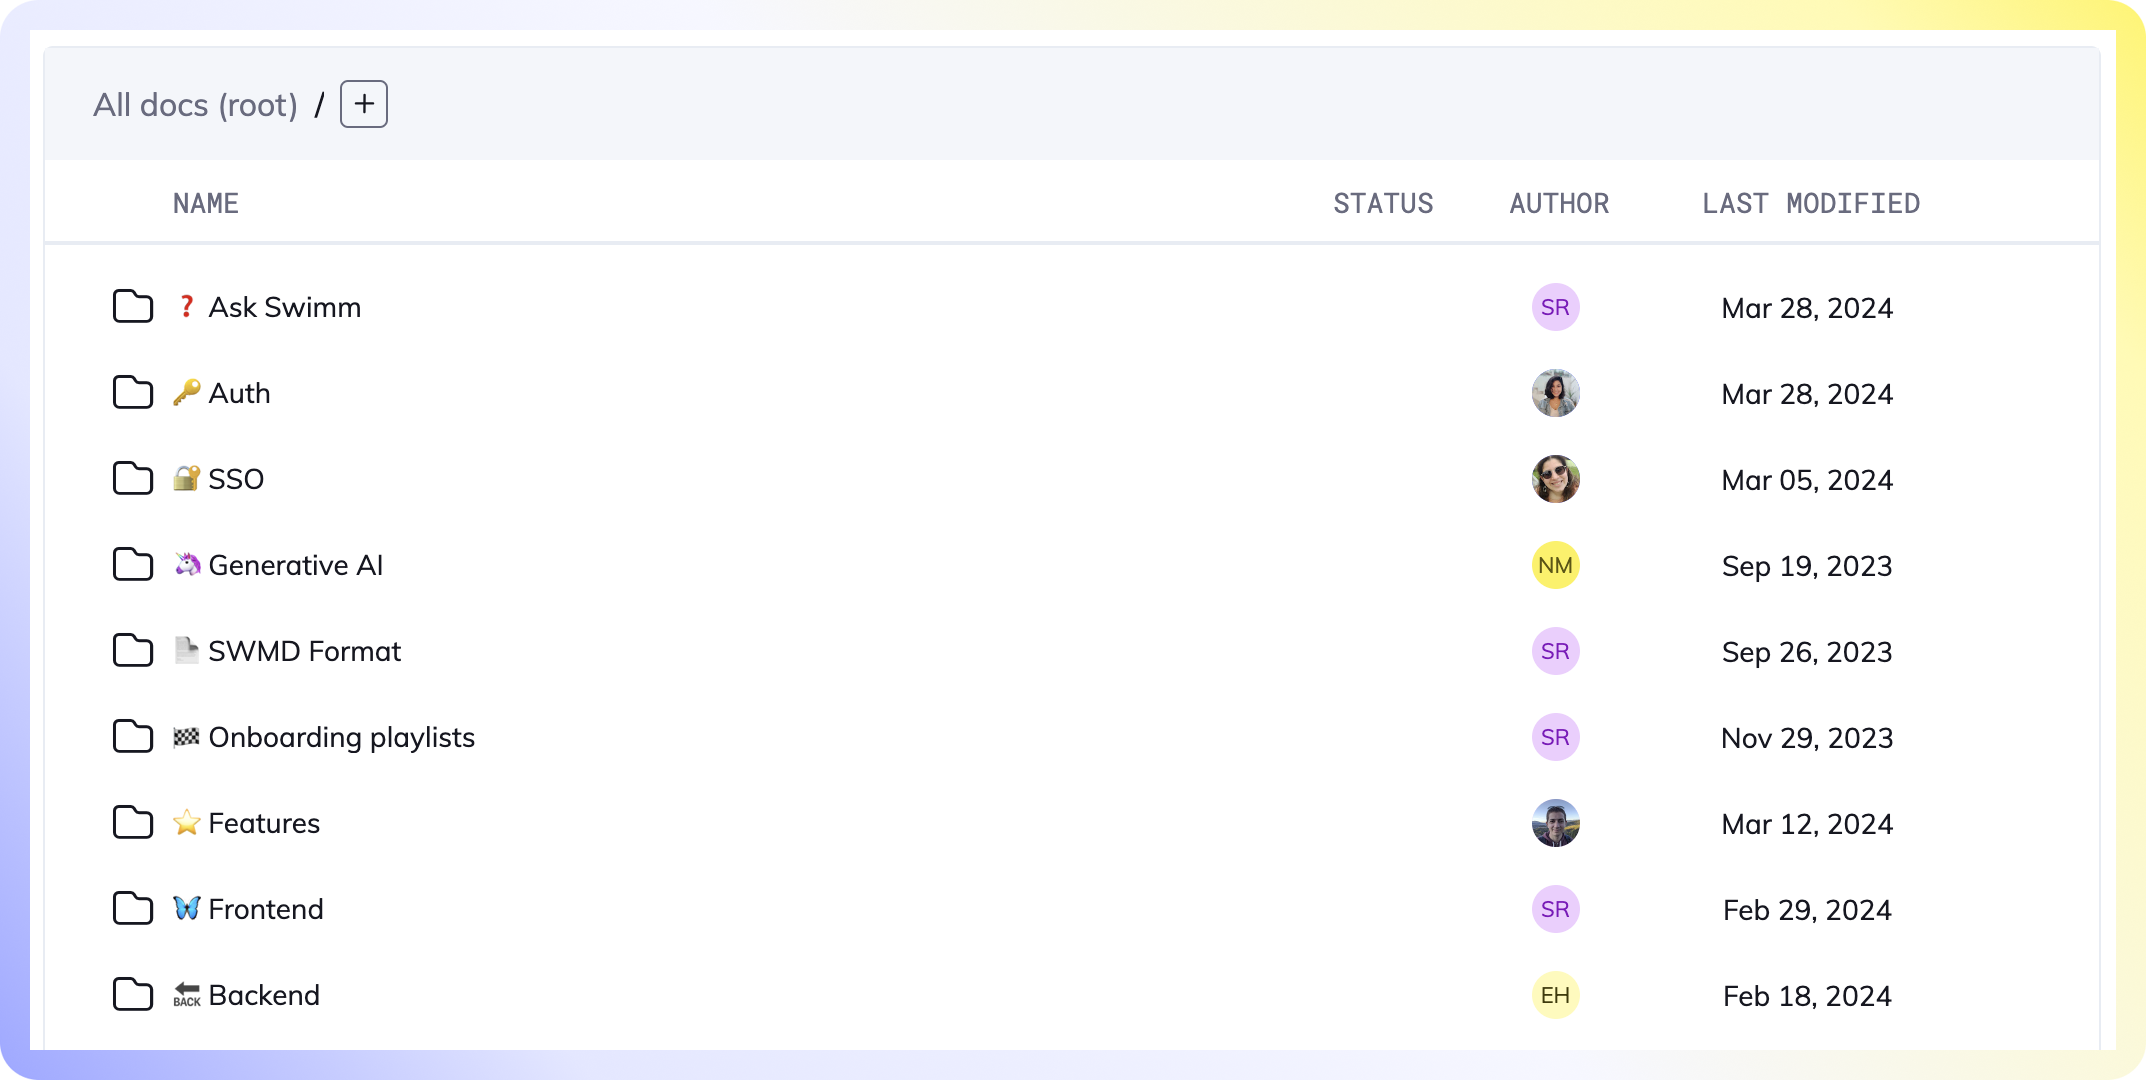
Folders
Folders allow you to create a hierarchy, by grouping related documents or playlists. Every doc, playlist and folder in the repository can have a parent folder.
Learn more about Folders.
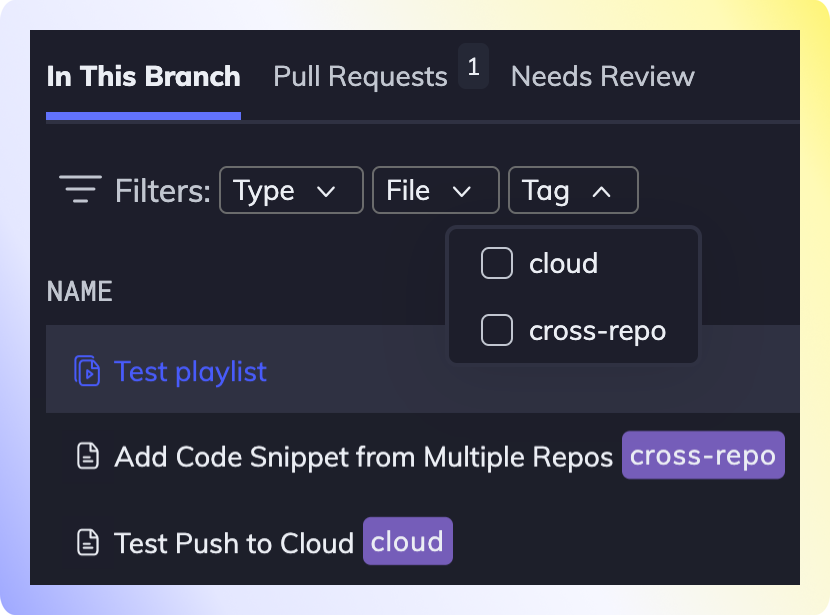
Tags
You can put tags on each doc, and then filter the tags in your repos to quickly find relevant documents. Tags can be assigned to local drafts, as well as docs that have been committed to the repo. When a tag is created, it can be used across all of your workspace repositories.
Best practice guides
Here are a list of Swimm guides to download and share with your team.
| Command | Description |
|---|---|
| Writing tips | This guide will teach you how to write effective documentation in 5 steps. |
| /ask Swimm | Our AI assistant that answers technical questions about your codebase. This document describes best practices to get the most out of /ask Swimm. |
This document is automatically kept up to date using Swimm.