How to create an Okta application for Swimm
To authorize SSO with Okta, using OpenID Connect (OIDC), for your organization, we will need you to create an SSO application on your Okta instance. Follow the steps:
Create Okta App
- Create App Integration
- Open ID Connect
- Application Type
- App Integration Name
- Redirect URI
- Trusted Sources
- Info for Swimm
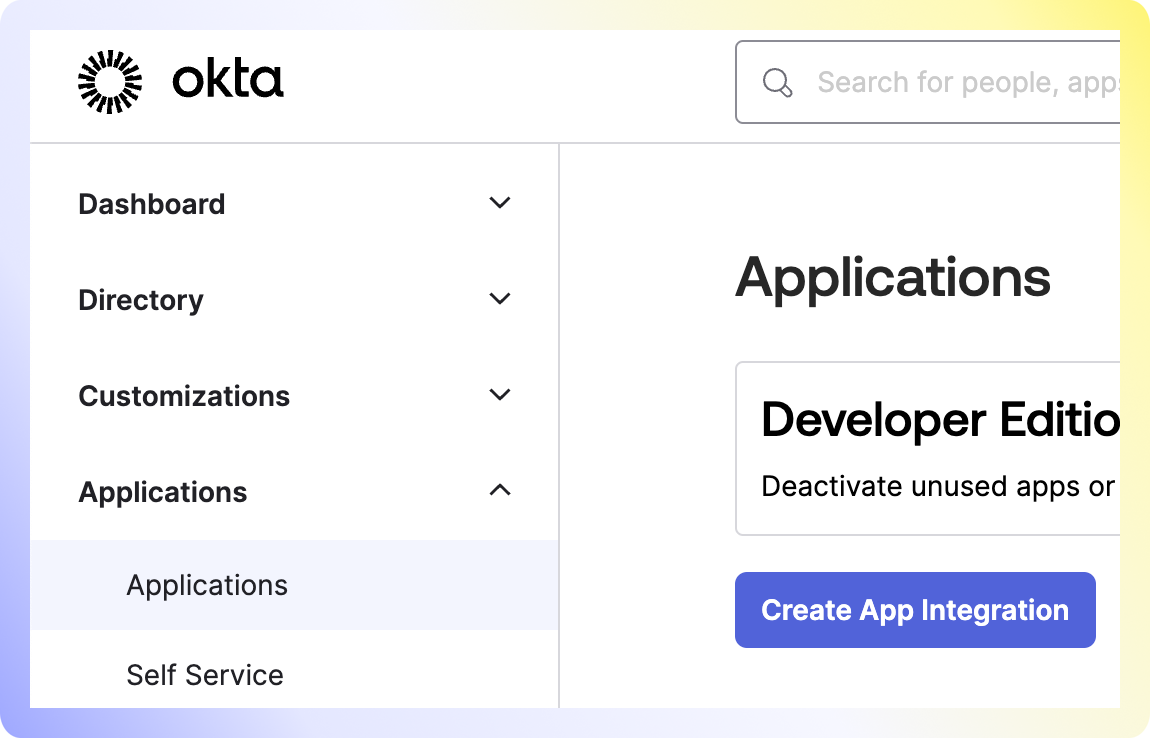
Navigate to the "Applications" menu within the Okta Admin Panel and click "Create App Integration."
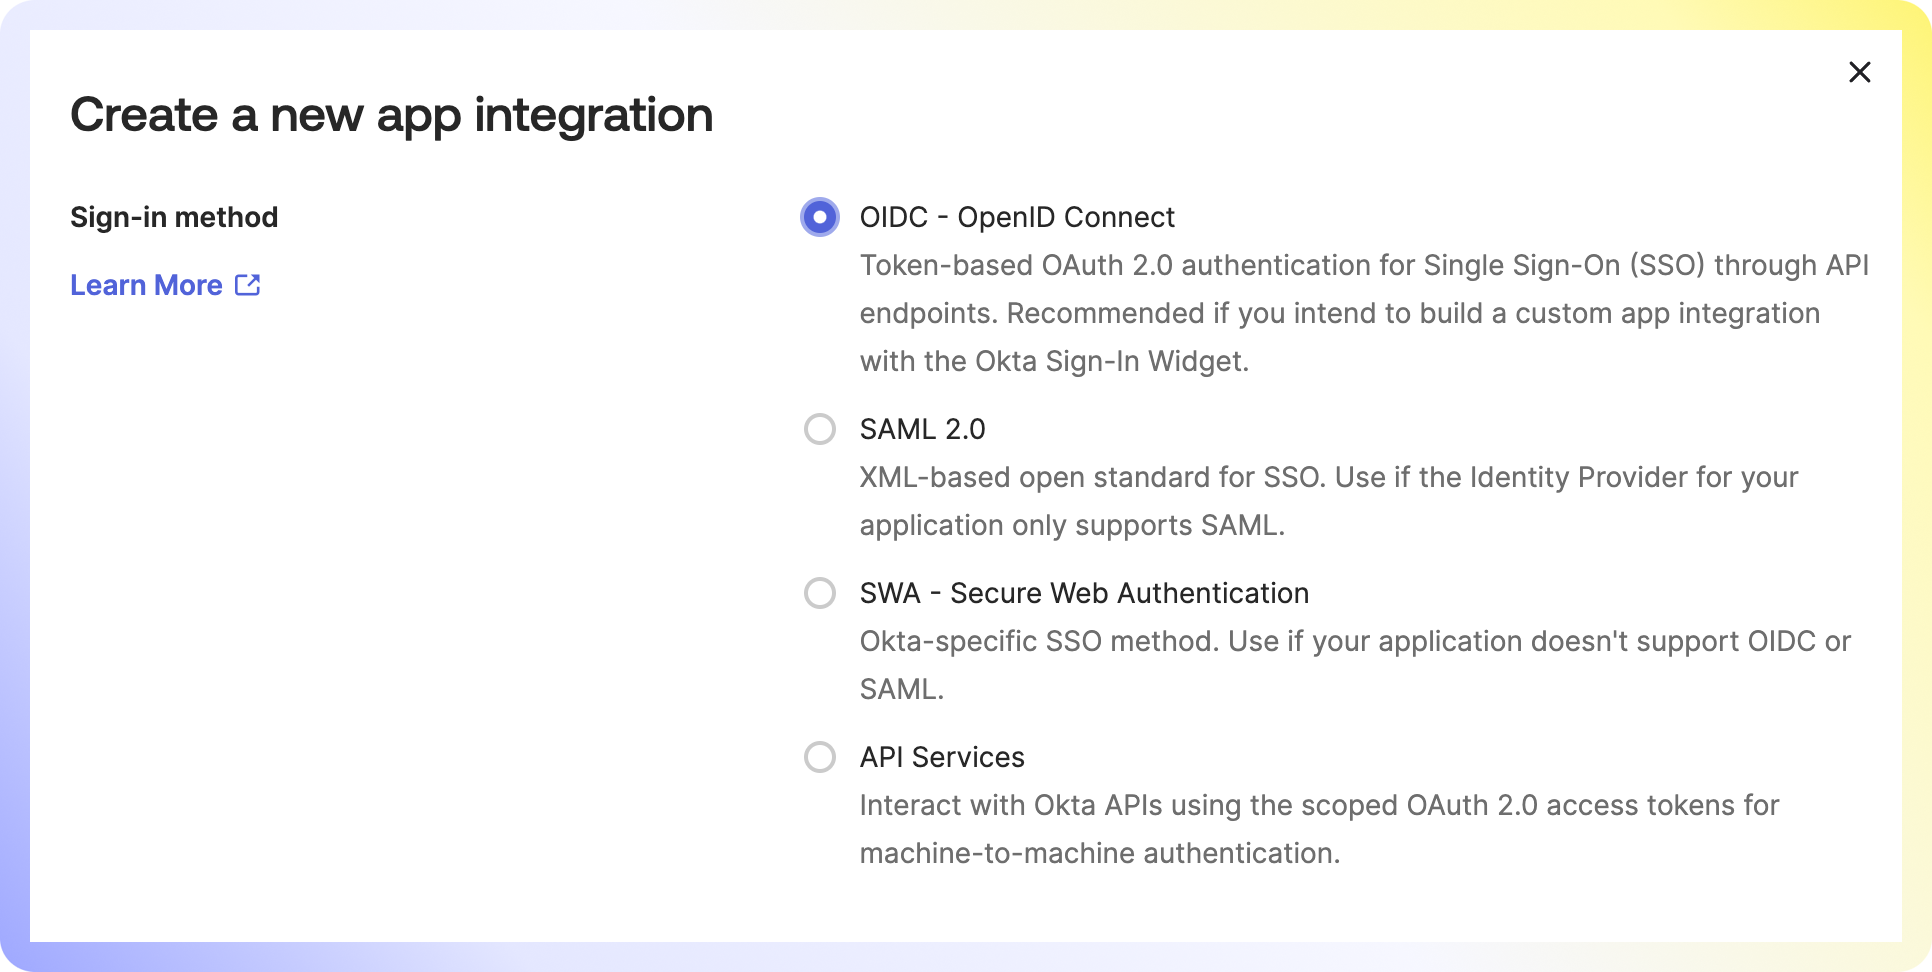
Select OIDC - Open ID Connect.
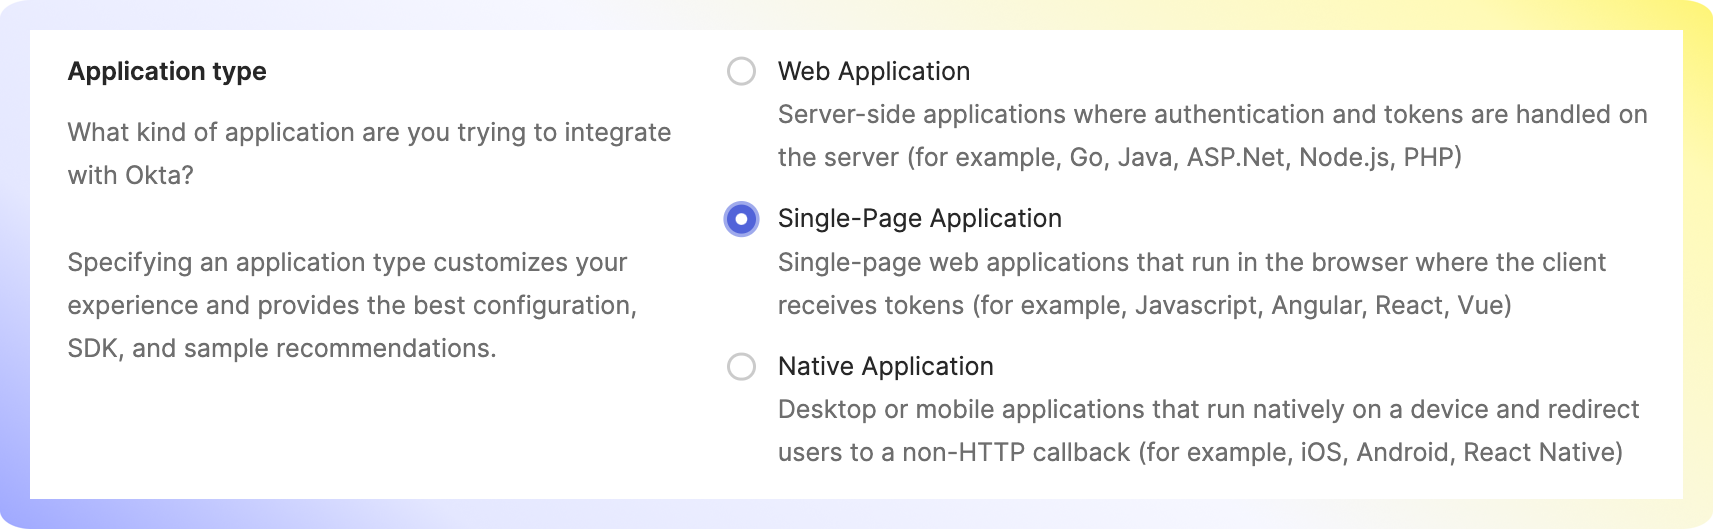
Select Single-Page Application and click Next.
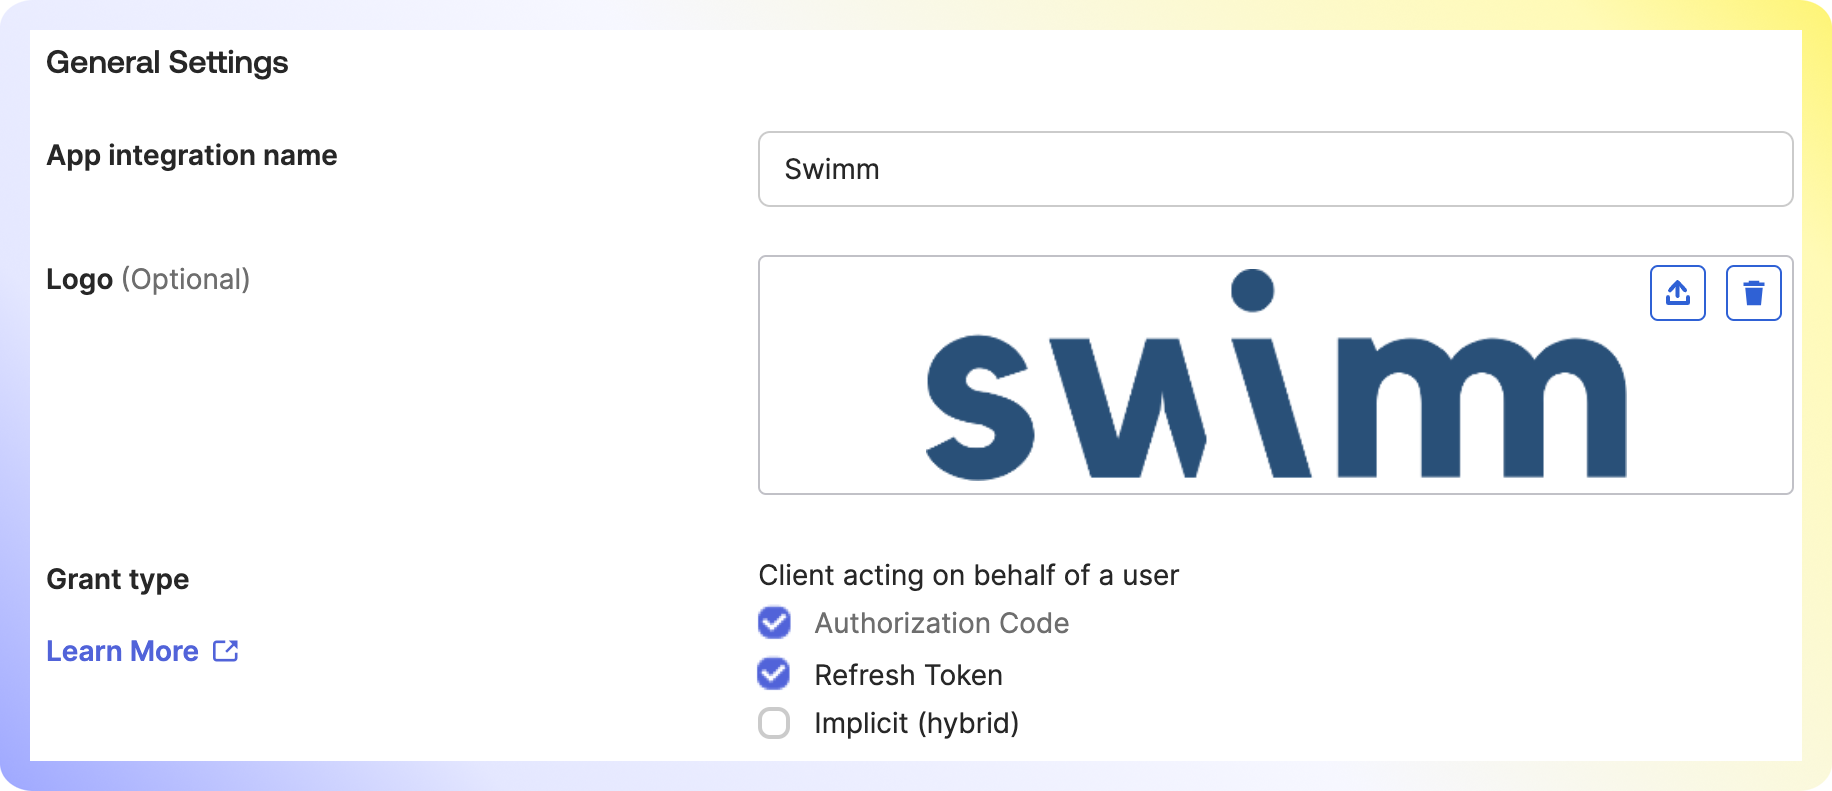
Type Swimm for the App integration name, and add the Swimm logo. Then, select these Grant types for Client to act on behalf of user:
- Authorization Code
- Refresh Token
1. Set sign-in redirect URI to be https://app.swimm.io/setOktaToken
2. Set sign-out redirect URI to be https://app.swimm.io/ssologout
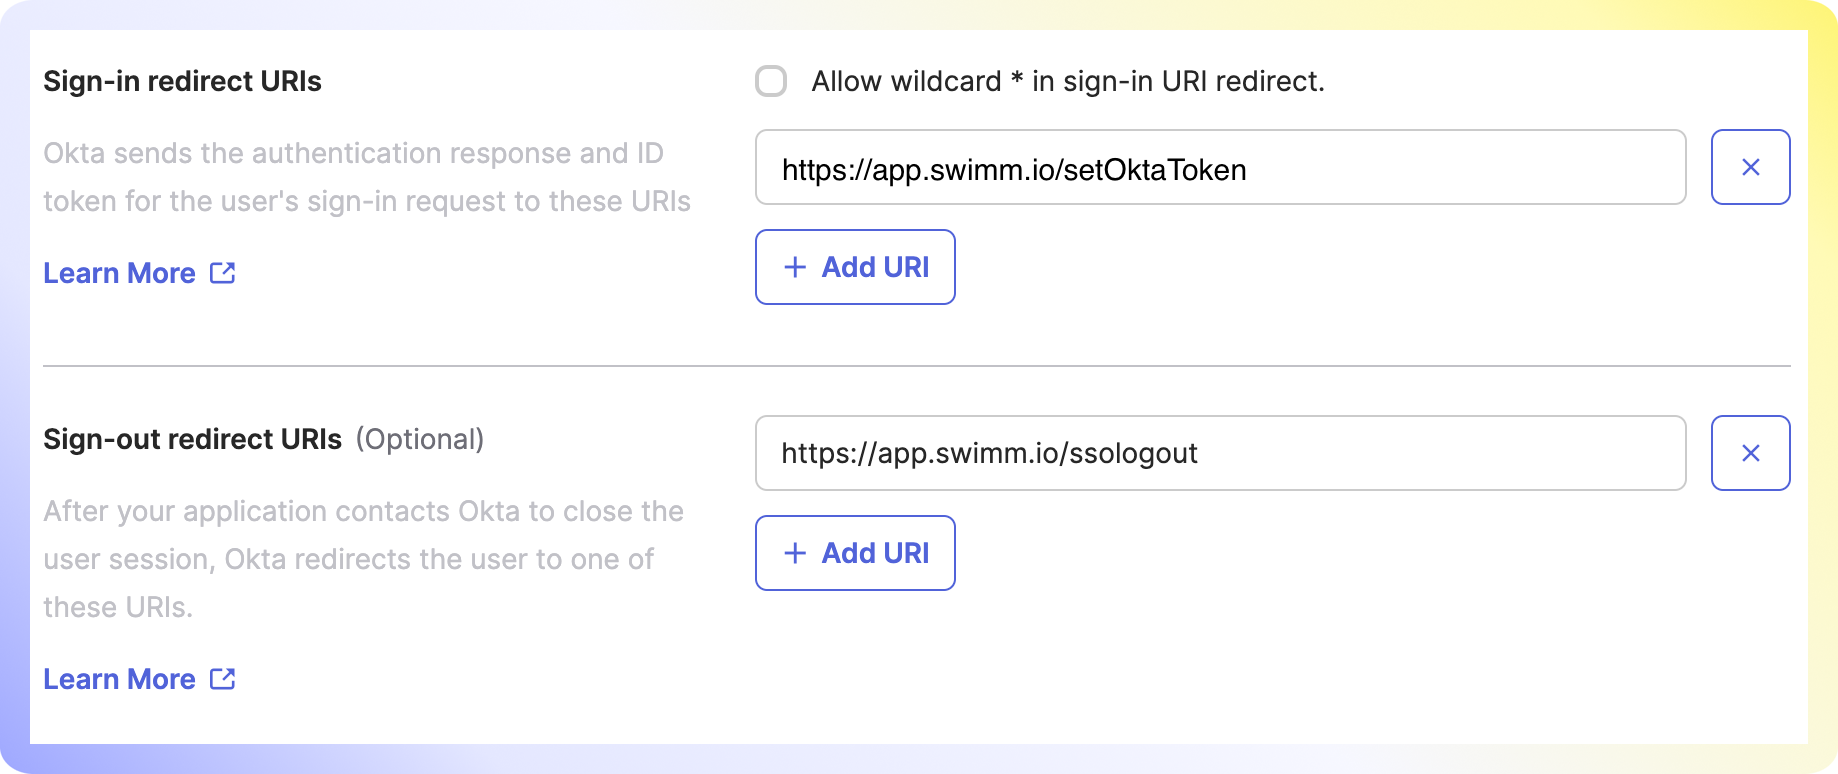
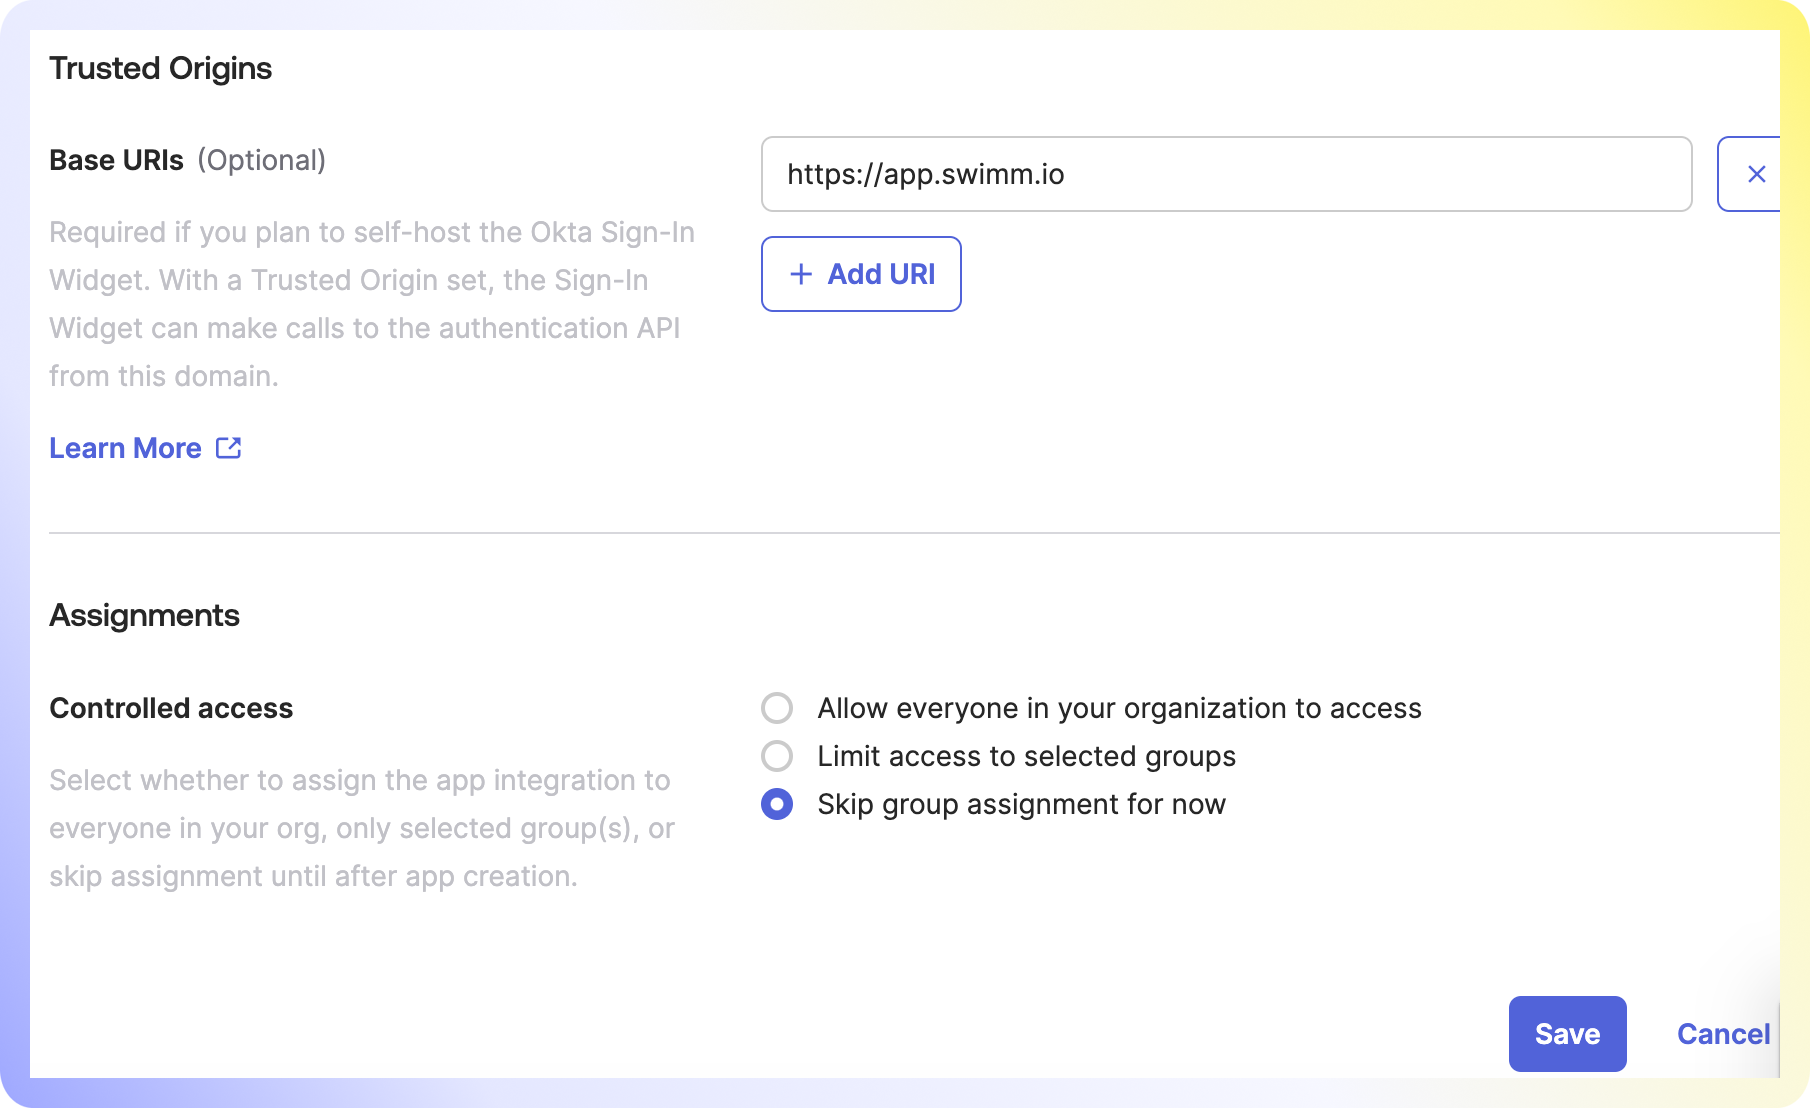
Add https://app.swimm.io as a trusted source. Assign developers with permissions to access the app. Authorize them before requiring SSO login, to avoid account lockouts. Click Save.
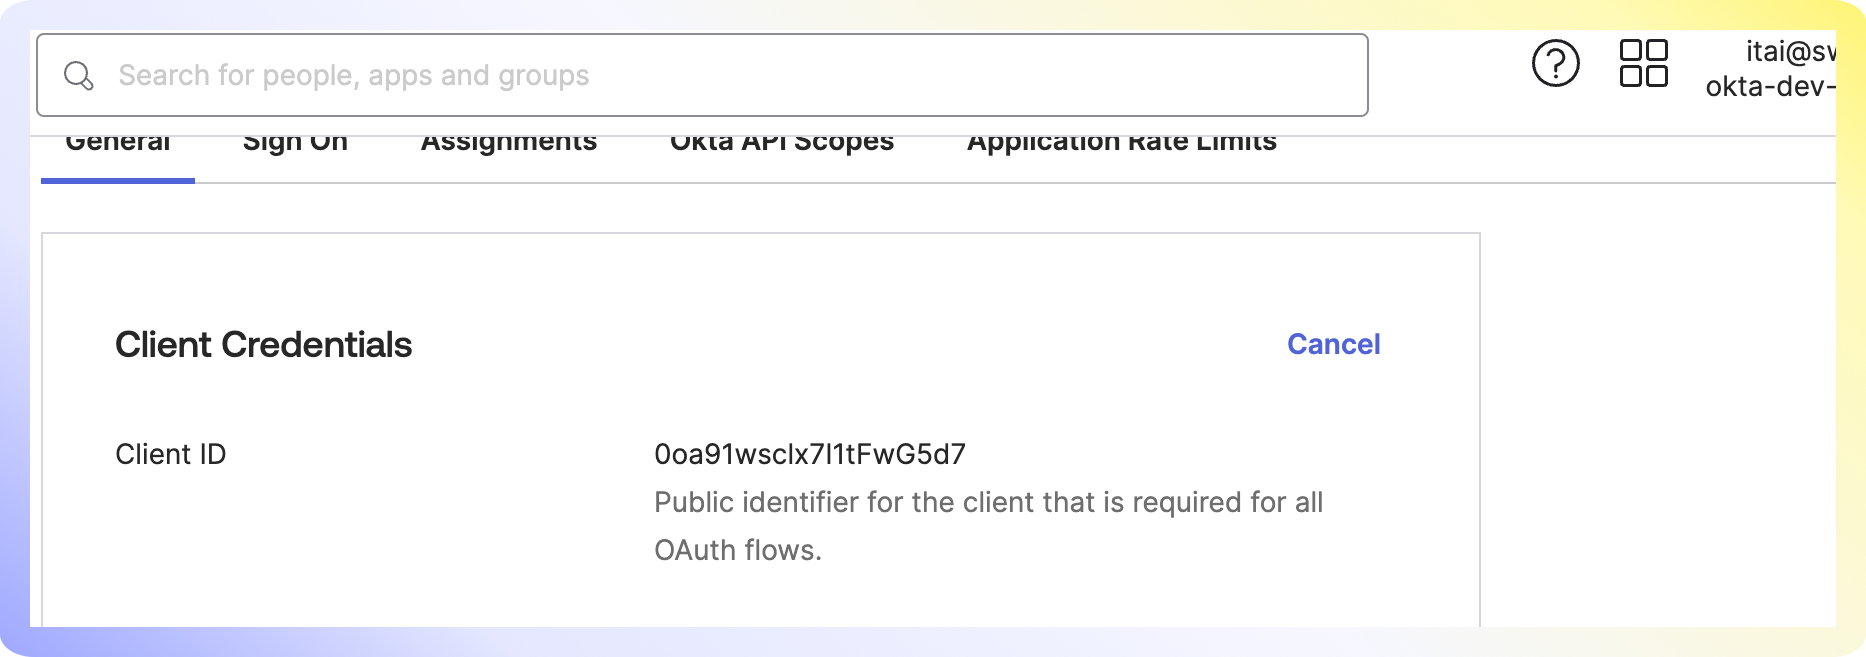
Swimm will need the Client ID and the Okta URL (top right, under your email address).
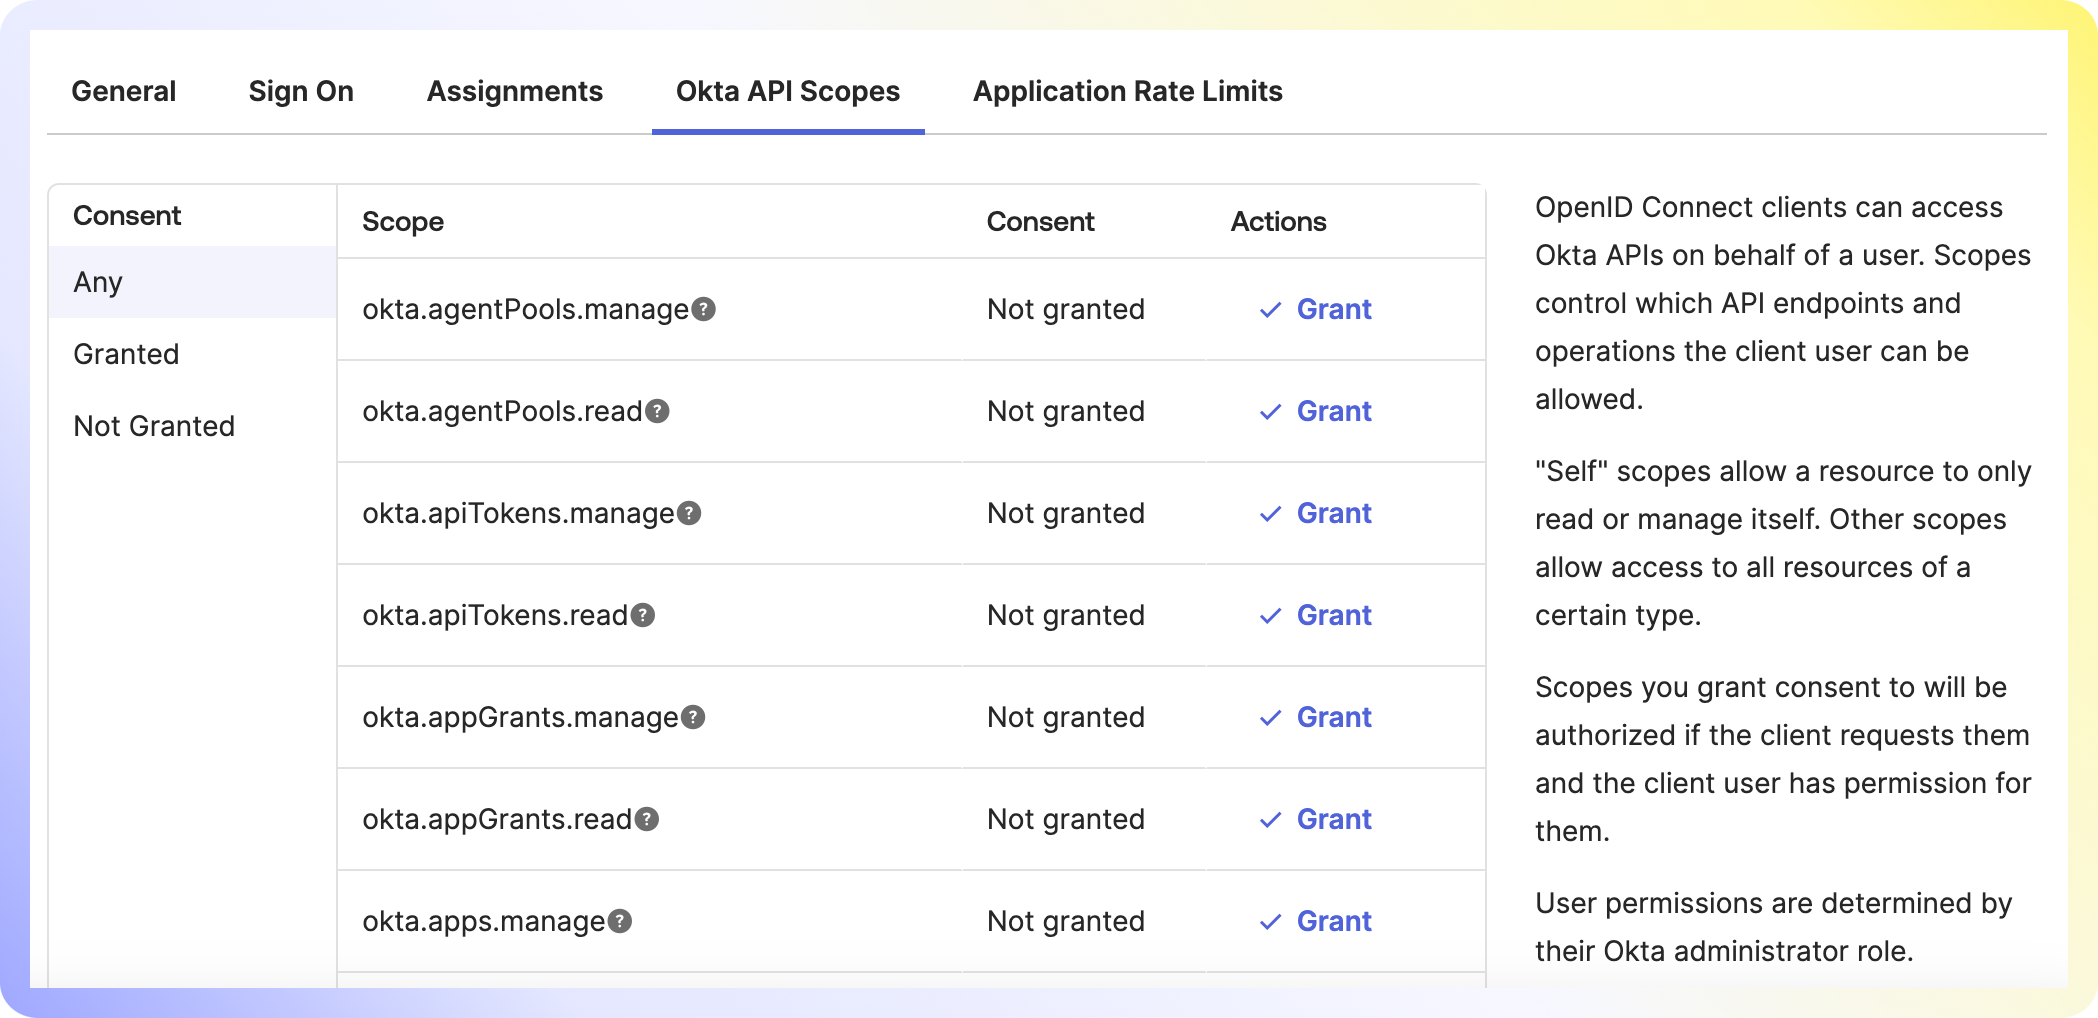
Next, we'll need to add some permissions to the app. Please navigate to Okta API Scopes and follow the steps below:
App Permissions
- API Scopes
- API Security
- Trusted Origins
- Swimm as Origin
Grant the following permissions:
- okta.myAccount.email.read
- okta.myAccount.phone.read
- okta.myAccount.profile.read
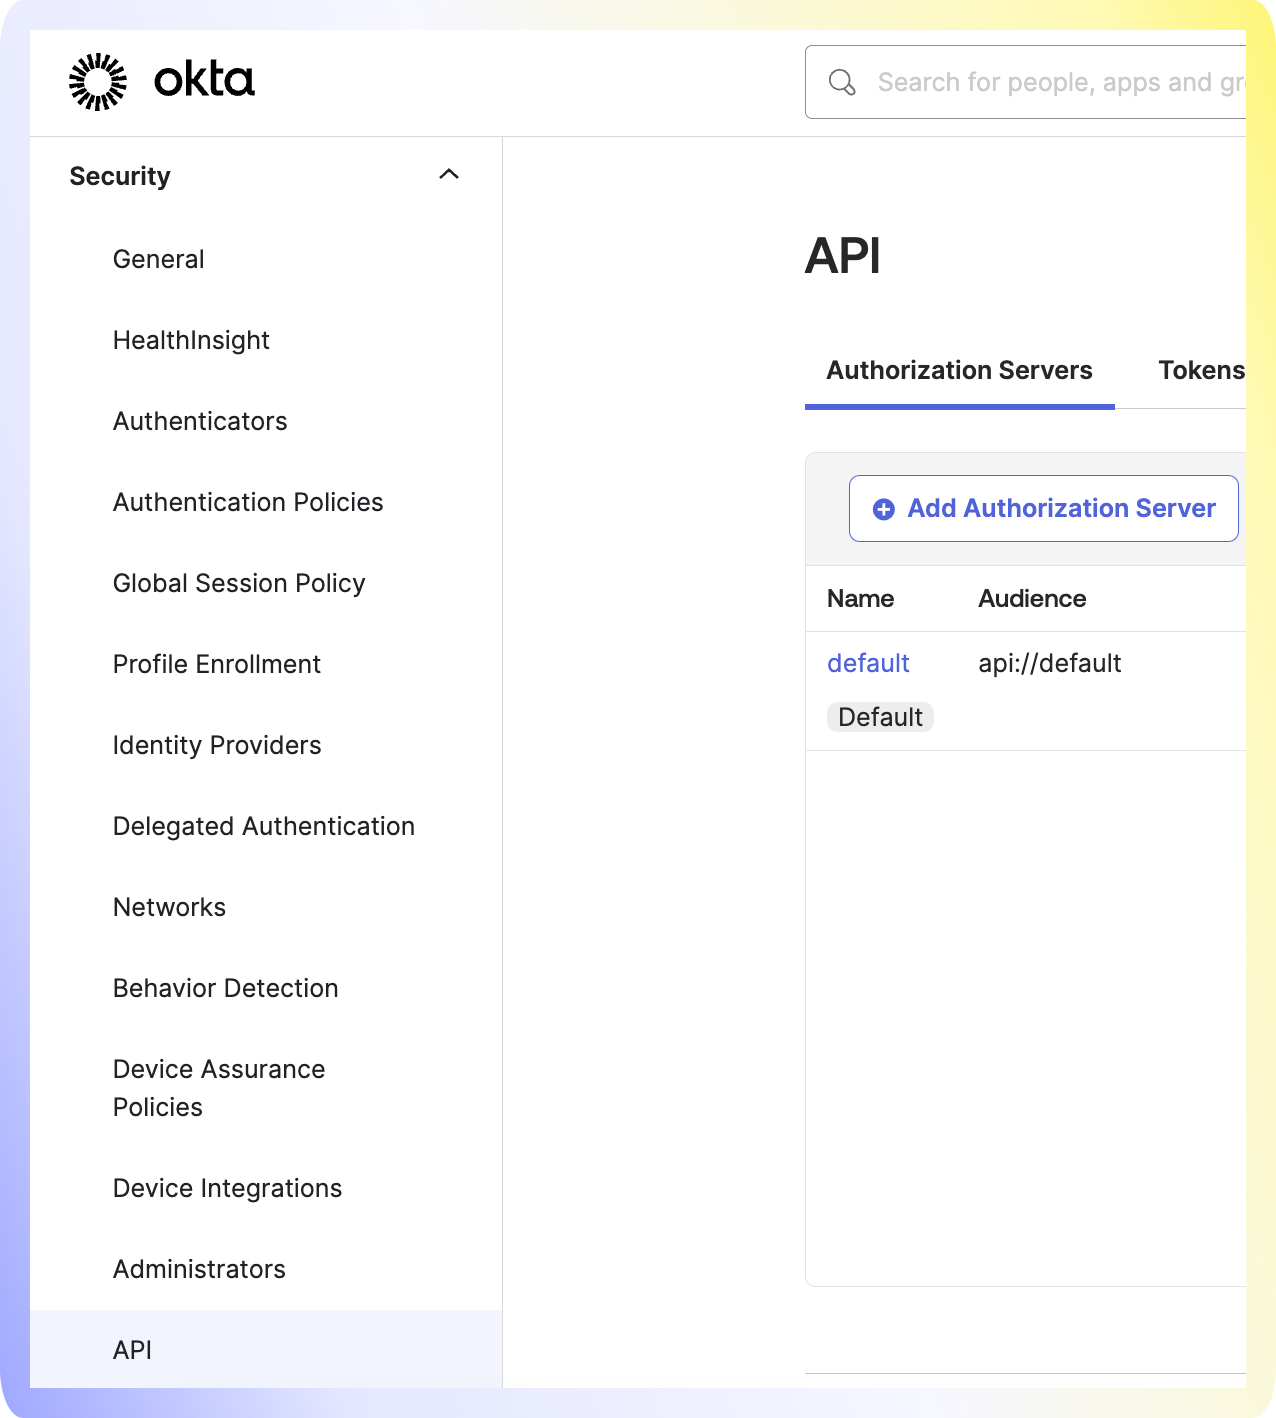
Navigate to Security -> API.
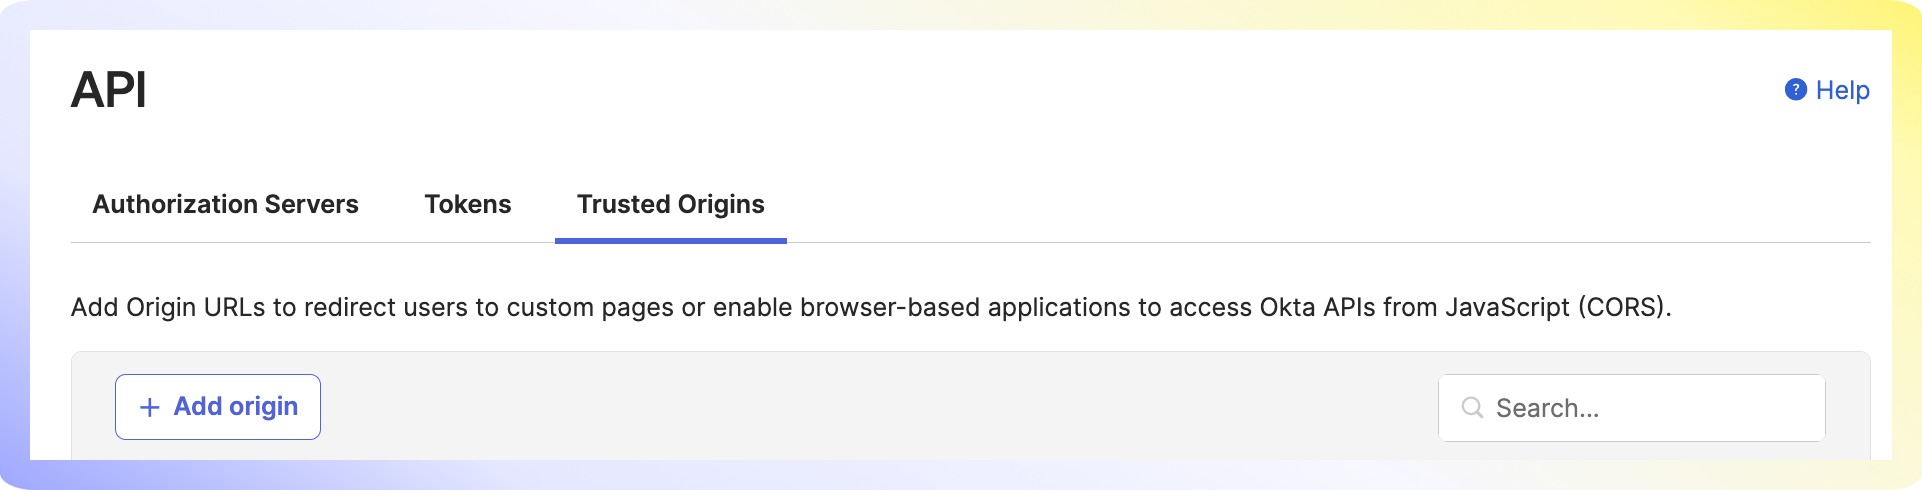
Click on Trusted Origins -> Add Origin.
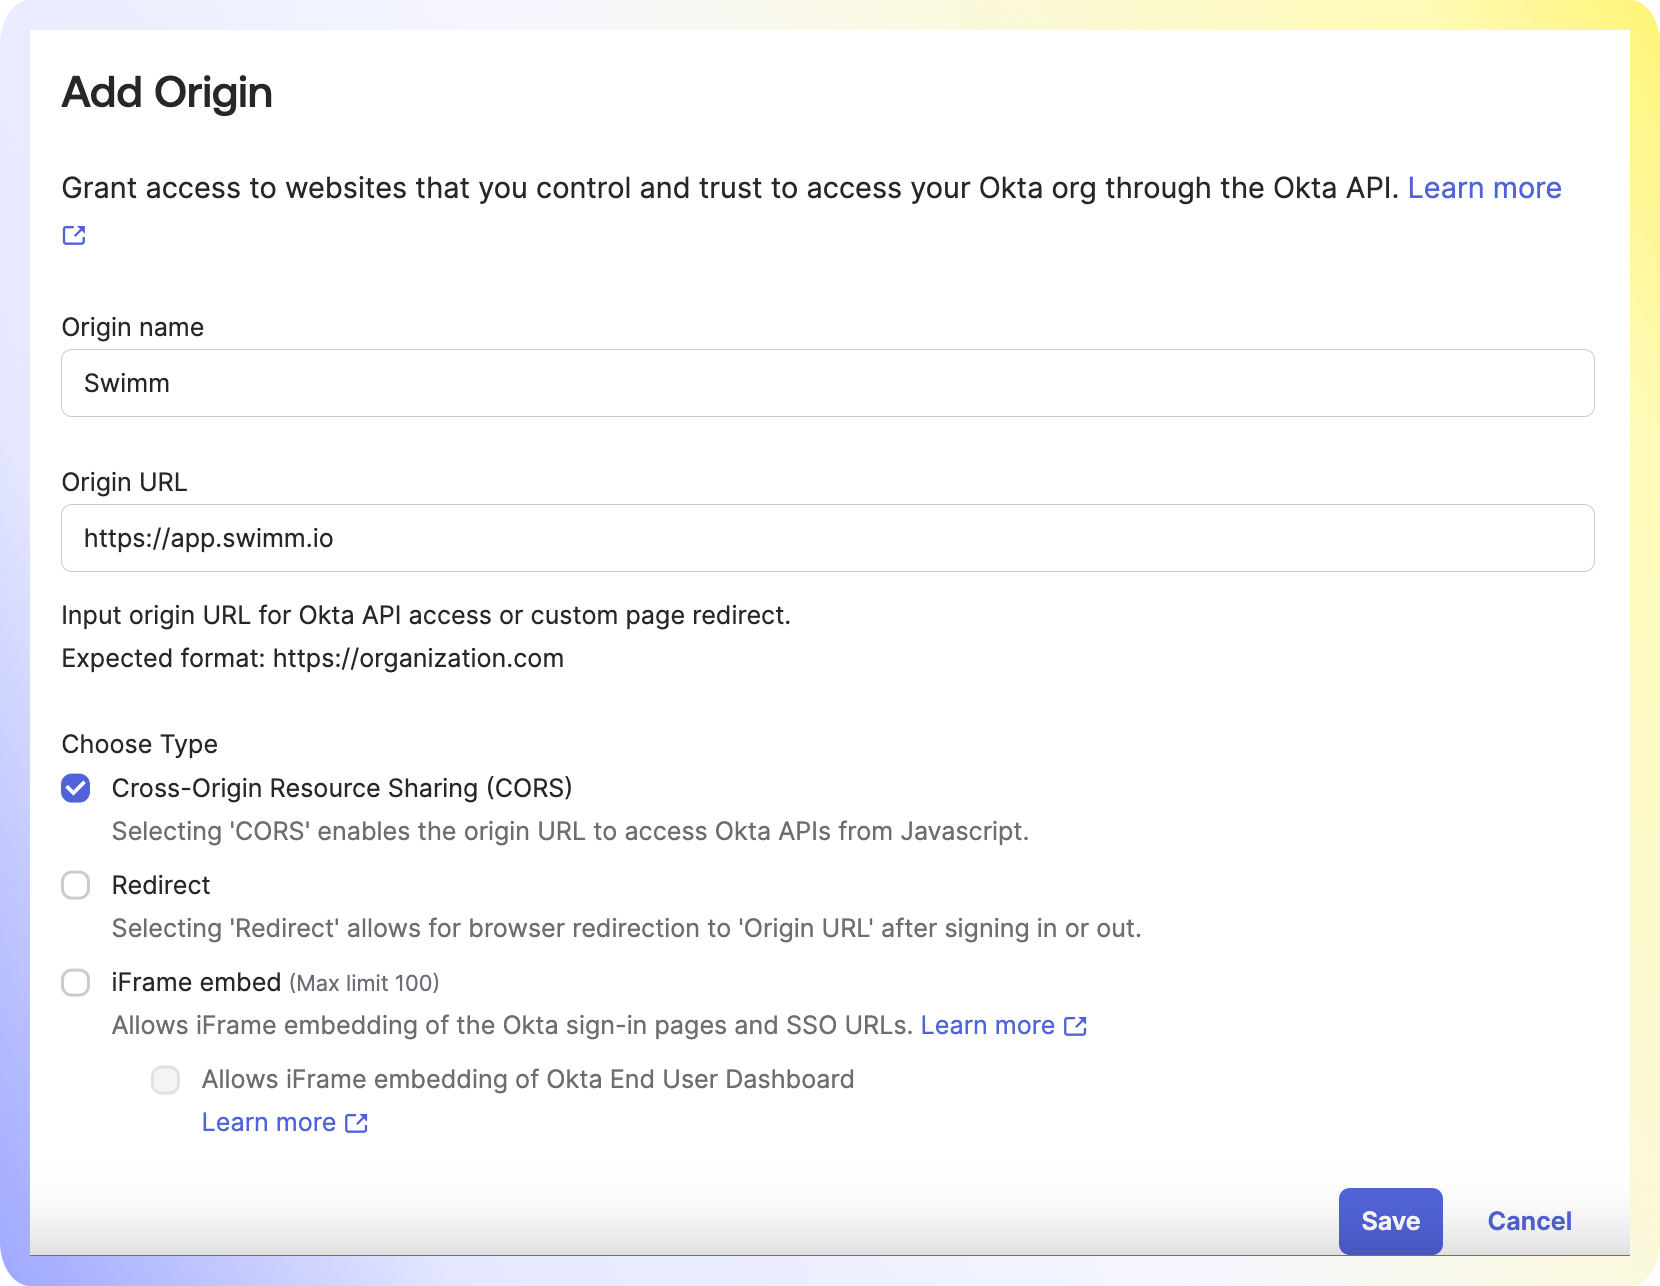
1. Fill in Swimm as the Origin Name.
2. Fill in https://app.swimm.io as the Origin URL.
3. Select Cross-Origin Resource Sharing.
Final Step: Send information to Swimm:
1. Client ID
2. Okta URL
Additional Information
- We do not have automatic provisioning. Please let us know your organization's domain so we can configure the SSO setup.
- If you have a set-up that requires users to re-authenticate every X hours / days, please let us know as well.