How to create a Bitbucket OAuth application for Swimm
To authorize Bitbucket Data Center for your organization, we will need you to create an OAuth application on your Bitbucket instance. Please follow these steps:
Install Swimm's Plugin
- Download Plugin
- Upload Plugin
- Verify Install
Get Swimm's compiled, Bitbucket Data Center plugin (.obr file).
Download Swimm plugin
Follow steps:
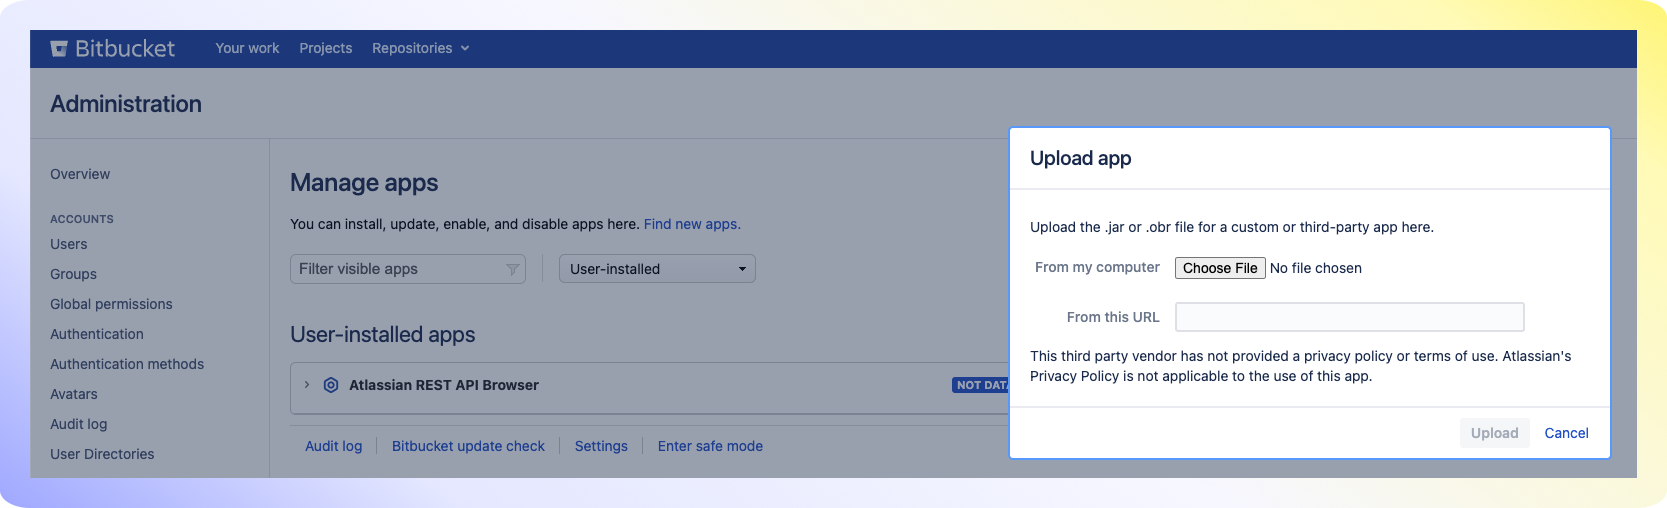
- Go to Bitbucket Datacenter Settings.
- Go to Manage apps.
- Choose Swimm's .obr file. Click Upload.
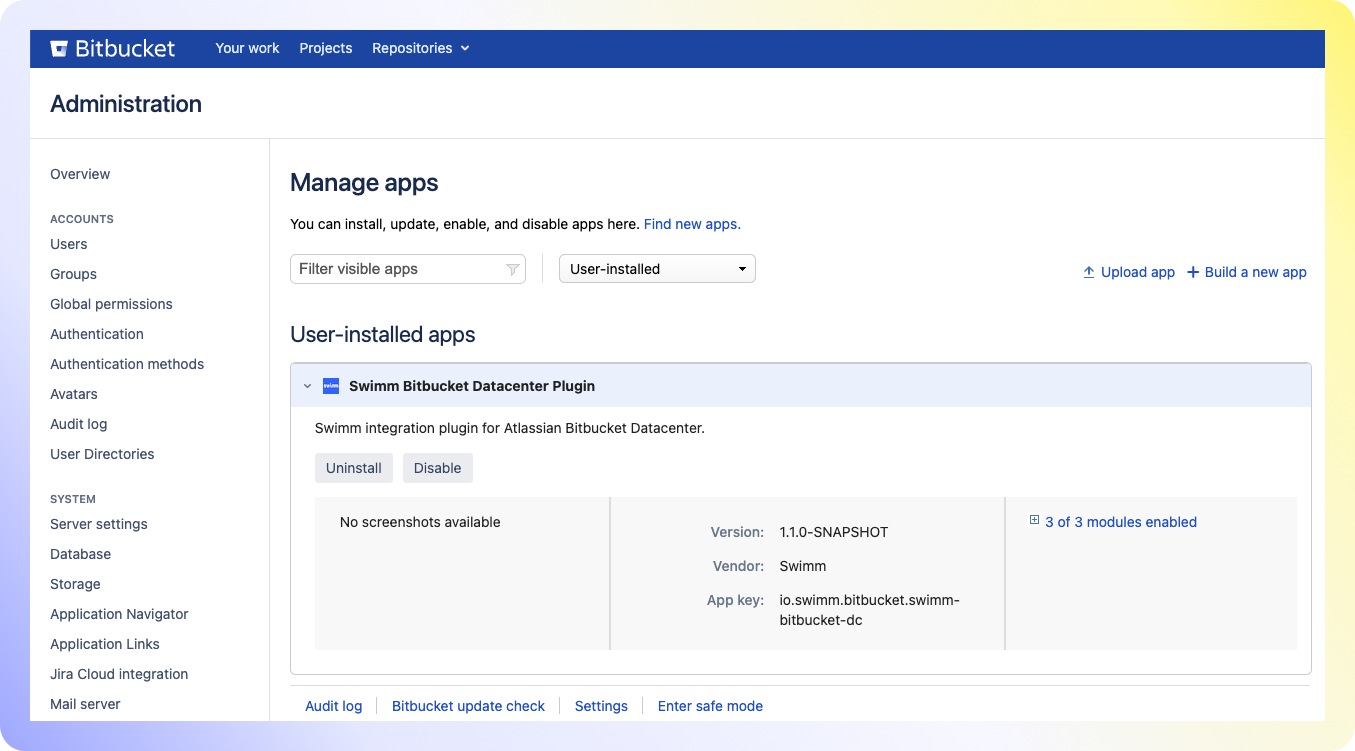
Verify the Swimm Bitbucket Data Center Plugin is installed.
Create Bitbucket OAuth App
- Admin Page
- Application Type
- Application Name
- Redirect URL
- Application Permissions
- Info for Swimm
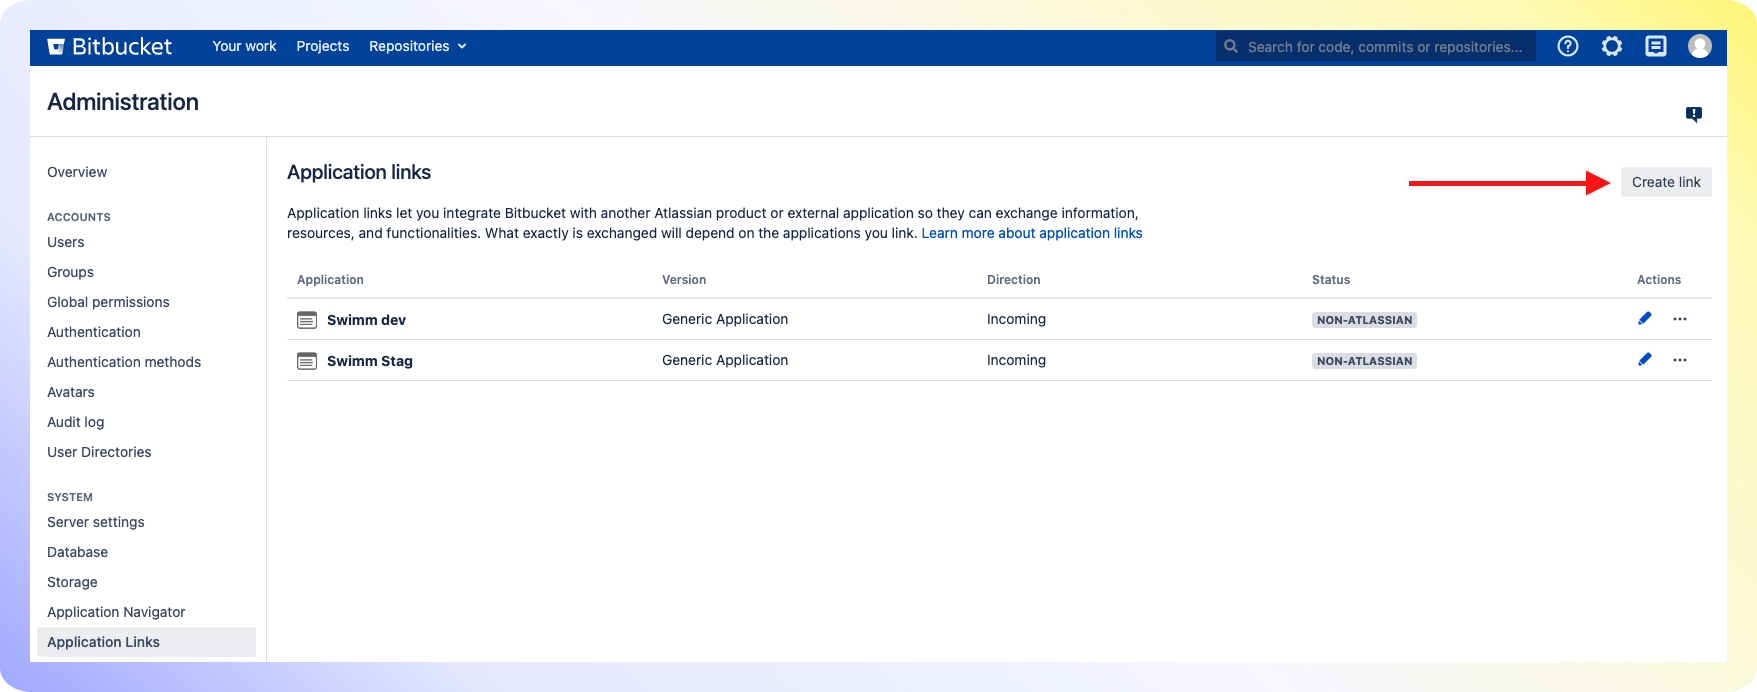
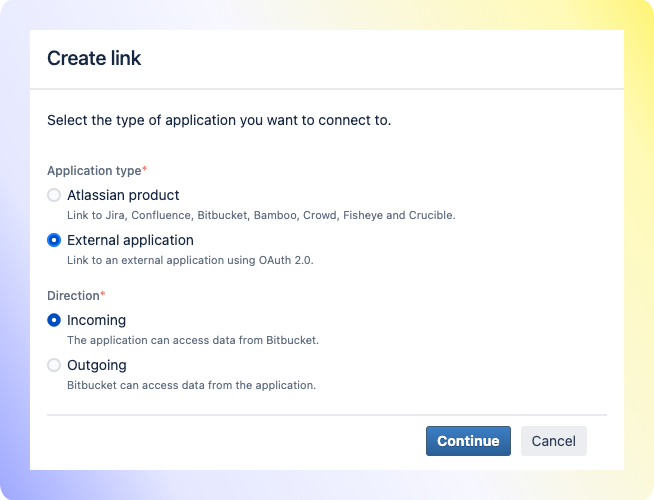
Navigate to the Administration page and click Application links within the side menu. Next, click Create link.
Choose External application for the "Application type" and Incoming for the "Direction." Click Continue.
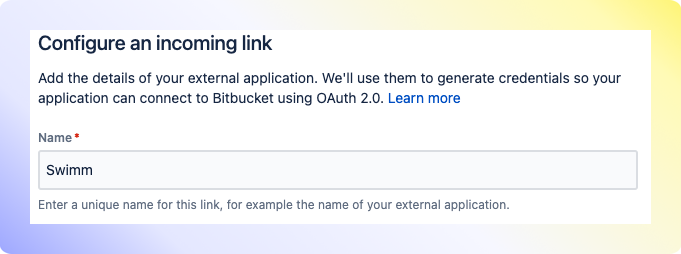
Type Swimm for the Application name.
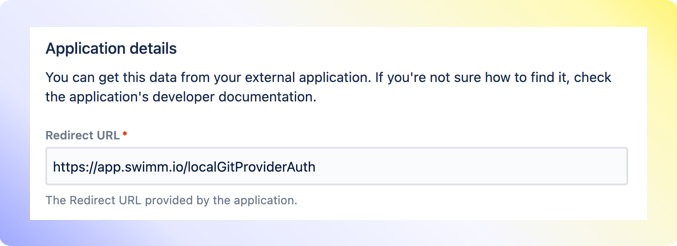
Type https://app.swimm.io/localGitProviderAuth for the Redirect URL
Under repositories, please grant Write permissions. Click Save.
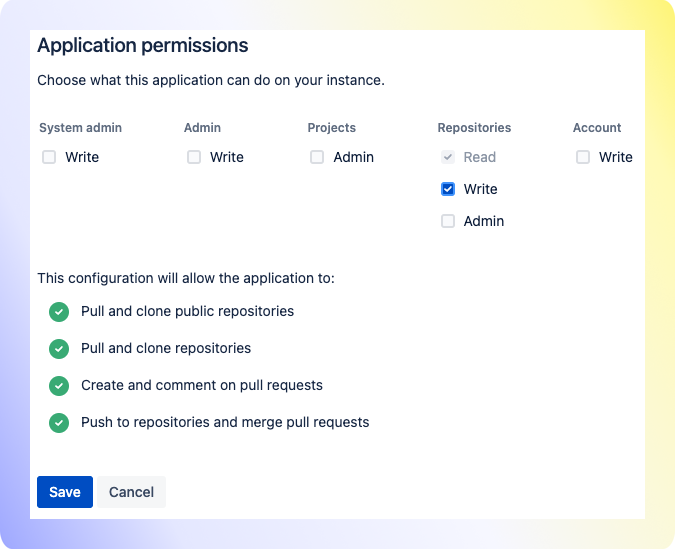
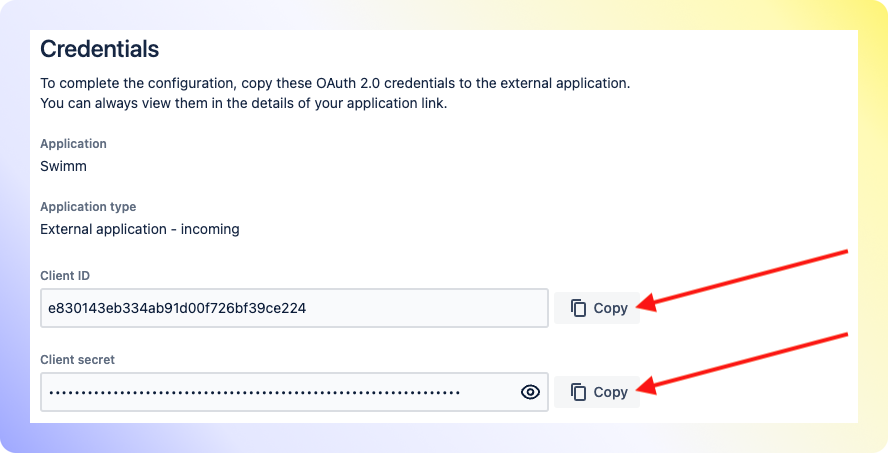
Swimm will need the Client ID, Client secret and Bitbucket Data Center Server URL.